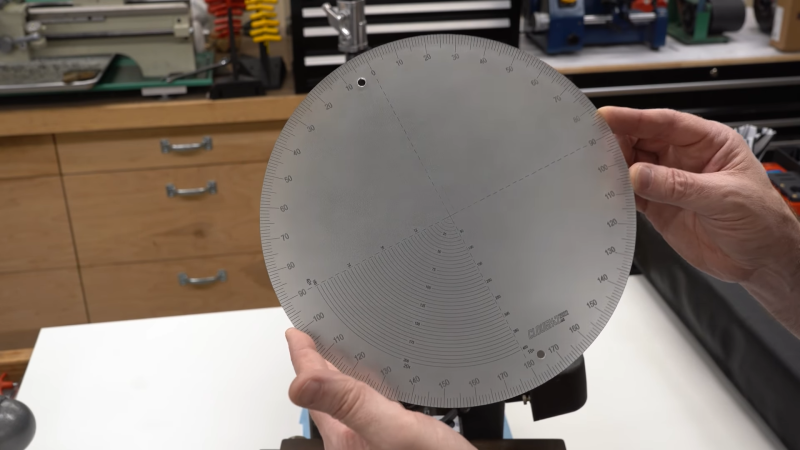
Precision instruments often contain specialized components that are essential to their function, but nearly impossible to replace if they fail. [Andre] had just such a problem with an optical comparator, which is an instrument typically used in machine shops to help check the tolerances of a finished part. It does this by projecting a magnified picture of an object onto a glass screen with markings showing angles and distances.
In the old comparator [Andre] bought on eBay, the markings on the glass had faded to such a degree that the instrument was almost unusable. So he contacted [James] over at Clough42, who was able to create a near-perfect replacement screen by using a laser cutter, as shown in the video embedded below.
The first step was to replicate the screen’s markings in a CAD program. [James] explains the process in Fusion 360, demonstrating how you can generate all the different scales nearly automatically through the proper use of constraints, variables and patterns. He then transferred the drawing to Lightburn, which drives the laser cutter and etches the markings into a sheet of glass covered with CerMark, a marking solution that turns a deep black when heated by a laser.
After etching, the final step was to apply frosting to the glass to turn it into a projection screen. While there are several ways to achieve this, [James] went for a simple spray-based method that gave surprisingly good results. It took a few experiments to find out that etching the markings on the back of the glass and applying the frosting on that side as well gave the best combination of sharpness and durability.
[James]’s project shows that even delicate instruments with custom glass components can be repaired, if you just have the right tools. A similar strategy might also work for creating custom scales for analog meters, or even old radio dials. If you’re not familiar with laser cutters, have a look at our experiments with an Ortur model. Thanks for the tip, [poiuyt]!


This and other videos by James are well worth watching. He is very detail oriented and states his reasoning very clearly.
If you want to try marking glass like in the video, you might try dry moly lubricant from the auto parts store.
I haven’t tried moly on glass, but it’s an inexpensive substitute for cermark for marking metal.
(As soon as my laser cutter is reassembled, that’s my next experiment.)
The local framing shop sells “art glass”, which is apparently glass that’s anti-reflective. (I hate going to a museum and seening all the paintings behind regular glass, and reflecting the room lights.)
I wonder if making the project using art glass would remove the reflections altogether.
Thanks for mentioning this!
I wasn’t aware that antireflective glass is available for framing. I have a silicon wafer framed using ordinary glass, and the extra reflections spoil the appearance. It looks much better without the glass, but then dust collects on the wafer and the background.
Yes- this is commonly referred to as “museum glass” by glass cutters, conservators & framing shops. It has an anti-reflective coating that works really well if you want to display things but it is very expensive compared to normal glass.
There is also “museum acrylic” that is basically the same thing but acrylic- both of these materials have special anti-reflective and UV blocking coatings on them to keep things underneath them not only from glare but from fading from uv-light like sunlight. The museum acrylic is cheaper than the glass, but still expensive. It’s not as heavy as glass though so if it falls it’s not likely to shatter.
Hoped this helps someone
I wonder how much these youtubers get paid to make autodesk advertisements.
A bit similar with NYC-CNC. That was a great channel but for the last few years it turned into an autodesk advertisement without much other content. And I see these things pop up everywhere.
This does remind me of another youtuber. Grinding fine lines into glass with a razor blade and fine grid. I think it was Rob Renzetti Yep, it’s around 34 minutes in his rebuild of a Nicon Comparator: youtube / watch?v=gPo1QBZj1Hg
Good content and free of irrating advertisements.
You do realize those ads are how people feed their families right? They don’t exist just to make content for people like you. This is their job.
I guess he expects the world on a platter for free. But if he were making videos himself I’m sure he’d complain about how much work for relatively low pay he’d be getting. I love the irony of people complaining about free content in exchange for ads (where most can be skipped). God forbid anyone else makes some money (out of advertisers’ pockets, not costing the viewer anything other than time) in compensation for the hours and hours of effort spent on making videos.
Provided the channel content doesnt sprout commercial bs and youtube provides the ads, no problem. Or the channel content sprouts the commercials and youtube doesnt, also great. Both sprouting effing commercials, bloody ´ell, gimme a ‘ucking break.
LaneyMachineTech on IG has a phenomenal optical comparator rebuild going on right now, I was just discussing this very thing with him and others who specialize in DRIE & laser etching yesterday.
Can anyone comment on how this could be done for a small custom reticle for a microscope objective? We were all trying to come up with a way it could be done accurately at small scale- almost exactly this exact etching- to measure small radii in something like my toolmaker’s microscope.
Buy a reticle on aliexpress (or surplusshed if you found one).
Far faster, cheaper and safer than playing with photoresist and hydrofluoric acid.
I’ll second the comment above: for small things, purchase is better than trying to deal with etching. Edmund Scientific has a selection of quality reticles as small as 21mm (just under an inch diameter) with various specs for flatness and such.
The line thickness on the Edmund series is 25 um, while on my very-well-dialed-in CO2 laser it’s 250 um (0.01 inches). For the price and effort, I don’t think you’re going to beat getting a professionally made one.
I’m happy to buy something- but I highly doubt the reticle etchings I need are commonly available. I am basically looking for markings similar to the optical comparator window in the video above but for a toolsmakers microscope. If the reticleis actually truly optically centered I have the capability of few different ways of grinding the glass down to fit my microscope but I highly doubt they are optically centered, which they need to be for my purposes for measuring.
I will take a look though.
This is one of the reasons I became a machinist I often found I needed something that I could not buy and it happened enough that I decided it would be better to know how to make absolutely anything