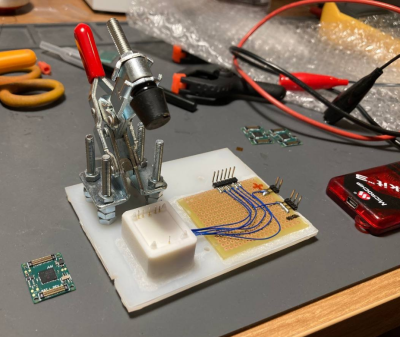
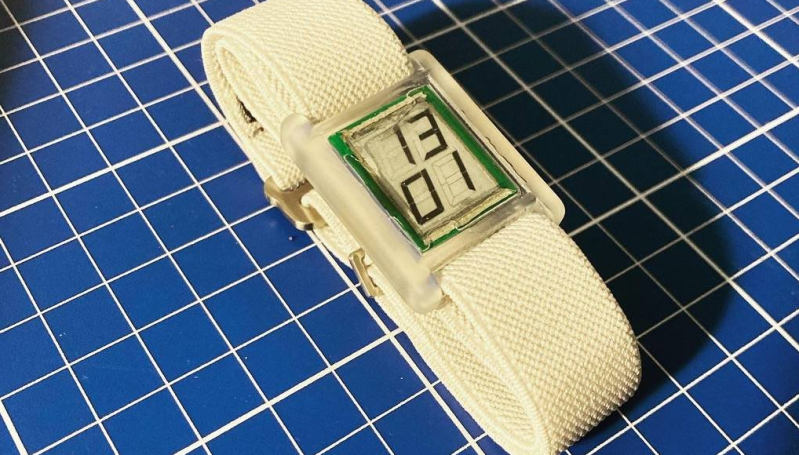
[Augusto Marinucci] liked the classic Cartier Tank series of dress watches aesthetic, but wanted something a bit more techy, with a decent runtime on a single battery. E-Ink displays are often used in such applications, but finding one to fit a custom case design, is a tall order. When ordering one off the shelf is not easy, the solution is to make one from scratch.

The article doesn’t have much information on the E-Ink side of things, which is a bit of a shame. But from what we can glean, the segment shapes — in this case, based on the famous Apollo DSKY — are formed in the top copper of a four-layer PCB, using filled and capped vias to connect invisibly from below.
A donor E-Ink display is cut to size with scissors (we don’t know much more than this!) and glued in place around the edge to make the common electrode connection. The display PCB attaches to the control PCB, at the rear using low-profile board-to-board connectors. This board hosts a PIC16 micro, as well as an RV-3028-C7 RTC which keeps time whilst consuming a paltry 45 nA.
Five volts are provided via a MAX1722 low-power boost converter which is fed power from the CR1616 cell via a couple of logic-controllable load switches. With a low-power design such as this, it’s critical to get this correct. Any mistakes here can easily result in a very low runtime. It is easy to over-stress small button cells and kill them prematurely.
The case looks like it’s printed in a translucent resin, with the PCB stack sealed inside with a UV-cured resin pour. It’s not immediately obvious if the rear panel can be removed to access the battery and programming port. There are what appear to be screw holes, so maybe that’s possible, or maybe they’re the rear side of the PCB mounting posts. Who can tell?
If DIY hardware is but too much effort for you, then there’s the option of hacking new firmware onto an existing watch, or perhaps meeting in the middle and making something out of all those junk E-ink tags you can get from time to time?
Thanks to [JohnU] for the tip!


a bit sad that there’s no way to recharge it through, but great build, I stumbled on it a few days ago…
I dunno, just some gold pad or something left exposed in the epoxy…
https://www.0xam.com/blog/diy-e-ink-part-1-delaminating-the-screen
TLDR a donor display is cut for the eink juice and clear condictor, the juice is then slathered onto the PCB and the conductor layer pressed on top, sealed with glue.
“A donor E-Ink display is cut to size with scissors (we don’t know much more than this!) ”
… which was the only reason the project caught my eye. Now, I feel … well … ho hum about it (i.e. wondering if the project is real or even reproducible).
Hi! Sorry if I didn’t document the eink build more.
There are a couple more blog entries on my site. I didn’t take a ton of photos but if anyone wants to recreate it and has some questions just reach out, I will be happy to answer any question.
The project is riproducibile and smaller screen are easier in my opinion because are simpler to clamp down.
Ah. Now I didn’t explore too much, but that would have been useful to find. I have some dead E-ink devices, so might give this a try. Just because.
It’s probably just me, but I think that is a really butt ugly watch. Major kudos for the project itself, though.
Can get your own custom e-ink display prototype for €3500.
Seems quite high, if that come down to €300 it would be a possibility.
https://www.ynvisible.com/services/prototype-production
Anyone know of a cheaper service?
One thought to the choice of RTC. While the RV3028-C7 has the lowest power consumption, it has it’s accuracy @20°C (+-1ppm, while the RV-3032-C7 (which runs on 160nA vs. 45nA of the 3028) it has it’s accuracy span over -40 to 85°C (+-2,5ppm). So maybe you get a bit less runtime but higher accuracy over time with that?