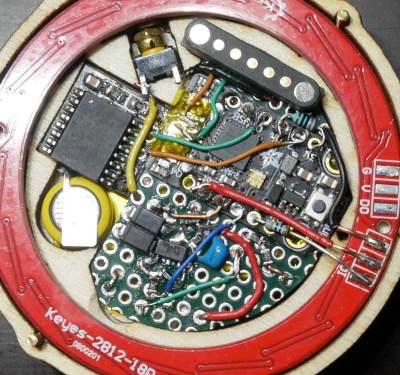
Dev Board Watch Takes Path Of Least Resistance

Building your own watch or clock is kind of a maker’s rite of passage. Once upon a time, if you went with a wrist watch, you’d typically work on producing your own compact PCB with everything crammed into a typical watch form factor, maybe relying on a simple binary output for compactness and simplicity. Times have changed, however, and [Arnov]’s design is altogether different in its construction.

The build relies on a XIAO ESP32-C3 microcontroller board as the brains of the operation. It’s paired with the XIAO expansion board. It’s designed as a carrier for the ESP32-C3, giving it a bunch of IO that’s accessible over readily-accessible connectors. It also features a display, a real-time clock, and a battery — pretty much the three main things you’d need to add to an ESP32 to turn it into a watch.

Thus, with the electronics pretty much done, it was simply up to [Arnov] to turn the device into a watch. He achieved this by screwing the frame and strap of an old Casio watch to a 3D printed carrier for the XIAO expansion board. With that done, it was simply a matter of writing the code to show the time from the RTC on the display. There’s no connectivity features, no smart stuff going on — just the time and date for your perusal.

Some might decry the project for simply slapping a watch band on a devboard. Or, you could look at how this indicates just how fast and easy development can be these days. Once upon a time, you could spend weeks trying to find a cheap display and then further weeks trying to get it working with your microcontroller. Now you can spend $20, get the parts in a few days, and get your project blasting along minutes later.

If you’ve done an altogether more ornate watch build of your own, we’d love to see that, too. Show us on the tipsline!

Fabbing A Fab New Watch Face

[STR-Alorman] is into vintage watches, particularly Omega Seamaster quartz numbers from the 1980s. Among his favorites is the Seamaster Calypso III, a precious few of which were created in a lovely and rare black-on-black colorway. [STR-Alorman] found one on online, but it had a number of problems including a scratched-up face. Having done a respectable amount of PCB design and assembly, he decided to make a new face and have it fabbed.

The one angle where you can even tell this is a PCB.

After taking scale-referenced photos with a DSLR, [STR-Alorman] created vectors in Illustrator and then ported those to KiCad. He sent two versions to the board house — one with holes at index points, and one without — because he wasn’t sure which would be better for applying the luminization compound that makes them glow. Spoiler alert: it was the one with the cutouts.

Once this was done, [STR-Alorman] reassembled the movement, which doesn’t look easy at all, and involved getting the height of a bit of CA glue just right so as not to interfere with the movement of the date wheel. He replaced the bezel insert, re-luminized the hands, and now has a beautiful timepiece.

We believe only the nerdiest of nerds could tell this is a PCB, and they would need exactly the right light to make that determination. Here’s a watch that leaves no doubt about it.

Droplet Watch Keeps Time Via Electrowetting

Hackers just can’t help but turn their sights on timepieces, and [Armin Bindzus] has designed an electrowetting-based watch.

Electrowetting is a way of changing the contact angle of droplets on a surface using electricity, and can be used to move said droplets. The liquid needs to be polar, so in this case [Bindzus] has used a red ink mixed with mono-ethylene glycol to stand out against the white dielectric back of the device. The 60 individual electrodes of the bottom section were etched via laser out of the ITO-coated glass that makes up the bottom plates of the face.

The top plate houses the small round pillars that keep the ink constrained to its paths. They are made of a photosensitive epoxy that is spin-coated onto the glass and then cured via the laser. The plates are put together at a distance of 0.23 mm with epoxy, but a small hole is left to insert the droplets and a filler liquid. An Attiny1614 microcontroller runs the show along with a DS3231 RTC. A 46V signal drives the droplets around their path.

It seems this project is a bit away from true wearable use, but perhaps [Bindzus] could make a desk clock first? If you’re interested in another ink-based, watch, how about this custom E-Ink Tank watch?

Continue reading “Droplet Watch Keeps Time Via Electrowetting”

A DIY E-Ink Tank Watch

[Augusto Marinucci] liked the classic Cartier Tank series of dress watches aesthetic, but wanted something a bit more techy, with a decent runtime on a single battery. E-Ink displays are often used in such applications, but finding one to fit a custom case design, is a tall order. When ordering one off the shelf is not easy, the solution is to make one from scratch.

Building a programming jig is a great idea for small-scale production

The article doesn’t have much information on the E-Ink side of things, which is a bit of a shame. But from what we can glean, the segment shapes — in this case, based on the famous Apollo DSKY — are formed in the top copper of a four-layer PCB, using filled and capped vias to connect invisibly from below.

A donor E-Ink display is cut to size with scissors (we don’t know much more than this!) and glued in place around the edge to make the common electrode connection. The display PCB attaches to the control PCB, at the rear using low-profile board-to-board connectors. This board hosts a PIC16 micro, as well as an RV-3028-C7 RTC which keeps time whilst consuming a paltry 45 nA.

Five volts are provided via a MAX1722 low-power boost converter which is fed power from the CR1616 cell via a couple of logic-controllable load switches. With a low-power design such as this, it’s critical to get this correct. Any mistakes here can easily result in a very low runtime. It is easy to over-stress small button cells and kill them prematurely.

The case looks like it’s printed in a translucent resin, with the PCB stack sealed inside with a UV-cured resin pour. It’s not immediately obvious if the rear panel can be removed to access the battery and programming port. There are what appear to be screw holes, so maybe that’s possible, or maybe they’re the rear side of the PCB mounting posts. Who can tell?

If DIY hardware is but too much effort for you, then there’s the option of hacking new firmware onto an existing watch, or perhaps meeting in the middle and making something out of all those junk E-ink tags you can get from time to time?

Thanks to [JohnU] for the tip!

Neon Watch Glows Rather Nicely, Tells Time

It wasn’t long after the development of the LED that LED watches became available. They were prized for their clear light output and low power draw. Neon bulbs, on the other hand, are thirsty for current and often warm or even hot in operation. And yet, [Lucas] found a way to build them into a sweet watch that actually does the job. Nice, right?

The design uses a simple trick to avoid killing the batteries with excessive power draw. The neon lamps are only activated when the user waves a hand above the watch, at which point the lamps light to display the time. Reading the time is  a little fiddly, but understandable with the aid of this PDF diagram. Basically, the two electrodes of each neon lamp are driven independently. This gives each of the four lamps three possible states: with the first electrode lit, the second electrode lit, or both lit. Four lamps multiplied by three states equals 12—so the watch can display the hour quite easily. As for minutes, a similar scheme is used with some modifications for clarity. Setting the time is via a light sensor on the watch which picks up flashes from a computer screen.

It reminds us of a time when we once thought nixie tubes were too power hungry for a wristwatch build… until the hackers of the world proved us wrong. Video after the break.

Continue reading “Neon Watch Glows Rather Nicely, Tells Time”

The ‘Scope Of This Kickstarter? Ten Years.

It may have taken ten years to come through on this particular Kickstarter, but a promise is a promise. In late August 2023, backers who had since likely forgotten all about the project started receiving their oscilloscope watches from creator [Gabriel Anzziani]. Whatever the reason(s) for the delay, the watch looks great, and is miles ahead of the prototype pictures.

As you may have guessed, it functions as both a watch and an oscilloscope. The watch has 12- and 24-hour modes as well as an alarm and calendar, and the ‘scope has all the features of the Xprotolab dev board, which [Gabriel] also created: ‘scope, waveform generator, logic analyzer, protocol sniffer, and frequency counter.

Internally, it has an 8-bit Xmega microcontroller which features an internal PDI, and the display is a 1.28″ E ink display. When we covered this ten years ago, the screen was the type of Sharp LCD featured in the Pebble watch. [Gabriel]’s ‘scope watch features eight buttons around the edge which are user-programmable. One of [Gabriel]’s goals was for people to make their own apps.

Of course, the Kickstarter rewards are no longer available, but if you want to build your own small, digital ‘scope, check out this DIY STM32 project.

Image via the Company Formerly Known As Twitter

Bare PCB Makes A Decent Homemade Smart Watch

These days, we live in a post-Dick Tracy world, where you can make a phone call with your fancy wristwatch, and lots more besides. [akashv44] has gone a simpler route, designing their own from scratch with a bare PCB design.

The build is based around the ESP-12E microcontroller, providing useful wireless connectivity that lets the watch interface with the outside world. The firmware makes queries of NTP servers and Yahoo’s weather API to collect time and weather data for display. It’s also capable of interacting with Blynk relay modules for controlling other equipment, which [akashv44] uses with lights and an air conditioner. The watch uses a small OLED display and a handful of small surface-mount tactile buttons for control. Power is courtesy of a small lithium-ion pouch cell, with charging handled by a TP4056 battery management IC.

It’s a simple smartwatch, but nonetheless one that teaches all kinds of useful skills in embedded development and design. It’s also funny to think how simple it is to build. A decade ago, before the ESP8266 was released, getting wireless connectivity in such a small package was a major engineering challenge. Even the Apple Watch didn’t come out until 2015! Food for thought.