Contrary to what our readers may think, we Hackaday writers aren’t exactly hacking layabouts. True, we spend a great deal of time combing through a vast corpus of material to bring you the best from all quadrants of the hacking galaxy, but we do manage to find a few minutes here and there to dip into the shop for a quick hack or two.
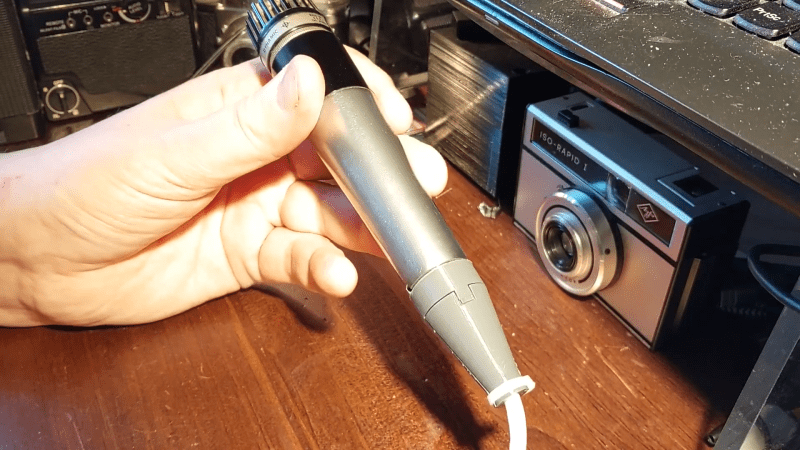
Our own [Jenny List] proves that with this quick and easy vintage microphone revival. The mic in question is a Shure Unidyne III, a cardioid pattern dynamic microphone that has been made in the millions since the 1950s. She’s got a couple of these old classics that have been sidelined thanks to their obsolete Amphenol MC3M connectors. The connectors look a little like the now-standard XLR balanced connector, but the pin spacing and pattern are just a touch different.
Luckily, the female sockets in the connector are just the right size to accept one of the crimp-on ferrules [Jenny] had on hand with a snug grip. These were crimped to a length of Cat 5 cable (don’t judge) to complete the wiring, but that left things looking a bit ratty. Some quick OpenSCAD work and a little PLA resulted in a two-piece shell that provides strain relief and protection for the field-expedient connections. It’s not [Roger Daltry] secure, mind you, but as you can see in the video below the break it’s not bad — nothing a few dozen yards of gaffer’s tape couldn’t fix. Come to it, looks like The Who were using the same microphones. Small world.


A pair of Shure 545’s were my first “serious” mic purchase in the 80s. I still have’em… somewhere. XLR version, fortunately.
Glad to see these classics given new life. But that exposed tiewrap? Cringe ;-)
I’ve made dozens of connectors using hot-melt glue. Stick your pins through a sheet of release paper into the connector you want to mate to (release side away from the good connector), fold the paper up around the wires, and hose things full of the hot-melt. Wait for it to COMPLETELY cool to avoid warping, unplug, and strip off the release paper. Trim for neatness.
That’s a really good idea!