While it’s the ideal choice for mass production, injection molding is simply no good for prototyping. The molds are expensive and time-consuming make, so unless you’ve got the funding to burn tens of thousands of dollars on producing new ones each time you make a tweak to your design, they’re the kind of thing you don’t want to have made until you’re absolutely sure everything is dialed in and ready. So how do you get to that point without breaking the bank?
That’s not always an easy question, but if you’re working with silicone parts, the team at OpenAeros thinks they might have a solution for you. As demonstrated through their OpenRespirator project, the team has developed a method of 3D printing single-use molds suitable for large silicone parts that they’re calling Digital-to-Silicone (D2S).
 In the video below, [Aaron] and [Jon] explain that they started off by simply printing injection molds in the traditional style. This worked, but the molds can get quite complex, and the time and effort necessary to design and print them wasn’t a great fit for their iterative development cycle. They wanted to be able to do from design to prototype in a day, not a week.
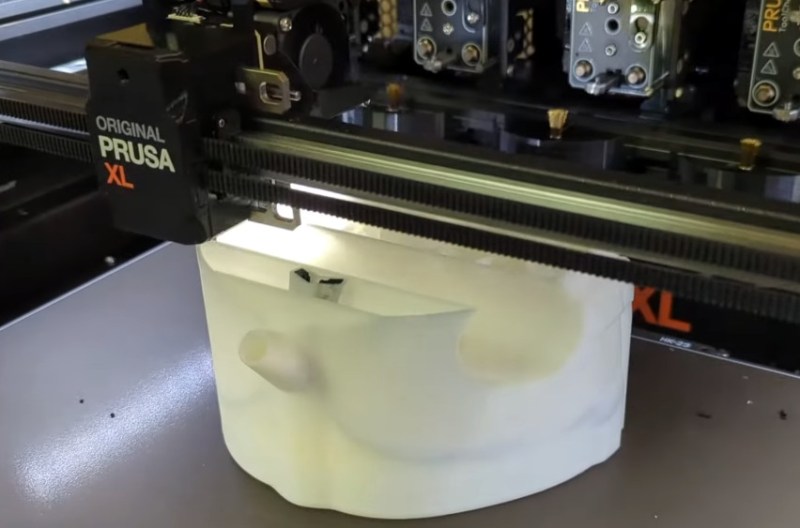
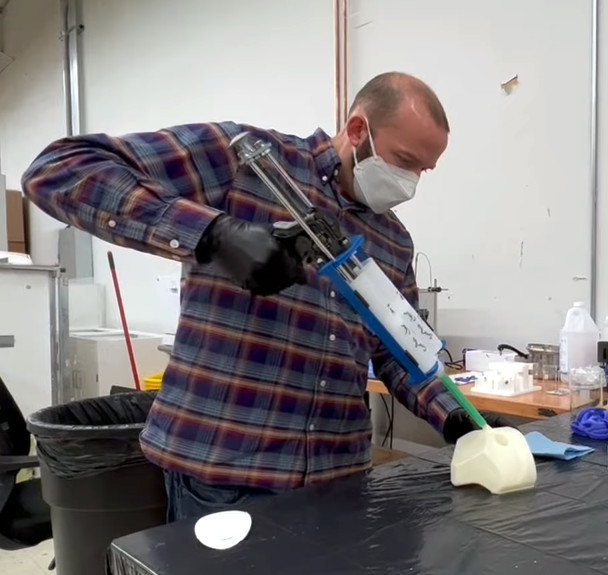
Eventually they realized that if they printed the mold out of a water-soluble filament, they could simplify its design greatly. They’ve documented the design process in detail, but the short version is that you essentially subtract the 3D model of the design you want to produce from a solid shape in your CAD package, and add a few holes for injecting the silicone. Once the silicone has cured, the mold can be dissolved away in warm water to reveal the finished part.
They then took this concept a step further. Thanks to the multi-material capabilities offered by some of the latest 3D printers, it’s possible to print structures within the mold. Once the silicone is injected, these structures can become part of the finished part. For the OpenRespirator, this lets them add PETG stiffening rings around where the filters to snap into the silicone mask body.
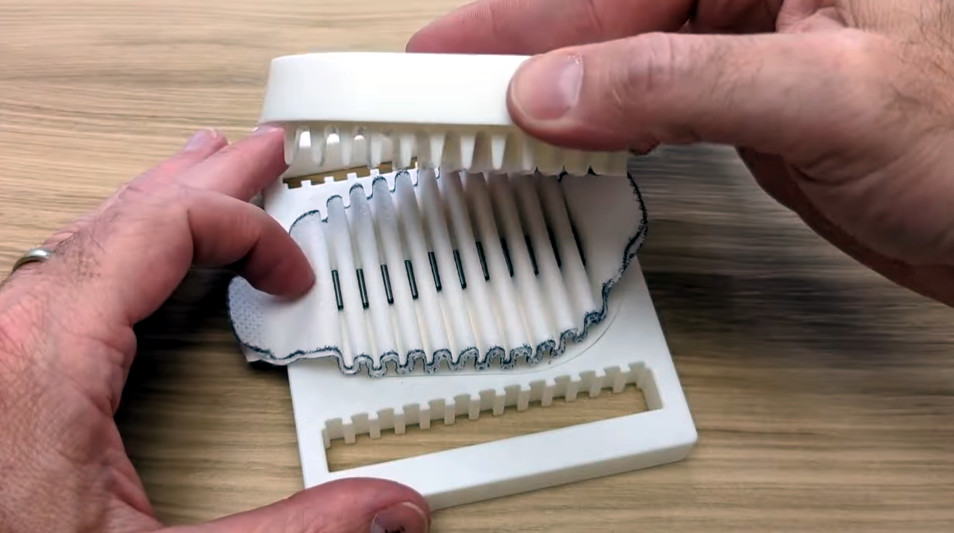
As an added bonus, the video also goes over their method of prototyping pleated filters with 3D printed forms. After inserting the filter media, snap-in arms push it down into the valleys of the form to create the pleats. These are held in place with the addition of small metal rods that are attracted to the magnets embedded into the form. Once the top and bottom of the form have been closed over the filter, silicone is injected to create a ring around the filter and lock everything into place.
We often think of 3D printing as ideal for prototyping, but usually in a very direct and obvious way. You print out a part to see if it works the way you want, and then take the design and have it made out of something stronger. But this presentation from OpenAeros shows just how versatile the technology can be. With even a half-way decent desktop printer, the potential time and cost savings can be enormous. Something to keep in mind should one of your side projects turn into something bigger.


While the aesthetics are… okay… I really like the design and the thoughts that went into it. I use 3M’s on a daily basis, because I suck at keeping re-usables clean. But from an ecological perspective I should really reconsider especially when seeing this project ❤️
How cool is this… Print a mold and dissolve it in water to reveal the produced item. Print using different materials so that some of it becomes part of the end product. Record the process using a mobile phone you keep in your pocket and upload it to Youtube for everyone to see. Share your knowledge so that everyone benefits from it.
Another thing to note is that in addition to PETG we also printed PCL (polycaprolactone) in situ and then molded silicone over this. PCL is a very interesting polymer as it has some nice material properties and is heat moldable with hot water (you can put a piece of PCL in some warm water – it will become soft and pliable and you can mold it into whatever shape you want) .
In this process – we were able to print PCL in place in certain parts of the mold and have it come out in the finished part (in this case the nose “wire” of the respirator) The finished part can then be dipped in hot water by the end user and molded to their preference/comfort.
We have also been successful in printing TPU in situ and then molding silicone over that :)
I didn’t even know you could get PCL in filament form, that is really useful to know, such a handy plastic. Is it a pain to print with? Seems like with how very low its melt temp is and how much heat it holds part cooling at least would be challenging.
It prints okay, our process settings for the Prusa are included in the documentation. We have been capsulating it in the silicone, so it doesn’t have to be such a beautiful print. In general though it’s not too hard to print though, and has really great material properties that are hard to get from other plastics.
Back in like 2015 or 2016 I started working on a more advanced version of this, which I called the “3M” or “3 Materials” concept. Yes, it was a play on words for the 3M “1 megapixel, 1 megabyte, 1 megapenny” unix workstations.
The basic idea was to take your 3D print, composed of a collection of files specifying the materials for it’s multiple parts (really, what parts should be silicone/TPU and what part should be hard plastic) and import them into something like OpenSCAD. There a script can run morphology operations to combine those two sets of shapes together, generate overmoulding around them that will be printed in dissolvable PVA, and then supbtract them from the overmoulding. Because printing straight TPU or other flexible filaments sucks, as the moving printhead tends to disturb it, the idea was to always have the TPU you were printing be supported and contained inside a shell of overmoulded PVA. Then you could print it like normal plastic along with all the solid bits, and when the print was done just toss it in the bathtub with no further processing required.
With this more primitive process, you have to actually fill the stupid thing with injected silicone, which is kinda sucky because it’s a fiddly manual process and you have to avoid leaving voids. When you print the support PVA, the TPU, and the hard plastic simultaneously you also don’t need to worry about having access to inject the silicone. You do still need to worry about connectivity for water though. No random chunks of isolated PVA in the middle of the print, much like voids filled of resin in resin printing.
Did you ever finish yours? Because for this “more primitive process” that you call “sucky”, they’ve not only finished, but fully documented the process.
I don’t see you having built anything either.
Recently I just started with a similar idea, but it was printing in polymer clay, completely forgot about dissolvable filaments, seems a lot easier than a custom printer, only concern would be cure inhibition, was any of that seen?
No issues with curing seen, we have used a few different water soluble filaments, and have used PLA PETG and TPU and all have worked great. Resin style printers though we’ve used as well and those have lots of issues around inhibition of the silicone curing. Surprisingly the water washable SirayaTech works okay.
That would be even better if the frame around the corrugated filter were card, e.g. as described at https://hackaday.com/2019/12/26/3d-printing-paper-sort-of/ However that would probably need to be assembled by gluing rather than silicone injection.