The difference between 3D printing and good 3D printing comes down to attention to detail. There are so many settings and so many variables, each of which seems to impact the other to a degree that can make setting things up a maddening process. That makes anything that simplifies the process, such as this computer vision pressure advance attachment, a welcome addition to the printing toolchain.
If you haven’t run into the term “pressure advance” for FDM printing before, fear not; it’s pretty intuitive. It’s just a way to compensate for the elasticity of the molten plastic column in the extruder, which can cause variations in the amount of material deposited when the print head acceleration changes, such as at corners or when starting a new layer.
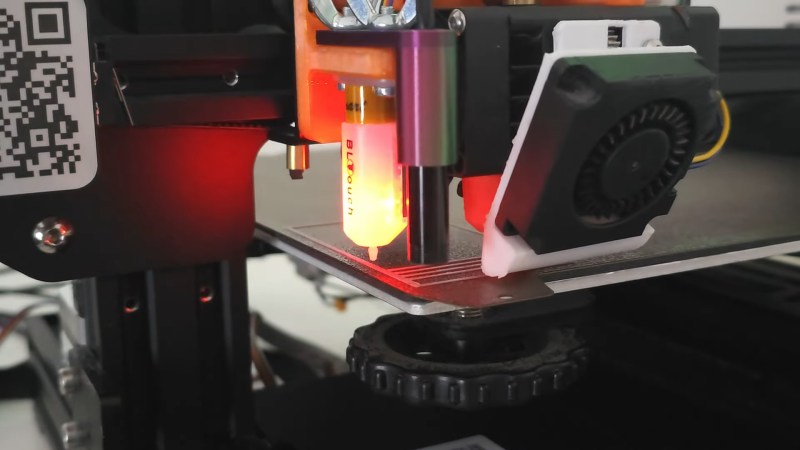
To automate his pressure advance calibration process, [Marius Wachtler] attached one of those dirt-cheap endoscope cameras to the print head of his modified Ender 3, pointing straight down and square with the bed. A test grid is printed in a corner of the bed, with each arm printed using a slightly different pressure advance setting. The camera takes a photo of the pattern, which is processed by computer vision to remove the background and measure the thickness of each line. The line with the least variation wins, and the pressure advance setting used to print that line is used for the rest of the print — no blubs, no blebs.
We’ve seen other pressure-advanced calibrators before, but we like this one because it seems so cheap and easy to put together. True, it does mean sending images off to the cloud for analysis, but that seems a small price to pay for the convenience. And [Marius] is hopeful that he’ll be able to run the model locally at some point; we’re looking forward to that.


Pressure advance on an Ender3 with its plastic wheels and cantilever Z-axis is like mounting Brembo disc brakes on the 4 wheels of an old Fiat panda. Cool that it can be done and a very nice proof of concept, but there are worse problems that can (and eventually will) bite you.
The acetal wheels have proven to be a non-issue with these and the cantilever axis is quickly, cheaply and easily remedied with a second Z motor and screw.
I’ve machined a custom mounting plate to mount a Revo Hemera XS to my E3V2 and it prints amazingly. Plus the addition of Klipper has been a worthwhile upgrade as well.
I agree with this. Pressure advance did noticeably increase the print quality on my Ender 3. It’s absolutely worth doing.
I think you’re seriously underestimating the capabilities of the platform.
in practice, that may be true. i haven’t fought with an ender3 in particular.
but in principle, it doesn’t have to be. one of the most remarkable things about calibration is that it moots a lot of defects. you can spend a lot of effort trying to make something ‘right the first time’, or you can just accept error so long as it’s repeatable, and calibrate it out. obviously doing both is the best but if you’re only going to do one then often calibration is better than perfection.
I agree the modified Ender 3 is not best use case (but its the printer I have). But even with it I see clearly improved corners on a test cube. But the great thing is this will work on any printer running klipper + usb cam…
tbh it probably IS the best use case, if anything needs a little extra help, it will be an ender-3, accumulative fixes make this an excellent platform, it might be long in the tooth these days but the fixes make it a decent machine if it’s all you’ve got access to.
on the contrary, pressure advance and input shaping are necessary to get good results from an ender 3
You sound like the kind of person who’d show up to the track with a Ferrari and still get lapped by Fiat Pandas.
Hahaha. I am Italian. I have seen things (fitted on a Panda or Fiat 500) you people wouldn’t believe
My kid brother has a VW powered Fiat 500 that does a 1/8 mile wheelie.
But I’m American, can’t stop teasing you:
A Pontiac GTO was/is faster than a Ferrari GTO.
Not just 1/4 mile, around Monza.
Hotrod mag has had fun teasing Ferrari fanboys for decades now.
Overpriced Italian trash for the rich and pretentious.
Quote Enzo: ‘I like American cars, I just don’t understand why you put truck engines in them’
Quote Americans back: ‘We like Italian cars, we just don’t understand why you put sewing machine engines in them.’
Funny. I won a short race with a Pontiac GTO on my Honda 360T back in the day. Nearly died doing it, but never dreamed that I could have bested a Ferrari.
Sounds like a regular photo would work fine for analysis. I see no need for the endoscope camera… for this anyway.
Direct Drive Extrusion might reduce the problem.
yeah that was exactly my thought…like, this method seems a lot like a ‘temperature tower’. no one uses a camera mounted on their printer for that, they just print the object and then hold it in their hands and eyeball it.
i know the kind of defects i had from pressure variability in a bowden extruder were absolutely not subtle…i definitely could evaluate it just eyeballing spaghetti traces on the build plate.
Yes but the key is that this is executed automatically at the start of every print (if you like) so it’s does it automatically without human input. Just like auto bed leveling or so…
Exactly. That it’s “easy” to eyeball is more reason to automate it away. When you run printers 24/7, the manual calibration processes add up, regardless of whether you’re running an Ender or a Voron. Automation reduces wasted time and improves reliability as the calibration and adjustments can be executed more proactively. Even BambuLab printers need some of these manual steps. At least with OSS firmware you can automate them away and spend your time on more productive things. Thank you for your work on this and for improving what OSS printers can do. This is what pushes the industry forward.
Cool thing is they are using fal.ai to provide access to the BiRefNet model, but there is no reason you couldn’t run it locally (provided you have a suitable gpu/platform for it)
https://github.com/ZhengPeng7/BiRefNet
yes I’m using this open model. In the video when I talk about running locally I was thinking about running it directly on the printer itself where the hardware constraints are lower… But I hope that a model like https://github.com/xuebinqin/DIS this can work if trained for this task and can be run on the printer itself…
Very nice! I’d love to set this up on my ender. Adding klipper’s pressure advance was a huge upgrade from stock, plus the other upgrades many of us have. I’m down to add a $3 endoscope for automated pressure advance!
Cool, let me know if you run into any issues or questions come up.
This looked like an amazingly smart idea, until I considered that pressure advance really isn’t hard to do quickly by eye. You have to remove the calibration lines by hand anyways, so you might as well just look down and take the 30 seconds to get a ‘close enough’ calibration factor without all this camera mess. I don’t even use it on my K1 Max, it really makes little difference and it’s usually just 0.04. Simply having it turned on and set to a general number makes the most difference.
The way I have set it up right now is that this runs, just like bed leveling, automatically at the beginning of the print. So you will loose a bit of build volume if you do it like this but you don’t have todo anything manually it will just continue with your print. And you remove the test pattern and the print at the end when everything is finished.
Was wondering, how much difference do different filaments make for pressure advance? Or is this a printer-geometry-set-it-once thing?
Pressure advance varies from filament to filament, it’s worth tuning at least once per range and if you get issues between colours in the same range, you can do a little retune for peace of mind. It also goes hand in hand with slicer flow calibration, so don’t forget to give that a tune first too! If you get PA tuned right, you’ll probably have solved any/most stringing issues as a bonus too.
Maybe a flatbed scanner camera could be hacked in somehow. Too complicated though
One thing I’d like to see is a strain-gauge sensor between the extruder and the nozzle (or nozzle and Bowden mount) to directly measure extrusion force which gives you pressure in the nozzle. This would remove a heap of guesswork trying to compensate for PA and could be used as direct feedback in the firmware driving the extruder.
It could also double as a nozzle touch sensor for bed leveling.