Continously Extruding 3D Printed Tubes With Compressed Air

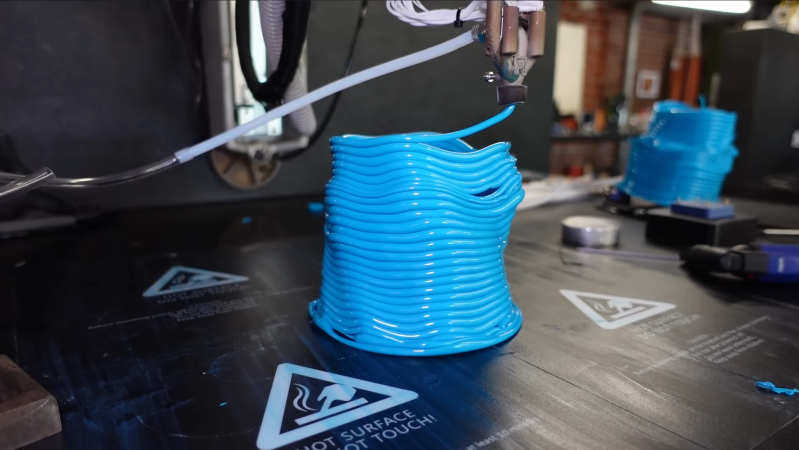
[Jan] of [Roetz 4.0] has a unique approach to multi-material 3D printing: he’s designed an extruder which takes two different materials and extrudes one as a shell around the other. This opens up some interesting possibilities, such as a conductive filament surrounded by an insulating shell; [Jan], however, didn’t have an immediate use for the process, so he moved on to a related technique: extruding plastic tubes with a compressed-air core.

The extruder he used for this was a variation on the dual-material extruder; it takes in two strands of filament, melts them, and extrudes them as a shell around the outlet of a compressed-air line, which was controlled by a high-precision pressure regulator. During testing with PLA, it seemed capable of extruding airtight tubes of filament, though it had a tendency to blow bubbles and form tubes with inconsistent diameters. The low thermal conductivity of the stainless steel extruder also proved problematic; coupled with the cooling effect of the compressed air, filament sometimes solidified inside the extruder.

[Jan] found it almost impossible to get consistent results using only pressure-based control; as the layer of molten plastic around the air gets thinner, it provides less resistance to further ballooning, leading to continuous expansion until the bubble bursts. Controlling the volume of air extruded provided much more consistent results, and in a second video, he built a peristaltic pump to do just that. He also switched to using TPU filament, which greatly improved layer adhesion. When inflated with compressed air, the finished TPU structures expanded slightly, though there were still air leaks. The results look promising, and TU Darmstadt has already carried out some research in this area.

In a separate research project, we’ve seen a similar multi-material co-extrusion approach used to print pneumatic channels. For more on the history of [Jan]’s multi-filament extruder, check out his Minuteman printer. Continue reading “Continously Extruding 3D Printed Tubes With Compressed Air”

Cheap Endoscopic Camera Helps Automate Pressure Advance Calibration

The difference between 3D printing and good 3D printing comes down to attention to detail. There are so many settings and so many variables, each of which seems to impact the other to a degree that can make setting things up a maddening process. That makes anything that simplifies the process, such as this computer vision pressure advance attachment, a welcome addition to the printing toolchain.

If you haven’t run into the term “pressure advance” for FDM printing before, fear not; it’s pretty intuitive. It’s just a way to compensate for the elasticity of the molten plastic column in the extruder, which can cause variations in the amount of material deposited when the print head acceleration changes, such as at corners or when starting a new layer.

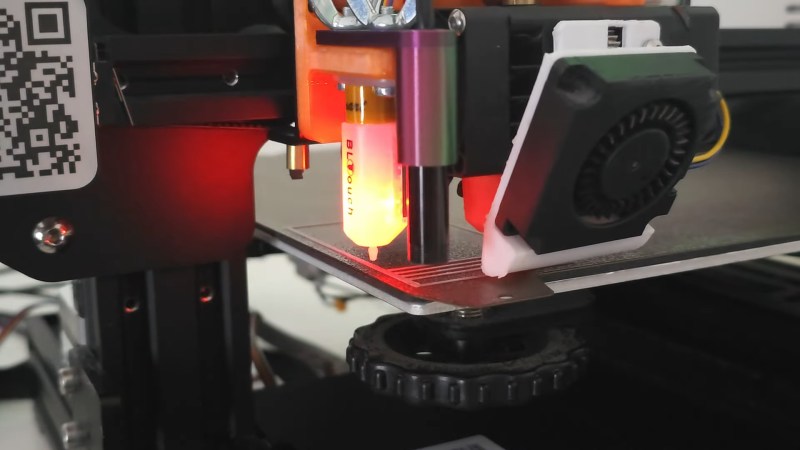
To automate his pressure advance calibration process, [Marius Wachtler] attached one of those dirt-cheap endoscope cameras to the print head of his modified Ender 3, pointing straight down and square with the bed. A test grid is printed in a corner of the bed, with each arm printed using a slightly different pressure advance setting. The camera takes a photo of the pattern, which is processed by computer vision to remove the background and measure the thickness of each line. The line with the least variation wins, and the pressure advance setting used to print that line is used for the rest of the print — no blubs, no blebs.

We’ve seen other pressure-advanced calibrators before, but we like this one because it seems so cheap and easy to put together. True, it does mean sending images off to the cloud for analysis, but that seems a small price to pay for the convenience. And [Marius] is hopeful that he’ll be able to run the model locally at some point; we’re looking forward to that.

Continue reading “Cheap Endoscopic Camera Helps Automate Pressure Advance Calibration”

Hackaday Links Column Banner

Hackaday Links: November 17, 2024

A couple of weeks back, we covered an interesting method for prototyping PCBs using a modified CNC mill to 3D print solder onto a blank FR4 substrate. The video showing this process generated a lot of interest and no fewer than 20 tips to the Hackaday tips line, which continued to come in dribs and drabs this week. In a world where low-cost, fast-turn PCB fabs exist, the amount of effort that went into this method makes little sense, and readers certainly made that known in the comments section. Given that the blokes who pulled this off are gearheads with no hobby electronics background, it kind of made their approach a little more understandable, but it still left a ton of practical questions about how they pulled it off. And now a new video from the aptly named Bad Obsession Motorsports attempts to explain what went on behind the scenes.

Continue reading “Hackaday Links: November 17, 2024”

Extrusion For The Pottery Shop

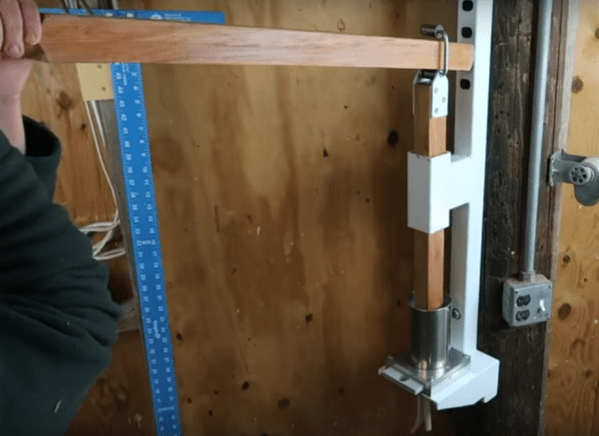
Extrusion is a process for forming materials by forcing them through an opening, which can allow for complex shapes. Aluminum extrusion beams are what most of us are probably thinking of, but plenty of other things are made from extruded material like pipe, heat sinks, and even macaroni. Extrusion can also be used for modelling clay to create uniform sections of rounded clay as a starter material for producing other pottery, and [Justins Makery] has built a custom extruder to do just that.

The build starts with welding together a metal frame to hold the press, and uses a wooden wagon handle to drive the extruder. The handle can be moved up or down the frame to increase the range of motion thanks to a custom bearing and slots cut into the frame’s post. The piston mechanism itself is built out of aluminum plate with a cylinder loosely fitted to it to allow for easy cleaning, and the top of the piston uses a loose-fitting plastic cap cut out of an old cutting board.

With everything in pace, the extruder can make cylinders of clay of any desired thickness thanks to swappable dies. While it doesn’t produce the end result of the workshop directly, it definitely helps to provide the potter with clay of uniform dimensions used for building other pieces of pottery, much like how aluminum extrusions are used to build all kinds of other things as well.

Continue reading “Extrusion For The Pottery Shop”

This Is The Future Of Waste Management

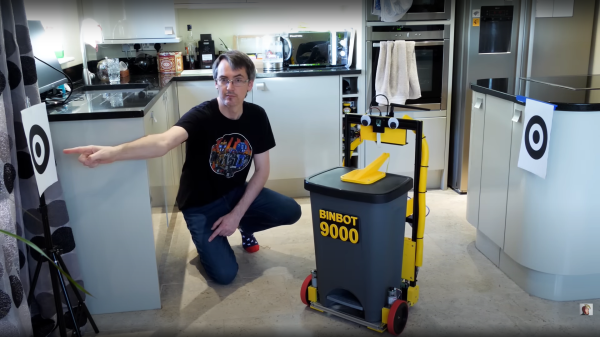
Many of us have been asking for some time now “where are our robot servants?” We were promised this dream life of leisure and luxury, but we’re still waiting. Modern life is a very wasteful one, with items delivered to our doors with the click of a mouse, but the disposal of the packaging is still a manual affair. Wouldn’t it be great to be able to summon a robot to take the rubbish to the recycling, ideally have it fetch a beer at the same time? [James Bruton] shares this dream, and with his extensive robotics skillset, came up with the perfect solution; behold the Binbot 9000. (Video, embedded below the break)

Continue reading “This Is The Future Of Waste Management”

Robotic Platform Is Open Sourced And User Friendly

Having a 3D printer or a CNC machine available for projects is almost like magic. Designing parts in software and having them appear on the workbench is definitely a luxury. But for a lot of us, these tools aren’t easily available and projects that use them can be out-of-reach. That’s why one of the major design goals of this robotics platform was to use as many off-the-shelf components as possible.

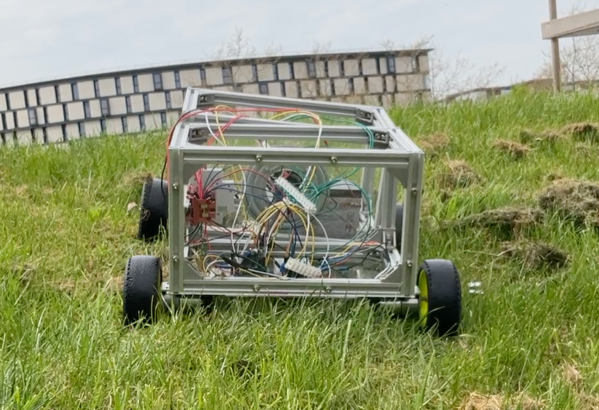
The robot is called the OpenScout and, as its name implies, intends to be a fully open-source robotics platform for a wide range of use cases. It uses readily-available aluminum extrusion as a frame, which bolts together without any other specialized tools like welders. The body of the robot is articulating, helping it navigate uneven terrain outdoors. The specifications also call for using an Arduino to drive the robot, although there is plenty of space in the robot body to house any robotics platform you happen to have on hand.

For anyone looking to get right into the useful work of what robots can do, rather than spending time building up a platform from scratch, this is an excellent project. It’s straightforward and easy to build without many specialized tools. The unique articulating body design should make it effective in plenty of environments. If you do have a 3D printer, though, that opens up a lot of options for robotics platforms.

Square Cuts On Aluminum Extrusion, No Mill Required

If you’re looking for the perfect excuse to buy that big, beautiful Bridgeport mill, we’ve got some bad news: it’s not going to be making perfectly square end cuts on aluminum extrusion. Sadly, it’s much more cost-effective to build this DIY squaring jig, and search for your tool justification elsewhere.

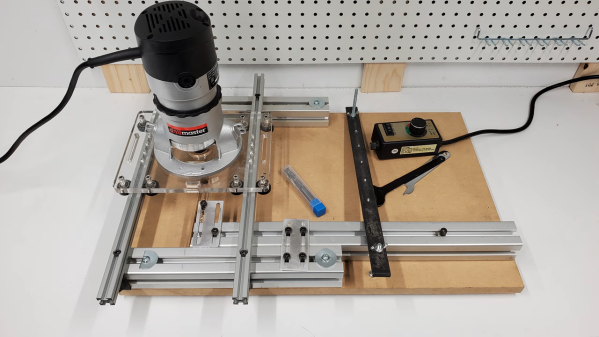
There’s no doubting the utility of aluminum extrusion in both prototyping and production builds, nor that the versatile structural members often add a bit of class to projects. But without square cuts, any frames built from them can be seriously out of whack, leading to misery and frustration down the road. [Midwest Cyberpunk]’s mill-less solution uses a cheap Harbor Freight router as a spindle for a carbide endmill, riding on a laser-cut acrylic baseplate fitted with wheels that ride in the V-groove of — you guessed it — aluminum extrusions. A fence and clamping system holds the extrusion firmly, and once trammed in, the jig quickly and easily squares extrusions that have been rough cut with a miter saw, angle grinder, or even a hacksaw. Check out the video below for a peek at the build details.

We love the simplicity and utility of this jig, but can see a couple of areas for improvement. Adding some quick-throw toggle clamps would be a nice touch, as would extending the MDF bed and fence a bit for longer cuts. But even as it is, this tool gets the job done, and doesn’t break the bank like a mill purchase might. Still, if your heart is set on a mill, who are we to stand in the way?

Continue reading “Square Cuts On Aluminum Extrusion, No Mill Required”