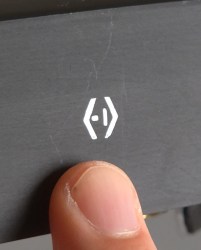
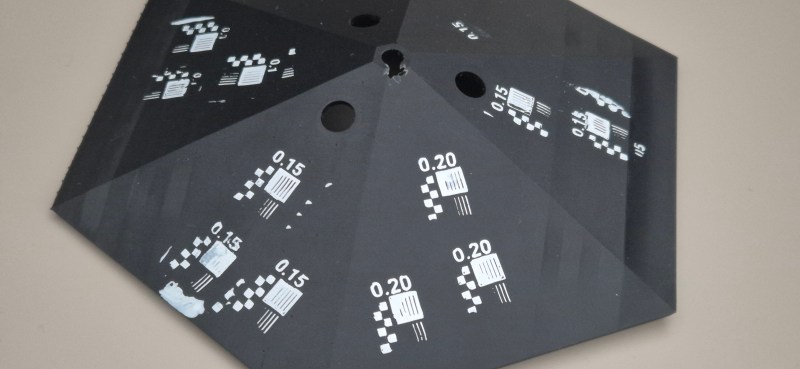
One of the hardest parts of a project — assuming it makes it that far — is finishing it up in an aesthetically pleasing manner. As they say, the devil is in the details, wearing Prada. Apparently the devil also has an excellent manicure, because [Tamas Feher] has come up with a way to introduce incredibly detailed decals (down to 0.1 mm) in cheap, repeatable fashion, using a technique borrowed from the local nail salon.

For those who aren’t in to nail art (which, statistically speaking, is likely to be most of you) there is a common “stamping” technique for putting details onto human fingernails. Nail polish is first applied to voids on a stencil-like plate, then picked up by a smooth silicone stamper, which is then pressed against the nail, reproducing the image that was on the stencil. If that’s clear as mud, there’s a quick demo video embedded bellow.
There’s a common industrial technique that works the same way, which is actually where [Tamas] got the idea. For nail salons and at-home use, there are a huge variety of these stencils commercially available for nail art, but that doesn’t mean you’re likely to find what you want for your project’s front panel.
[Tamas] points out that by using a resin printer to produce the stencil plate, any arbitrary text or symbol can be used. Your logo, labels, whatever. By printing flat to the build plate, you can take advantage of the full resolution of the resin printer — even an older 2 K model would more than suffice here, while higher res like the new 16 K models become the definition of overkill. The prints go quick, as they don’t need any structural thickness: just enough to hold together coming off of the plate, plus enough extra to hold your designs at a 0.15 mm inset. That doesn’t seem very thick, but remember that this only has to hold enough nail polish to be picked up by the stamper.
[Tamas] cautions you have to work fast, as the thin layer of nail polish picked up by the stamper can dry in seconds. You’ll want plenty of nail polish remover (or plain acetone) on hand to clean the stamper once you’ve finished, as well as your stencil. [Tamas] cautions you’ll want to clean it immediately if you ever want to use it again. Good to know.
While this is going outside of the nail art kit’s comfort zone, it might not quite be abuse. It is however a very useful technique to add to our ever-growing quiver of how to make front panels. Besides, we don’t specify you have to literally make components suffer; we just want to see what wild and wonderful substitutions and improvisations you all come up with.


Awesome! Also very similar to how watch dials are made.
I guess a resing printer is not a bad tool for the job if that’s what you have availabe. But photopolymer plates that are made for pad printing or flexography/letterpress printing are commercially available and easy to process (similar to photo-resist pcbs). laser engraving a plate instead is also an option if that’s what you have available.
Solder paste stencils (from jlcpcb and similar) might work also. Though they have limitations on how large the apertures can be without a middle bridge to support them.
It should be much easier (with better / more predictable results) to use just photo-resist PCB as a printing plate instead of the resin printed one. Much more similar to original printing process.
Adjusting the etching time allows us to create shallower or deeper etched regions – to precisely regulate amount of ink.
Years ago I used those draftsman letter transfer sets that are rubbed on through a mylar sheet. First paint the surface with the color you want your letters. Then rub the letters on. Spray over a second color. Let it dry well. Use a sticky tape over the letters to remove the tranfers. Voilà. You have your clean letters! Spray clearcoat for added protection.
I’ve seen this used for Warhammer figures recently as well! I forget the guys’ names but one of the small companies in the space released some steel stencil plates that would probably be good for other things too.
I believe that was Goobertown and EbayMinatureRescues new product which really is just some nice etched plates on the 40K theme for a regular stamper. Goblin Hobbies I think they called themselves in this case.
I keep a few bottles of nail polish to paint my PLA 3d prints. Two or three coats are enough.
Good old pad printing, freehand mode – congrats, I would never get such precise results manually!
Here’s a video from some factory (German only, but you’ll see how it’s done industrial style):
https://www.youtube.com/watch?v=MxwKRzv8iEs
German name is “Tampondruck”, btw.
You might want to look into UV DTF transfers. This is a full color process that prints on a carrier film. A backing is then applied. When you want to use the transfer, you peel the backer, rub the transfer onto the desired substrate, then peel away the top carrier film. Nothing is left but the ink and the adhesive holding it to the substrate. Depending on the printer used, the printing resolution can be up to 1440dpi. The color is superb.
Unfortunately UVDTF results in way thicker material. Padprints if using the correct ink can be almost hight free.
Skipped your article as you assumed nobody here would be into it.
“If that’s clear as mud, there’s a quick demo video embedded bellow” – *below.