It’s possible to improve your 3D prints in all kinds of ways. You can tune your printer’s motion, buy better filament, or tinker endlessly with any number of slicer settings. Or, as [Dirt-E-Bikes] explains, you could grab yourself some silica gel.
If you’re unfamiliar with silica gel, it’s that stuff that comes in the “DO NOT EAT” packet when you buy a new pair of shoes. It’s key feature is that it’s hygroscopic—which means it likes to suck up moisture from the atmosphere. When it comes to 3D printing, this is a highly useful property—specifically because it can help keep filament dry. Over time, plastic filament tends to pick up some moisture on its own from the atmosphere, and this tends to interfere with print quality. This can be avoided by storing filament in a sealed or semi-seaeled environment with silica gel. The gel will tend to suck up most of the moisture from the air in the sealed container, helping to keep the filament drier.
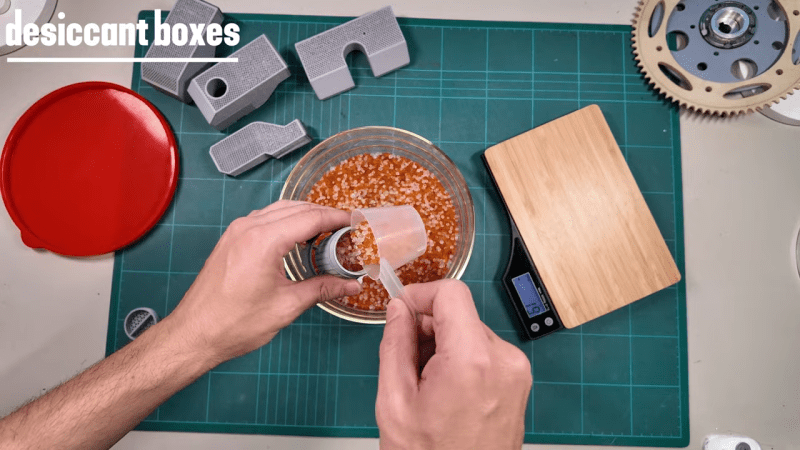
[Dirt-E-Bikes] does a great job of explaining how best to integrate silica gel with your filament spools and automatic material changer (if you have one). He also explains the value of color changing silica gel which indicates when the material is saturated with water, as well as how to dry it out for reuse. You can even combine some of the color changing beads with the more common plain white beads recycled from your shoe boxes, since you only need a few colored beads to get an idea of the water content.
We’ve explored other filament drying solutions before, too. Video after the break.
[Thanks to Keith Olson for the tip!]


Living in Arizona, I never had a problem with PLA absorbing moisture.
Once I moved to San Francisco I learned the hard way to keep my spools in airtight bins with Damp-Rid. Probably going to switch to silica beads before too long.
You can get a decent dehumidifier for cheap in Amazon. That should solve your moisture problems long term
“Do not eat silica gel with remaining mouth” just doesn’t have the same vibe as the laser version.
Maybe covered in the video: Take some fresh (or freshly regenerated) silica gel and dribble a few drops of water on it to see why this “do not eat” warning exists.
Now imagine what you’re supposed to do when you have a stomach full of exploded glass shards.
Ooh – pop rocks!
I’ve done this and the silica gel did nothing at all.
If you use it a lot, you can try it in the sun, am oven or the microwave
SOLVED: What is the best way to dry used desiccant Silica-Gel? – Skills – iFixit https://share.google/i3PxPXezUR7qNmATz
I concur with that link. My dessicator box is an old camping cooler with an airtight lid. I use about 1 kg of silica gel in it. A hygrometer in the box claims it keeps the humidity between 8-9 percent.
About 3 times a year, spring summer and fall, I need to regenerate it, according to its indicator.
Regeneration is in a 120 C oven, 4 hours. Less than 110 C or less than 3 hours is not enough. Much more than 120 C would (they say) damage the silica gel. I have not verified that.
The only real issue is that the darn stuff gets fragile and turns to sand over the years, falling out of the screen containers. Coming up on 10 years with this I’ve had to replace silica gel once, and coming up on needing to replace it again.
try 15 minutes in the microwave at 50% power.
it works with the orange stuff
I’d presume those numbers are going to depend on the wattage of your microwave. I’ve owned microwaves from 600 to 1700 watts, and I don’t believe that the same time and percentage settings would work identically on all of them.
Mmmmmm sand
Everyone with a 3D printer doesn’t already know this? TIL.
Yeah, one of the first things I did after buying a 3d printer was to buy a filament dryer after a botched petg print
I have 10 year old rolls of pla, never dried or sealed. Still print good. It really depends on where you live.
This.
I live in arizona, and the only real times I have to worry about humidity is in the late summer (we refer to it as the monsoon season) and sometimes mid winter if it gets cold enough.
I need to see how low a temperature the spare toaster oven I have can go and use it to dry out the dessicant bundles I have, as the stuff I’m using has finally changed color after a year and needs to be dried out.
I’ve never had a problem printing with PLA or TPU, but I have to keep PETG and ABS dry or I’m just wasting it.
Yep – the 3D printing crowd are obsessed with wet filament being the cause of all evils but I’ve never had to dry filament in my life, they seem to assume everyone must live in a swamp.
https://xkcd.com/1053/
There was a time in the past when you didn’t already know this.
Cat litter can be bought as large silica gel crystals that already have an indicator.
Put a cloth or sock over a hoover tube to remove the dust.
i store my filament in popcorn tins with surplus silica packets. works fine in rainforest conditions, provided you periodically dry them out in the toaster oven (mine has a dehydrate mode).
Since everyone’s sharing their methods, I’ll do the same:
I thrifted an Oster toaster oven. Looked pretty good and was just really dirty. Scoured with steel wool for a while, added an Arduino, temp/humidity sensor and a relay… and it’s perfect. The drip tray is filled with the orange color-changing desiccant beads and a couple of the Uline clay packs, as well as a Uline paper humidity indicator strip.
I did this primarily because I have many oversized spools of more serious materials, like glass-fiber polyamide, which won’t fit in Polymaker’s Polydryer etc. My spools have never been more dry, and all of my hygroscopic stuff prints beautifully. I’ve never really used it for PLA because I don’t really print in PLA except for rare one-off prototypes for fitment check.
Also have the whole mess on an ESP8266-based relay running Tasmota so I could integrate it into Home Assistant, for twice a day “top-offs”, since nylon reabsorbs moisture even in low RH. Desiccant tends to drift, so this prevents slow saturation and moisture inside the spool itself… as well as mitigating seasonal RH creep.
If you’re serious about serious materials, thrift a toaster oven/air fryer.
Did you use the Arduino for precise temperature control of the toaster oven? If so, in broad strokes how did you accomplish that, some kind of PWM control of the heater element with feedback from the temp sensor? I wouldn’t think most cheap toaster over or air fryer’s inbuilt temp controls would be accurate enough to rely on.
No, not really precise control, essentially just a thermostat: target temperature reached, hold and toggle off the relay. Since I sealed the door with some silicone gasket material, it keeps temp for a good while with just the fan circulating air inside of it. If it gets too far below the temp target it just kicks the relay back over.
For what it’s worth, the oven itself is set as high as it’ll go using the knobs on the front, on a “max”/convection setting to keep air moving.
I’m sure there’s a better way to do it, but so far my PA6-{GF,CF} holds at ≤10% humidity, measured with a battery powered hygrometer and the Arduino’s DHT11 temp/humidity sensor, and everything prints beautifully.
Uncooked rice might work as well. A problem in humid climates is that salt (NaCl) absorbs water in a salt shaker. Adding rice helps to keep the salt from absorbing water and clumping. Non-toxic and reusable by drying in the oven. I think a cooler of any flavor with a terrarium heater and a bed of rice will keep moisture at bay and the filaments dry. Most expensive component is the heater.
If you experiment I’d like to know the results. The rice works well with salt because it wants to absorb the moisture more than the salt does, otherwise the salt would be keeping your rice dry. Same is true of silica and most plastics (not sure if all is true), but I’ve no idea about rice vs say pla or petg.
as this is the primary use of silica gel, therefore its not much of a “hack”, is it?
Personally I’ve never had a problem with moisture. I don’t use silica gel or anything and I keep my rolls for years like a savage. Probably the local climate!
Please correct me if I’m wrong, but my understanding is that “crystal cat litter” is silica gel. Very cheap, and most brands have blue indicator crystals to let you know when it’s exhausted. I drill a few dozen small holes in a peanut butter jar, fill with litter, place in the container holding whatever is to be kept dry. Cheap enough to be binned when the color changes, but can be regenerated in a few hours in an oven at 105-110C.
It’s an option if you don’t get enough of those tiny packets to be useful.
Mason jar. Aluminum (not plastic) window screening. No lid, just the ring.
Don’t remove the silica gel from the jar, ever. Just bake the whole thing to regenerate.
A quick check on Chewy.com for this and Amazon for orange-indicating silica shows that cat litter wins on price for a 5 kg or so, but above 8 kg it swings the other way.
Good tip!
Use Activated Alumina Desiccant! Amazing stuff.
Cloth bags work great for holding the silica gel. There’s no point in wasting a bunch of time and plastic to print custom holders.
Microwave is risky because a microwave oven puts out a lot more power than a few small bags of silica gel can absorb without a fast temperature rise. I stupidly produced some smoke this way and had to air out my kitchen.
I packet my silica gel in cheap tea bags meant for loose-leaf tea. That and 13×13” ziplock bags to store the spools.