Time And Date Clock Does It With RGB LED Strips

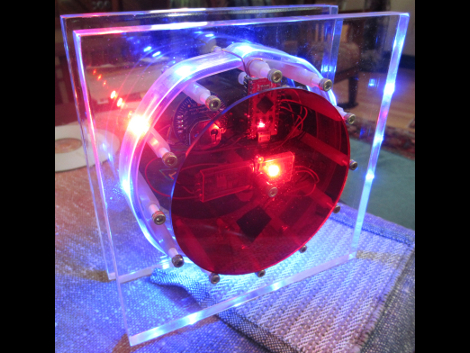
[Craig’s] color clock really came together quite nicely. The majority of the body is acrylic, with two large clear squares and a pair of colored discs. All are held in place by a ring of hardware with spacers in them, and the RGB LED strip that is used to display time and date wraps around those spacers. This hides the components in the center, with a USB cord connecting to the Arduino compatible board to power the device.

Hours are displayed in red, with minutes shown in green, and blue used as a background color. In the center you can see one of two red LEDs which alternate like a pendulum to mark the passing seconds. There are timed events every ten , fifteen, and thirty minute. At the fifteen minute mark the clock switches to display the date. The other two events are animations to keep things interesting. All of the settings for the clock are accessed using just two momentary push buttons mounted on the back of the clock.

Continue reading “Time And Date Clock Does It With RGB LED Strips”

Reverse Engineering An RGB LED Remote

In the quest to add some mood lighting in his basement, [Mohonri] found an infrared wireless remote that is able to control several RGB LED strips. The only problem with this remote is the inability to control it via a wall-mount panel or even a computer. Obviously this would not stand for such a swank basement, so [Mohonri] did the reasonable thing and reverse engineered one of these remotes.

The build started with ripping the remote apart and figuring out how it ticks. [Mohonri] found the small IR LED transmitter and hooked up an oscilloscope to capture some data. After a bunch of trial and error and a big help from relevant documentation he had the entire button matrix – and thus the functions available to the LED strip – available to output via wall panel or computer.

[Mohonri] hasn’t completed his build yet; this was just the reverse engineering and documentation stage. Now, though, it shouldn’t be hard to control the RGB LED strips through an Arduino, a computer, or even an Android/iOS device with a small IR LED plugged into the headphone jack.

Minimalist RGB LED Cube Has A Very Short BoM

charlieplexed-led-cube

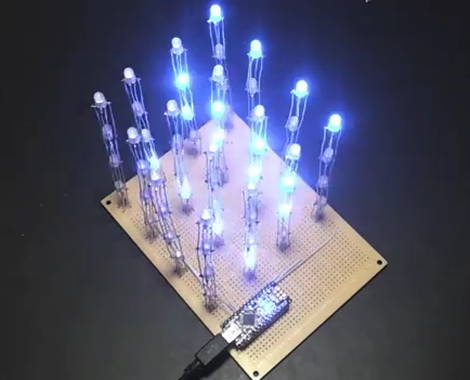
[Asher Glick] wrote in to share a project he has been working on with his friend [Kevin Baker], a 4x4x4 RGB LED cube. The pair are students at Rensselaer Polytechnic Institute and also members of the newly-formed Embedded Hardware Club on campus. As their first collaborative project, they decided to take on the ubiquitous LED cube, trimming down the component count to nothing more than 64 LEDs, a protoboard, some wire, and a single Arduino.

Many cubes we have seen use shift registers or decade counters to account for all the I/O required to drive so many LEDs. Their version of the cube has none of these extra components, solely relying on 16 of the Arduino’s I/O pins for control instead. You might notice something a bit different about the structure of their cube as well. Rather than using a grid of LEDs like we see in most Charlieplexed cubes, they constructed theirs using 16 LED “spires”, tucking the additional wiring underneath the board.

The result looks great, as you can see in the videos below. The cube looks pretty easy to build, and with a cost around $60 it is a reasonably cheap project as well.

Nice job, we look forward to seeing all sorts of fun projects from the Embedded Hardware Club in the future!

Continue reading “Minimalist RGB LED Cube Has A Very Short BoM”

Color Sensing With An RGB LED And Photoresistor

[Fjord Carver] brings together an RGB LED and CdS Photoresistor to make a color sensor. Those Cadmium Sulfide lights sensors usually have a very wide swing of resistance when exposed to varying levels of light sensitivity. That makes for great resolution when reading them using the ADC of a microcontroller. The LED comes into play by shining known wavelengths of light on the surface being measured. Three separate readings are taken with each of the LED’s different colors, then used to extrapolate the RGB value of the test material. We saw the very same method used a couple of years back. This time around it’s an Arduino doing the measuring instead of a PIC.

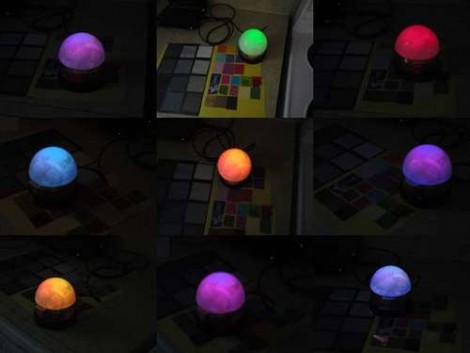
So why isn’t that sensor shown in this picture? It’s because we appreciate the application which [Fjord] is using for this sensor. He built a lamp that shines the same color as the surface on which it is placed.

Adding USB Control For Ikea RGB LED Strips

Here’s an altered PCB that gives USB control to an Ikea Dioder. This is a $50 product that comes with four strips each containing nine RGB LEDs. The stock controller has a color selection wheel and a couple of buttons. [Rikard Lindström] wanted to use it to match ambient light to the colors of his computer monitor — yes, it’s another ambilight clone.

Since he already had a bunch of AT90USB162 chips on hand he chose that route. These chips have native USB support (he’s using the LUFA package which is a popular choice), but no on-board ADC. That means no need for the potentiometer from the original controller because there’s no easy way to read its value. Removing it made plenty of room for his add-on PCB. He also depopulated the PIC microcontroller that originally drove the unit, soldering to the empty pads in order to connect is own board. The finished product fits back in the original case, with the addition of a USB cable as the only visible alteration. Now he can dial in colors using a program he wrote.

In case you’re wondering, it looks like this is a newer version of control circuitry when compared to the original Dioder hack we covered.

Persistence Of Vision Helicopter Blades With RGB LEDs

A user named [BOcnc] on the rcgroups forums just posted his RGB POV helicopter blades.

The two blades are attached to the heli just as any other whirlygig. The electronics, though, are mounted underneath the blade with a battery pack. We covered a build last year that demonstrated weight added to a spinning blade won’t tear everything apart, but that build used only blue LEDs. This build is full color and makes us feel like we’re living in a cyberpunk future populated by Recognizers and Daft Punk.

The images are stored on an SD card that receives data from a USB port. The microcontroller is a PIC32, and from what we can assume from the schematics, the RPM of the blades is measured by an on-board hall effect sensor (don’t quote us on that, though). There’s no hope of a commercial release from [BOcnc], though. He can’t find anyone to manufacture the blades, and the entire build was too expensive. It sure looks pretty though, so check out the video of it after the break.

Continue reading “Persistence Of Vision Helicopter Blades With RGB LEDs”

RGB LED Spectrum Analyzer Coffee Table

rgb_led_spectrum_analyzer_coffee_table

This year, students working for Texas Instruments as part of their Co-op program were challenged to construct a project around the company’s MSP430 microcontroller. A team of three students, [Max Thrun, Mark Labbato, Ian Cathey] decided to build something that would fit perfectly in any college student’s dorm room – an RGB LED coffee table.

We’ve covered RGB LED tables in the past, but as far as we can tell this is the first MSP430 based unit we’ve seen. Microcontroller aside, the table features a lot of items that are considered “standard equipment” when it comes to these sorts of living room LED installations. The trio installed 128 RGB LEDs into their table, isolating each one using a wooden grid, and used some frosted glass to diffuse the display a bit.

What really makes this table stand out is the software. The team wrote an application that creates a Fast Fourier Transform of whatever music is being played, in order to find beats and generate real-time visualizations for their table. The result is a pleasing display that’s sure to be a hit at parties.

Check out the video below to see their creation in action.

Continue reading “RGB LED Spectrum Analyzer Coffee Table”