One-button Audiobook Player Made From A Raspberry Pi

[Michael Clemens] was looking for gifts for his Grandmother’s 90th Birthday. She is visually impaired and loves to be able to listen to audiobooks. The problem is that she doesn’t really get the hang of using electronics. He made things easy by building her a one-button audiobook player.

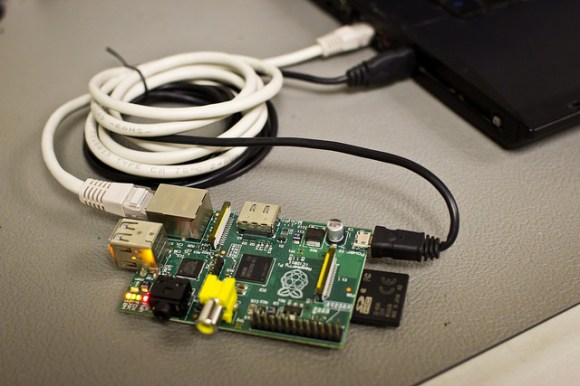
The Raspberry Pi board is a perfect solution for this project. It’s cheap, it has an audio port, it has storage for the books on the system SD card, and it runs Linux. The last part is key as it made things very simple when [Michael] started pulling together the various components.

When the RPi is powered up it drops immediately into a Python script which loads the audio track and places the music player daemon in pause. The yellow button seen above works as a play/pause button when clicked. If the listener misses something she can hold the button for more than four seconds to go back one track. Loading new books is easy too. [Michael] copies the files onto a thumb drive with a special volume label. When plugged into the RPi USB port the script automatically copies the book and starts playing when the drive is removed. He included a video demo on his project page linked above.

PCA9517 I2c Translator A Perfect Companion For Raspberry Pi Hardware Add-ons

The rig pictured above works as an Internet connected temperature sensor which sends [Zaion] an email with a graph of the change over time. This in itself is interesting, but one part in particular caught our eye. He’s using an i2c temperature sensor , and we think the PCA9517 Level-Translating I2C Bus Repeater that makes it possible is a perfect match for the RPi.

This is a Texas Instruments part. You can find more about it from the company’s product page. The key words in the name of the chip are ‘Level-Translating’. This has two bus connections, each with variable voltage levels. On side A the bus can be 0.9V to 5.5V. On side B the bus range is 2.7V to 5.5V. Since the Raspberry Pi I/O pins operate at 3.3V this could connect to the B side, give you the ability to interface with i2c parts rated for lower or higher voltages. This is especially handy for folks who started with the Arduino and own mostly 5V compliant prototyping hardware.

The part comes in a SOIC package, which you can easily hand solder and will costs around $1 depending on the supplier.

Rasperry Pi: Now Mostly Open Source

If you’ve been following the developments of building Android, Chromium, and other OSes for the Raspberry Pi, you’ll come across a common theme. The drivers for the Raspi’s chip are closed source and protected by Broadcom with an NDA. This limits the ability of devs to take on projects that involve messing around deep inside the CPU.

Today, this is no longer the case. The CPU on the Raspberry Pi is now the first ARM-based system with fully functional, vendor-provided drivers.

Previously, the drivers for OpenGL ES, OpenMax, and other goodies inside the ARM chip have been closed source, available only to the Raspberry Pi foundation and those willing to sign a non-disclosure agreement with Broadcom. With this release, the drivers are open source, allowing the devs behind the Android, Chromium, Haiku, *BSD, and the RISC OS to dig deep into the Broadcom drivers and get their projects working.

The new files are available in the Raspberry Pi git, just waiting for devs to take a look at it.

RPi Video With Pygame

Adafruit has a new tutorial on creating video with an RPi and pygame. The goal is to create custom user interfaces on low cost hardware, powered by the easy to use pygame library. The tutorial walks through getting your RPi set up to run pygame, creating a basic pygame script that controls the framebuffer, and drawing an oscilloscope display on the screen.

This tutorial uses Adafruit’s WebIDE as a development environment. This is an excellent solution for working on video display, since you can develop the code on a networked computer and view the shell while running your graphical application. This is very useful for debugging, since you can just print information to your WebIDE console.

There’s a lot of potential for this setup. It would be ideal for creating any kiosk application. Maybe an announcement display, interactive kiosk, or even a programmable logic controller type user interface? What else could you build with a RPi attached to a LCD touchscreen?

Check out a video of Adafruit’s display in action after the break.

Continue reading “RPi Video With Pygame”

SNES Emulator Has It’s Slot Sealed Shut

If you look closely you’ll notice there’s nowhere to put the game cartridge on this Super Nintendo system. That’s because this is a Rasberry Pi based SNES emulator that plays ROMs, not cartridges. Since the RPi board is used the only limit to what you can play is the board’s RAM and which ROMs you have on the SD card.

The case has basically been gutted and the unused cartridge slot was sealed with some Bondo before painting. In addition to the Rasberry Pi you’ll find a 7-port powered USB hub and a Teensy microcontroller board. The hub allows for the controllers to be connected via USB. The Teensy is recognized as a USB HID device and is used to connect the reset button to a functions on the emulator program. The power switch still works too. To make this happen [MIDItheKID] spliced a USB connector and a microB USB connector to the power switch. We think this draws power from the hub but we’re not 100% sure.

[MIDItheKID] mentions in the Reddit comments that he’s thinking of grabbing that new RPi that has more memory and doing some similar work on his dead PSX.

APRS IGate Built Using A Raspberry Pi

The hardware seen above is used to bridge a local RF radio network to the APRS-IS network. The APRS-IS is an Internet Service that uses a web connection to communicate between APRS networks in different parts of the world. The Raspberry Pi is perfect for this application because of its ability to connect to a network, and its native use of Linux.

On the software side the majority of the work is done by a Python script. It is responsible for setting up and monitoring a connection with an APRS-IS server. To connect to the handheld radio unit a USB sound card was used. The Multimon package is used to send and receive audio packets through this hardware.

[Sunny] has a few upgrades planned for the system. The device needs to report its location to the APRS-IS server and the plan is to add functionality that will look of the WiFi AP’s location automatically. It may also be possible to get rid of the radio all together and use a DVB dongle as a software defined radio.

Building A Raspi Case In True Hackaday Fashion

[Ben] needed a case for his Raspberry Pi. Instead of going the usual laser-cut plastic or 3D printed route, he took a path far more familiar to us here at Hackaday. His case is built out of aluminum found in his basement, providing a neat reuse for some old aluminum extrusion he had lying around.

Part one of [Ben]’s thoroughly documented build goes over the process of acquiring some of this very handy aluminum extrusion. Part two covers a very neat feature of [Ben]’s scrap of aluminum: because of a pair of internal chamfers, [Ben] was able to mount his Raspi and USB hub to a separate piece of PVC and slide the whole assembly in.

The final assembly included dremeling a piece of aluminum plate for the Raspi and USB hub ports and wiring the whole thing together.

Right now the newly enclosed Raspi is working happily as [Ben]’s home server. Not exactly the use case a rugged aluminum case would see the best use from, but it looks great all the same.