Smoothing PLA Printed Parts

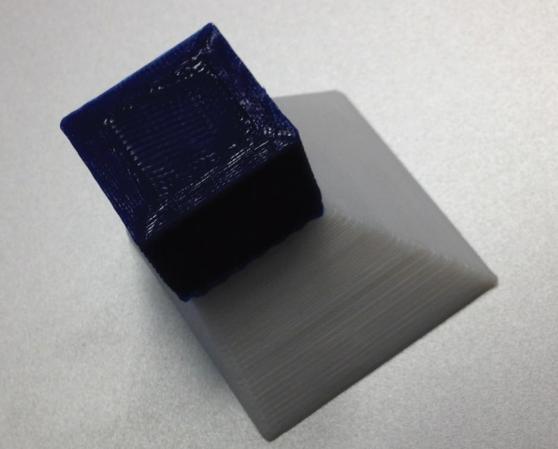
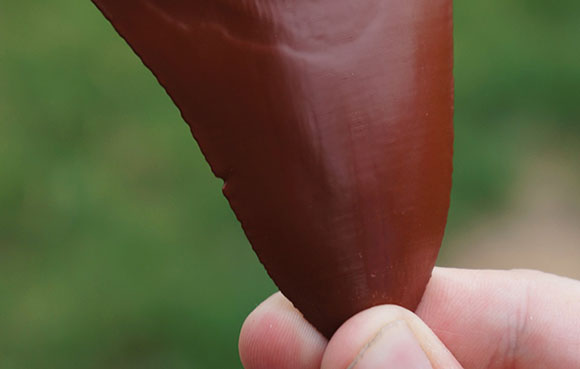
We’ve seen a few advances in the finishing processes of 3D prints over the last few months that result in some very attractive parts that look like they were injection molded. Smoothing ABS prints is now a necessary skill for anyone looking to produce professional parts, but those of us using PLA for our RepRaps have been left in the cold. After some experimentation, the guys over at protoparadigm have come up with a way to smooth out those PLA prints, using the same technique and a chemical that’s just as safe as acetone.

Instead of acetone, the guys at protoparadigm are using tetrahydrofuran, or THF, as a solvent for PLA. Other PLA solvents aren’t friendly to living organisms or are somewhat hard to obtain. THF has neither of these qualities; you still need to use it in a well ventilated area with nitrile gloves, but the same precautions when using acetone or MEK still apply. It’s also easy to obtain, as well: you can grab some on Amazon, even.

The process for smoothing PLA prints with THF is the same as smoothing ABS prints with acetone. Just suspend the print in a glass container, pour in a tiny amount of the solvent, and (gently) heat it. The evaporated solvent will smooth all the ridges out of the print, leaving a shiny and smooth surface. You can, of course, hand polish it by dedicating a lint-free cloth and a pair of gloves to the task.

Hot Plate Stirrer Dissolves Support Material In 3D Printed Objects

Hot_plate_stirrer

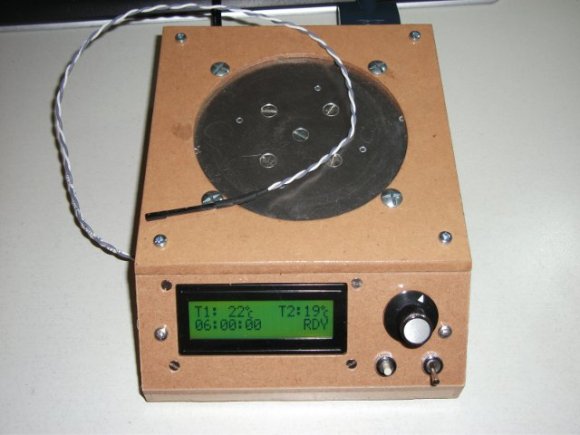
When you want to print a 3D object you run into problems if there is a part that has nothing below it. The hot, soft filament coming out of the extruder will droop with gravity if not given something to rest on while it hardens. The solution is to use a second material as a support. But then you’ve got to find a way to remove the support structure when the printing is done. That’s where this beauty comes in. It’s a heated stir plate for dissolving PLA.

The PLA is printed using a second extruder head. Once the part is cooled [Petrus] puts it into a heated bath of sodium hydroxide (lye). The solvent will remove the PLA but not harm the ABS. Speaking of ABS, [Petrus] also mentions that this can double as a temperature controlled hot plate for polishing ABS prints using acetone vapor.

There’s all kinds of good stuff inside of this beast so do check out the full plans to learn more. Our favorite part is the stir bar which is a piece of threaded rod and a couple of nuts. To make it safe to submerge in the chemicals he 3D printed a pill-shaped enclosure for it.

[Thanks Matt]

Making PLA Stick To A 3D Printer Build Platform By Using Hairspray Or An Acetone ABS Slurry

[Chris] has been having some real problems getting PLA to stick to the build platform of his Printrbot. This is of course not limited to this brand of printers, and affects all extruder-based hardware using the PLA as a source material. He came up with a couple of ways to fix the problem.

The first is something we’re quite familiar with. The image above shows [Chris] applying a thin layer of hairspray to the platform. This is a technique the we use with our own 3D printer. The sheets of paper are used as a mask to help keep the sticky stuff off of the threaded rod. For more info on the hairspray trick [Chris] recommends that you read this article.

The second technique uses a slurry made from saturating a bottle of acetone with ABS leftovers. In the clip after the break he shows off a glass jar of the solvent with scraps from past print jobs hanging out inside. After a couple of days like that it’s ready to use. He takes a paper towel, wets it with the solution, and wipes on a very small amount. He does mention that this will eventually eat through the Kapton tape so apply it rarely and sparingly.

Continue reading “Making PLA Stick To A 3D Printer Build Platform By Using Hairspray Or An Acetone ABS Slurry”

Finally, A Machine That Makes Cheap 3D Printer Filament.

If there’s one problem with the RepRap, it’s the cost of filament. Sure, there’s also the computationally difficult problem of slicing 3D models, but a 5 to 10 times markup on turning plastic pellets into filament is the biggest problem. It’s even a bigger problem than the problems of compatibility and interchangeable parts that comes with everyone forking a ‘standard’ printer design dozens of times. The cost of filament, though, is the biggest problem, right up there with RepRap developers focusing nearly entirely on different printer designs instead of the software, firmware, and electronics that are also vitally important to the RepRap project.

Nearly a year ago, we caught wind of a competition to create a home-based filament manufacturing station that takes cheap plastic pellets available for about $5/kg and turns them in to 3D printer filament that usually sells for $50/kg. A winner for this competion has finally been announced. The winner, [Hugh Lyman] just won $40,000 for his home filament creation station, the Lyman Filament Extruder

The goal of the Desktop Factory Competition was to create a machine that produces filament suitable for 3D printers with a total build cost of under $250 USD. [Lyman] met the goal by using a few motors, 3D printed parts, a PID controller, and off the shelf auger drill bit (that’s the actual model and supplier he used, by the way) that is able to reliably churn out plastic filament.

If you want to build your own Lyman Extruder, all the plans are up on Thingiverse, but LulzBot, the awesome people who gave us a 3D printer, hope to sell a pre-assembled version of this extruder sometime in the future, hopefully with a chain guard around that sprocket.

Soluble Support Structure Can Be Used With Any Extruder-based 3D Printer

One of the issues with extruder-based 3D printing is that it can be very difficult to print objects that have voids in them. You simply must have something to deposit the soft material on until it has a chance to harden. [Matt] found a solution which should work for any extruder-based printer (with one caveat we’ll get to in a minute). He prints a support structure out of HIPS then later dissolves it using Limonene. The image on the left shows the object soaking for 24 hours. The final project is seen beside it.

The only real problem with this technique is that it requires a second extruder. Since printers build objects by layers, switching material in a single print head isn’t an option. HIPS stands for High-Impact Polystyrene. It extrudes at the same temperature as the ABS (235C) and adheres well to a heated bed kept at 115C. ABS will be unaffected by the hydrocarbon solvent Limonene, except for the residual smell of citrus.

Giving 3D Printed Parts A Shiny Smooth Finish

No matter how good a 3D printer gets, you’re always going to have visible print layers. Even with very high-quality prints with sub-0.1mm layer height, getting a shiny and smooth finish of injection molded plastic is nearly impossible. That is, of course, until you do some post-print finishing. [Neil Underwood] and [Austin Wilson] figured out a really easy way to smooth out even the jankiest prints using parts you probably already have lying around.

The technique relies on the fact that ABS plastic and acetone don’t get along together very well. We’ve seen acetone used to smooth out 3D printed objects before – either by dunking the parts in an acetone bath or brushing the solvent on – but these processes had mixed results. [Neil] and [Austin] had the idea of using acetone vapor, created in a glass jar placed on top of a heated build plate,

The process is pretty simple. Get a large glass jar, put it on a heated build plate, add a tablespoon of acetone, and crank the heat up to 110C. Acetone vapor will form in the jar and react with any printed part smoothing out those layers. The pic above shows from right to left a 3D printed squirrel at 0.35 mm layer height, 0.1 mm layer height – the gold standard of high-end repraps – and another print with 0.35 layer height that was run through a vapor bath for a few minutes. Amazing quality there, and cheap and easy enough for any 3D printer setup.

You can check out the tutorial video after the break along with a video showing exactly how dangerous this is (it’s not, unless you do something very, very dumb).

Continue reading “Giving 3D Printed Parts A Shiny Smooth Finish”

MakiBox Turns Plastic Pellets Into 3D Objects

The holy grail of desktop 3D printers – aside from manufacturing full color objects in any shape imaginable – is turning tiny plastic pellets into a plastic filament. Many projects have attempted this with moderate levels of success but turning pellets into filament still an open problem. MakiBot hopes to solve this problem by manufacturing plastic filament just in time to be squirted out a nozzle onto the print bed.

MakiBox is seeing a lot of potential with their pellet drive. Instead of sending huge amounts of pellets into an auger extruder, the team realized the best option would be to send pellets into the hot end one at a time. This makes for better thermal characteristics and produces a very consistent filament.

Turning plastic pellets into 3D objects is an enticing idea but producing a filament on the fly is an interesting concept. While the MakiBox team is making custom color filament right now, in the future it might be possible to mix colors for full-color prints.

Videos demonstrating the extruder after the break.

Continue reading “MakiBox Turns Plastic Pellets Into 3D Objects”