Stratasys Vs Bambu Lab: Industrial Vs Consumer ABS Showdown

The test parts being printed on the Stratasys Fortus 450mc. (Credit: My Tech Fun, YouTube)

Professional Stratasys FDM printers demand a pretty hefty price premium over your typical hobbyist-level machine, with the gold-plating continuing even with the special filament cartridges that you buy for some of their printers.

This raises the question of in how far this eye-watering price tag is justified, and how much is just you paying for support and the brand name. After acquiring a spool of Stratasys ABS filament via a US viewer, [Dr. Igor Gaspar] set to work to try and answer this question.

The viewer had already liberated the spool of ABS+ P430 filament from its cartridge, making it easy to use that directly with the Bambu Lab FDM printer.

To make it a fair comparison, [Igor] also needed to have a sample printed on a real Stratasys printer, for which he used a local company’s services. An interesting sidenote here is that the US viewer’s company moved away from Stratasys to Bambu Lab printers.

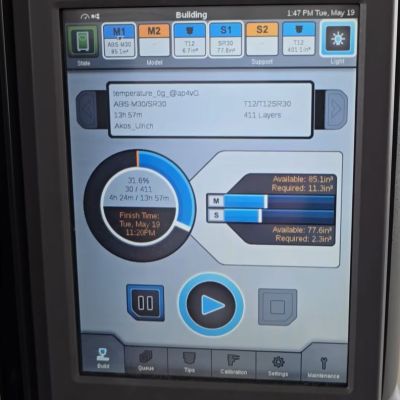
[Igor] was able to see his test parts being printed on the Stratasys printer, as said company is in the same city. This showed him that it took 14 hours to print the parts versus 3.5 hours on the Bambu Lab printer, suggesting that his worries about the right printing parameters for the Stratasys filament were warranted. Sussing those out was thus paramount for a fair comparison and warranted some test prints.

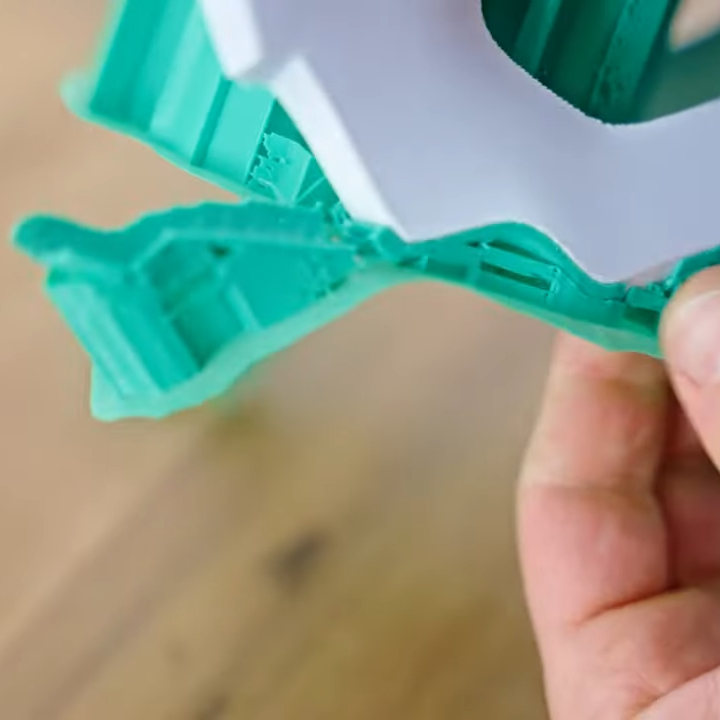
From a sheer aesthetic point of view the Stratasys-printed parts looked much cleaner, and their dimensional accuracy was also significantly better due to the slicer adjusting for this. Between the used Stratasys M30 and Bambu Lab ABS filaments there’s no clear winner, with both trading blows. Amusingly enough, the older Stratasys ABS type in the form of the ABS+ P430 filament performed the best of all when printed on the Bambu Lab printer at its preferred temperature setting.

Moral of the story is thus that – unless you really want to pay for that service contract – to loot old Stratasys ABS spool cartridges and use them in your hobbyist FDM printer. As [Igor] says in the conclusion, the nicer looks is probably due to them printing very thin layers, much finer than the 0.2 mm layers he used. This would also match the much longer print time and is thus something we can replicate on any FDM printer with a temperature-controlled printing environment.

Continue reading “Stratasys Vs Bambu Lab: Industrial Vs Consumer ABS Showdown”

Injection Molding Your Own Rubik’s Cubes Takes Work

If you just want to play with a Rubik’s Cube, you can simply buy one from a local toy store. If you want to build one, you could 3D print something and put it together yourself. But what if you want to make lots of Rubik’s Cubes? Then, you might go down the road that [EngBroken] just walked.

What started as a fun reverse-engineering project would lead to an 8-month journey to reproduce Rubik’s Cubes from scratch using injection molding. [EngBroken] started by identifying the basic pieces that make up the cheap cube they bought, including the center core, the edge pieces, and the corner pieces. Parts were then recreated in CAD, and [EngBroken] then set about designing and milling injection molds out of 6061 aluminium to make the parts.

Amusingly, to get the correct colors for the separate parts of the cube, [EngBroken] made the curious decision to mix cut-up pieces of 3D printer filament with clear ABS pellets to tint it as needed. Parts were then assembled with UV-curing glue, and [EngBroken] had a Rubik’s cube built from scratch. Well he actually had several, since he had a stack of parts since injection molding is great at producing things in quantity.

This isn’t a great way to go if you want a Rubik’s cube on the cheap. [EngBroken] estimates the labor put in to this exercise came out to $56,000 alone, to say nothing of what it took to produce all those aluminium molds and source all that plastic. Still, a great deal was learned in the process. We’ve looked at the challenges of injection molding before, too.

Continue reading “Injection Molding Your Own Rubik’s Cubes Takes Work”

Failed 3D Printed Part Brings Down Small Plane

Back in March, a small aircraft in the UK lost engine power while coming in for a landing and crashed. The aircraft was a total loss, but thankfully, the pilot suffered only minor injuries. According to the recently released report by the Air Accidents Investigation Branch, we now know a failed 3D printed part is to blame.

The part in question is a plastic air induction elbow — a curved duct that forms part of the engine’s air intake system. The collapsed part you see in the image above had an air filter attached to its front (towards the left in the image), which had detached and fallen off. Heat from the engine caused the part to soften and collapse, which in turn greatly reduced intake airflow, and therefore available power.

Serious injury was avoided, but the aircraft was destroyed.

While the cause of the incident is evident enough, there are still some unknowns regarding the part itself. The fact that it was 3D printed isn’t an issue. Additive manufacturing is used effectively in the aviation industry all the time, and it seems the owner of the aircraft purchased the part at an airshow in the USA with no reason to believe anything was awry. So what happened?

The part in question is normally made from laminated fiberglass and epoxy, with a glass transition of 84° C. Glass transition is the temperature at which a material begins to soften, and is usually far below the material’s actual melting point.

When a part is heated at or beyond its glass transition, it doesn’t melt but is no longer “solid” in the normal sense, and may not even be able to support its own weight. It’s the reason some folks pack parts in powdered salt to support them before annealing.

The printed part the owner purchased and installed was understood to be made from CF-ABS, or ABS with carbon fiber. ABS has a glass transition of around 100° C, which should have been plenty for this application. However, the investigation tested two samples taken from the failed part and measured the glass temperature at 52.8°C and 54.0°C, respectively. That’s a far cry from what was expected, and led to part failure from the heat of the engine.

The actual composition of the part in question has not been confirmed, but it sure seems likely that whatever it was made from, it wasn’t ABS. The Light Aircraft Association (LAA) plans to circulate an alert to inspectors regarding 3D printed parts, and the possibility they aren’t made from what they claim to be.

Destructive Testing Of ABS And Carbon Fiber Nylon Parts

PAHT-CF part printed at 45 degrees, with reinforcing bolt, post-failure. (Credit: Functional Print Friday, YouTube)

The good part about FDM 3D printing is that there are so many different filament types and parameters to choose from. This is also the bad part, as it can often be hard to tell what impact a change has. Fortunately we got destructive testing to provide us with some information here. Case in point [Functional Print Friday] on YouTube recently testing out a few iterations of a replacement part for a car.

The original part was in ABS, printed horizontally in a Bambu Lab FDM printer, which had a protruding element snapped off while in use. In addition to printing a replacement in carbon fiber-reinforced nylon (PAHT-CF, i.e. PA12 instead of the typical PA6), the part was now also printed at a 45° angle. To compare it with the original ABS filament in a more favorable way, the same part was reprinted at the same angle in ABS.

Another change was to add a machine screw to the stop element of the part, which turned out to make a massive difference. Whereas the original horizontal ABS print failed early and cleanly on layer lines, the angled versions put up much more of a fight, with the machine screw-reinforced stop combined with the PA12 CF filament maxing out the first meter.

The take-away here appears to be that not only angles are good, but that adding a few strategic metal screws can do wonders, even if you’re not using a more exotic filament type.

Continue reading “Destructive Testing Of ABS And Carbon Fiber Nylon Parts”

3D Print ABS Without A Screaming Hot Bed

ABS is a durable material that can be 3D printed, but requires a 100° C build surface. The print bed of [Pat]’s Bambu Lab A1 Mini is unable to get that hot, which means he can not print ABS…or can he? By fiddling a few settings, he prints ABS no problem with only a 60° C bed, thanks to a PLA interface layer.

Here’s what’s going on: first [Pat] prints a single layer of PLA, then does a filament swap for ABS (which the printer thinks is PETG with extrusion temperature bumped to 255° C and a tweaked flow rate) and lets the print finish. The end result is an ABS part with a single layer of PLA at the bottom, all printed on a 60° C bed. That PLA layer peels off easily, leaving a nice finish behind.

[Pat] is printing small parts in ABS for a custom skeletal mouse shell (pictured above) and his results are fantastic. We’re curious how this technique would fare with larger ABS objects, which tend to have more issues with warping and shrinkage. But it seems that at least for small parts, it’s a reliable and clever way to go.

We originally saw how [JanTec Engineering] used this technique to get less warping with ABS. As for why PLA is the way to go for the interface layer, we’ve learned that PLA only really truly sticks to PLA, making it a great interface or support for other filaments in general. (PETG on the other hand wants to stick to everything but PLA.)

3D Printed Downspout Makes Life Just A Little Nicer

Sometimes, a hack solves a big problem. Sometimes, it’s just to deal with something that kind of bugs you. This hack from [Dillan Stock] is in the latter category, replacing an ugly, redundant downspout with an elegant 3D printed pipe.

As [Dillan] so introspectively notes, this was not something that absolutely required a 3D print, but “when all you have a hammer, everything is a nail, and 3D printing is [his] hammer.” We can respect that, especially when he hammers out such a lovely print.

By modeling this section of his house in Fusion 360, he could produce an elegantly swooping loft to combine the outflow into one downspout. Of course the assembly was too big to print at once, but any plumber will tell you that ABS welds are waterproof. Paint and primer gets it to match the house and hopefully hold up to the punishing Australian sun.

The video, embedded below, is a good watch and a reminder than not every project has to be some grand accomplishment. Sometimes, it can be as simple as keeping you from getting annoyed when you step into your backyard.

We’ve seen rainwater collection hacks before; some of them a lot less orthodox. Of course when printing with ABS like this, one should always keep in mind the ever-escalating safety concerns with the material.

Continue reading “3D Printed Downspout Makes Life Just A Little Nicer”

Printing In Multi-material? Use These Filament Combos

If one has a multi-material printer there are more options than simply printing in different colors of the same filament. [Thomas Sanladerer] explores combinations of different filaments in a fantastic article that covers not just which materials make good removable support interfaces, but also which ones stick to each other well enough together to make a multi-material print feasible. He tested an array of PLA, PETG, ASA, ABS, and Flex filaments with each in both top (printed object) and bottom (support) roles.

A zero-clearance support where the object prints directly on the support structure can result in a very clean bottom surface. But only if the support can be removed easily.

People had already discovered that PETG and PLA make pretty good support for each other. [Thomas] expands on this to demonstrate that PLA doesn’t really stick very well to anything but itself, and PETG by contrast sticks really well to just about anything other than PLA.

One mild surprise was that flexible filament conforms very well to PLA, but doesn’t truly stick to it. Flex can be peeled away from PLA without too much trouble, leaving a very nice finish. That means using flex filament as a zero-clearance support interface — that is to say, the layer between the support structure and the PLA print — seems like it has potential.

Flex and PETG by contrast pretty much permanently weld themselves together, which means that making something like a box out of PETG with a little living hinge section out of flex would be doable without adhesives or fasteners. Ditto for giving a PETG object a grippy base. [Thomas] notes that flexible filaments all have different formulations, but broadly speaking they behave similarly enough in terms of what they stick to.

[Thomas] leaves us with some tips that are worth keeping in mind when it comes to supported models. One is that supports can leave tiny bits of material on the model, so try to use same or similar colors for both support and model so there’s no visual blemish. Another tip is that PLA softens slightly in hot water, so if PLA supports are clinging stubbornly to a model printed in a higher-temperature material like PETG or ABS/ASA, use some hot water to make the job a little easier. The PLA will soften first, giving you an edge. Give the video below a watch to see for yourself how the combinations act.

Continue reading “Printing In Multi-material? Use These Filament Combos”