Fixing A Hot Shop, With Science

We know that pretty much everybody in the Northern hemisphere has had a hellish summer, and there’s little room for sympathy when someone busts out with, “Oh yeah? You think THAT’s hot? Well, lemme tell you…” But you’ve got to pity someone who lives in north Texas and has a steel Quonset hut for a shop. That’s got to be just stupidly hot.

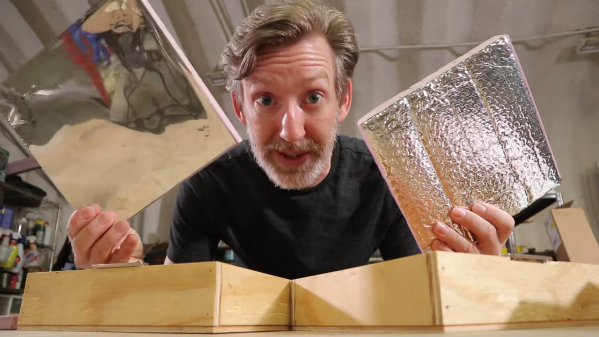
But stupid hot can be solved — or at least mitigated — with a little smarts, which is what [Wesley Treat] brought to bear with this cleverly designed shop door heat shield. When it pushes past 42°C — sorry, that sounds nowhere near as apocalyptic as 108°F — the south-facing roll-up door of his shop becomes a giant frying pan, radiating heat into his shop that the air conditioner has trouble handling. His idea was to block that radiant heat with a folding barrier, but to make sure it would be worth the effort, he mocked up a few potential designs and took measurements of the performance of each. His experiments showed him that a layer of extruded polystyrene (XPS) foam insulation covered with reflective Mylar did better than just the foam or Mylar alone.

The finished heat shield is an enormous tri-fold plywood beast that snugs up against the door when things get toasty in the shop. There’s a huge difference in temperature between the metal door and the inside surface of the shield, which will hopefully keep the shop more comfortable. We imagine that the air between the door and the shield will still heat up, and convection could still distribute all that hot air into the shop. But at least he’s giving the AC a fighting chance.

In addition to great shop tips like this and his custom storage bins, [Wesley] is a talented signmaker. He’s pretty funny too — or maybe that’s just the heat talking.

Continue reading “Fixing A Hot Shop, With Science”

Making Custom Curved Mirrors At Home

Generally speaking, creating custom mirrors is a complex task that involves a lot of careful grinding, and isn’t something to be taken lightly if you need precision results. Just ask the folks who provided NASA with a wonky mirror for the Hubble. But assuming you’re not working on an orbital space telescope (or even a ground based one, for that matter), [volzo] has recently documented some techniques for producing single and double curved mirrors of reasonable quality using common workshop tools.

The first step is finding something that’s a bit easier to work with than glass. After testing various reflective materials such as PVC foil and painted PETG sheets by comparing the reflections of projected test patterns, [volzo] found that laminated polystyrene gave the most accurate results. If you just want to make a simple bent mirror, he shows how you can pop one of these sheets on a CNC router, make the appropriate cuts, and fold them into shape.

That part might seem a bit obvious, but what about a more complex shape? Here, [volzo] points to how the thin sheets of polystyrene also lend themselves to vacuum forming. As demonstrated in the video below, all it takes is a 3D printed plug and some basic equipment to rapidly produce mirrors in arbitrary shapes.

Now obviously the optical properties of such mirrors will leave something to be desired, but depending on your application, that might not be such a big deal. As examples [volzo] shows off a few projects using these custom mirrors, such as a tabletop camera that captures both sides of the table simultaneously and a circular projector. Laminated polystyrene could potentially even be used to create low-cost variable mirrors.

Continue reading “Making Custom Curved Mirrors At Home”

Making Microfluidics Simpler With Shrinky Dinks

It’s as if the go-to analogy these days for anything technical is, “It’s like a series of tubes.” Explanations thus based work better for some things than others, and even when the comparison is apt from a physics standpoint it often breaks down in the details. With microfluidics, the analogy is perfect because it literally is a series of tubes, which properly arranged and filled with liquids or gasses can perform some of the same control functions that electronics can, and some that it can’t.

But exploring microfluidics can be tough, what with the need to machine tiny passages for fluids to flow. Luckily, [Justin] has turned the process into child’s play with these microfluidic elements made from Shrinky Dinks. For those unfamiliar with this product, which was advertised incessantly on Saturday morning cartoon shows, Shrinky Dinks are just sheets of polystyrene film that can be decorated with markers. When placed in a low oven, the film shrinks about three times in length and width while expanding to about nine times its pre-shrunk thickness. [Justin] capitalized on this by CNC machining fine grooves into the film which become deeper after shrinking. Microfluidics circuits can be built up from multiple layers. The video below shows a mixer and a simple cell sorter, as well as a Tesla valve, which is a little like a diode.

We find [Justin]’s Shrinky Dink microfluidics intriguing and can’t wait to see what kind of useful devices he comes up with. He’s got a lot going on, though, from spider-powered beer to desktop radio telescopes. And we wonder how this technique might help with his CNC-machined microstrip bandpass filters.

Continue reading “Making Microfluidics Simpler With Shrinky Dinks”

These Gorgeous Robot Parts Are Hand-Made

[Dickel]’s robot MDi #4 has been in progress for several years, but what we wanted to draw your attention to is the way the parts have been fabricated and what kind of remarkable results are possible with careful design, measurement, cutting, and finishing. Much of MDi #4 was made by hand-cutting and drilling sheets of high impact polystyrene (HIPS) with a utility knife and layering them as needed. Epoxy and aluminum provide gap filling and reinforcement of key sections, and fiberglass took care of one of the larger sections.

The process [Dickel] follows is to prototype using cardboard first. Parts are then designed carefully in CAD, and printed out at a 1:1 scale and glued to sheets of polystyrene. Each sheet is cut and drilled by hand as necessary. Layers are stacked and epoxied, embedding any hardware needed in the process. Two examples of embedding hardware include sealing captive nuts into parts with epoxy, or using aluminum to add reinforcement. After some careful sanding, the pieces look amazing.

Scroll down a bit on that project page and you’ll see plenty of great photos of the process [Dickel] used. A video highlighting the head and a video showing the careful work that goes into making each part are embedded below.

Continue reading “These Gorgeous Robot Parts Are Hand-Made”

Building A Dead-On-Accurate Model Ford Pickup From Scratch

In a world filled with 3D printed this and CNC machined that, it’s always nice to see someone who still does things the old-fashioned way. [Headquake137] built a radio controlled truck body (YouTube link) from wood and polystyrene using just a saw, a Dremel, a hobby knife, and a lot of patience. This is one of those builds that blurs the lines between scale model and sculpture. There aren’t too many pickup trucks one might call “iconic” but if we were to compile a list, the 6th generation Ford F-series would be on it. [Headquake137’s] model is based on a 1977 F100.

ford-thumb2
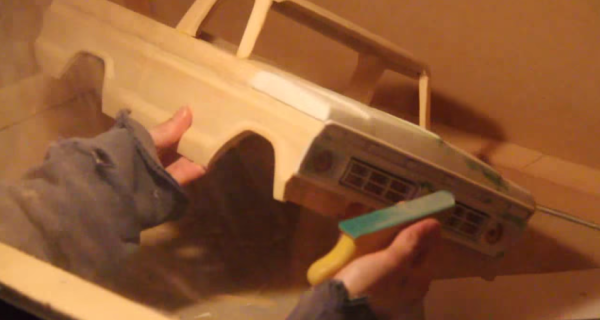
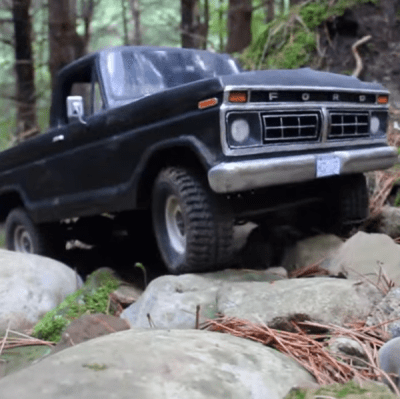
The build starts with the slab sides of the truck. The basic outline is cut into a piece of lumber which is then split with a handsaw to create a left and a right side. From there, [Headquake137’s] uses a Dremel to carve away anything that doesn’t look like a 1977 F100. He adds pieces of wood for the roof, hood, tailgate, and the rest of the major body panels. Small details like the grille and instrument panel are created with white polystyrene sheet, an easy to cut material often used by train and car modelers.

When the paint starts going on, the model really comes to life. [Headquake137] weathers the model to look like it’s seen a long life on the farm. The final part of the video covers the test drive of the truck, now mounted to a custom chassis. The chassis is designed for trails and rock crawling, so it’s no speed demon, but it sure does look the part riding trails out in the woods!

[Headquake137] managed to condense what must have been a 60 or 70 hour build down to a 14 minute video found below.

Continue reading “Building A Dead-On-Accurate Model Ford Pickup From Scratch”

Maker Faire Kansas City: Entrepreneurial Spirit Taking Shape

One of the great things about an event like the Kansas City Maker Faire is that there are so many reasons that makers sign up to show their things. Some makers come to teach a skill, and others to sell their handmade creations. Those with an entrepreneurial streak looking to launch a product might rent a booth to get a lot of eyes on their idea. That’s just what [Ted Brull] of Creation Hardware was after this weekend–exposure for Kevo, his small-scale vacuum former.

kevo-mt-dew
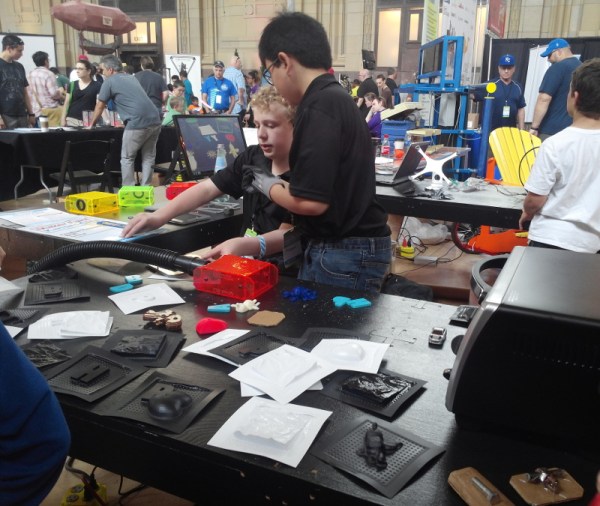
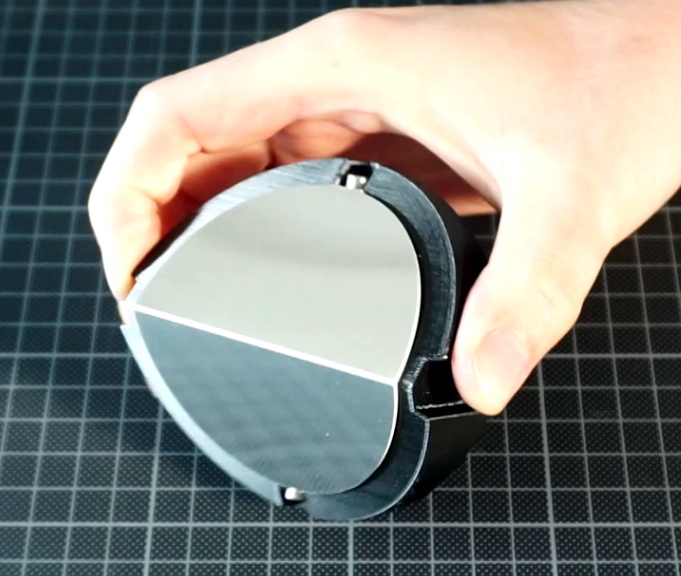
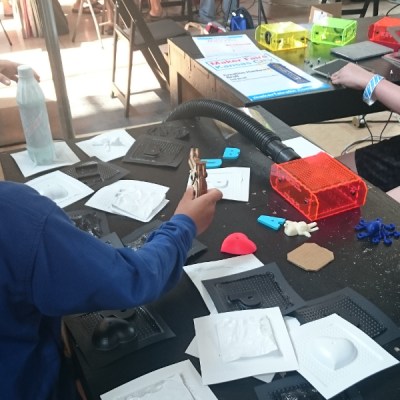
Kevo is a simple and affordable solution for makers of all stripes. It can be used to make molds, blister packaging for items, or even electronics enclosures. [Ted]’s Kickstarter campaign for Kevo has already been successfully funded, but there’s still plenty of time to get a Kevo kit for yourself. The basic reward includes the vacuum-forming chamber and two sizes of adapters that cover most vacuums. It also ships with an aluminium frame to hold polystyrene sheets during the heating and molding processes, and starter pack of pre-cut pieces in black, white, and clear plastic.

Creation Hardware had many vacuum-formed molds on display and were constantly making more from 3D-printed objects, toys, and other things. Our favorite mold was a 20oz bottle of Mountain Dew, which shows how far the small sheets of plastic can stretch.

Drone-enium Falcon

If you own a quadcopter chances are you own more than one. It’s kind of an addictive thing in that way. So dig out that dinged up model and build something awesome around it. We’d suggest making it look exactly like a Millenium Falcon. Okay, to be fair this is built around a custom quadcopter originally designed to carry a camera and GPS but removed for this project. We’re not sure if stock models have enough extra umph to lift a fancy fuselage like this (maybe you’ll weigh in on that in the comments?).

As with any great build this started with a scale drawing. The drawing was printed for use as a cutting template for the expanded polystyrene. Part of what makes it look so fantastic is that the fuselage isn’t 2-dimensional. There is depth in the places that matter and that’s all because of near-mythical foam cutting/shaping skills on [Olivier’s] part.

Final touches are LEDs on front and to simulate the curved engine on the tail. You can almost see this thing picking up a handless [Luke] below Bespin’s floating city. This Falcon flies like… a quadcopter (what did you expect? The Kessel Run in 12 parsecs?), which you can see in the videos after the break. The second clip shows how easy it is to remove the foam body from the quad frame, yet another nice touch!

Of course if Star Wars isn’t your thing you can give trolling the skies as a flying body a shot.

Continue reading “Drone-enium Falcon”