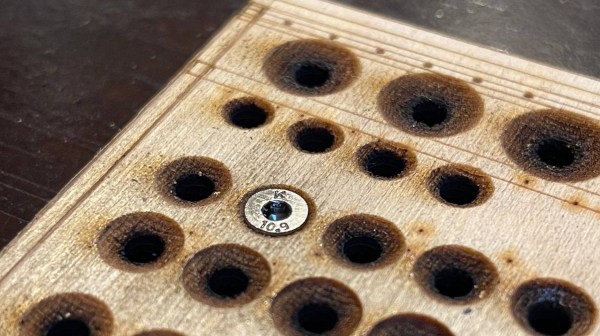
Here’s a fun quick hack from [Timo Birnschein] about using the 3D laser engraving (or ‘stamp’ engraving) mode of certain laser cutter toolchains to create a handy countersink shape in a laser-cut and engraved workpiece. Since [Timo] uses a small laser cutter to cut out and mark project boards for their electronics builds, having an extra messy, manual countersinking operation with subsequent clean-up seemed like a waste of time and effort, if the cutter could be persuaded to do it for them.
Designs are prepared in Inkscape, with an additional ‘3D engraving’ layer holding the extra processing step. [Timo] used the Inkscape feathering tools to create a circular grayscale gradient, leading up to the central cut hole (cuts are in a separate layer) which was then fed into Visicut in order to drive the GRBL-based machine, However, you could do it with practically any toolchain that supports laser power control during a rastering operation. The results look perfectly fine for regions of the workpiece not on show, at least, but if you’re only interested in the idea from a functional point of view, then we reckon this is another great trick for the big bag of laser hacks.
There have been a great number of laser cutting hacks here over the years, since these tools are so darn useful. The snapmaker machine can be a 3D printer, a CNC cutter and a laser cutter all in one, albeit not too perfect at any of those tasks, but the idea is nice. If you own a perfectly fine 3D printer, but fancy a spot of laser engraving (and you have good eye protection!), then you could just strap a 5W blue diode laser to it and get your fix.


