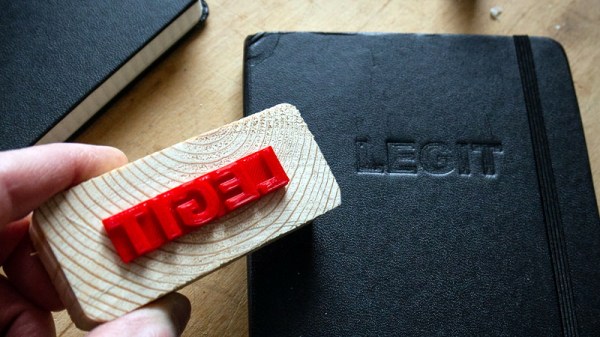
While it’s arguably a bit closer to the “Arts & Crafts” region of the making spectrum upon which we don’t usually tread on account our l33t sense of superiority, we’ve got to admit that the quick and easy notebook customization demonstrated by [Sean Hodgins] is very compelling. We don’t put ink to dead trees with nearly the frequency we used to, but when we do it might as well be Hemingway-style with a little black Hackaday emblazoned notebook.
 As demonstrated in the video after the break, the process starts by designing the stamp in your CAD package of choice. For optimal results [Sean] suggests fairly large capital letters, but with practice you should be able to get into some more creative fonts. Potentially you could even use the logo of your favorite hacking blog, but who are we to dictate what you do?
Whatever you chose, it needs to be mirrored and placed on a relatively thick backing. He recommends a 2 mm thick “plate” with the letters raised on top. You’ll want to print it at a high infill percentage, but even still it shouldn’t take more than 30 minutes or so to run off. Remember there tends to be diminishing returns on infill past 50%, so taking it all the way to 100% is not going to do much but expend more time and plastic.
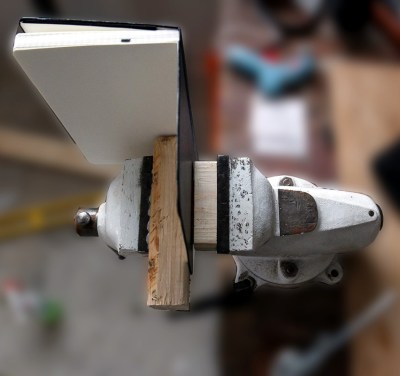
Once printed, [Sean] hot glues the stamp to a block of wood since putting pressure on the printed piece directly would likely crack it. Then it’s just a matter of getting your notebook, printed stamp, and blocks of wood lined up in to a suitably beefy bench vise. Getting everything aligned is one of those things that easier said than done, so expect to mess up the first couple until you get the hang of it.
When the alignment looks good, crank it down and let it sit for a few minutes. If you’re embossing the design into actual leather, wetting it a bit before putting the pressure on should help. The final effect is understated but undeniably very slick; and with the Holidays rapidly approaching this might be an excellent way to knock out some legitimately thoughtful gifts.
Ultimately the idea here is something of a lightweight version of the 3D printed press break dies used to bend aluminum or the punch and die set used for steel plates. At this point it seems there’s enough evidence to say that 3D printed objects are certainly strong enough (in compression, at least) to put some legitimate work in.
Continue reading “Easily Deboss Notebooks With A 3D Printed Stamp”


