Either in need of a coffee table or suffering a severe lack of upscaled electronics, [Darren] just finished up a great build for his living room. It’s a huge, scaled up version of a UV erasable EPROM with an infinity mirror in place of the fused quartz window.
[Darren]’s coffee table was inspired by an earlier build by the geniuses at Evil Mad Scientist. A few years ago, they built a 555 footstool that was scaled up about 30 times its normal size. Even at footstool scale, the 555 is still relatively tiny.
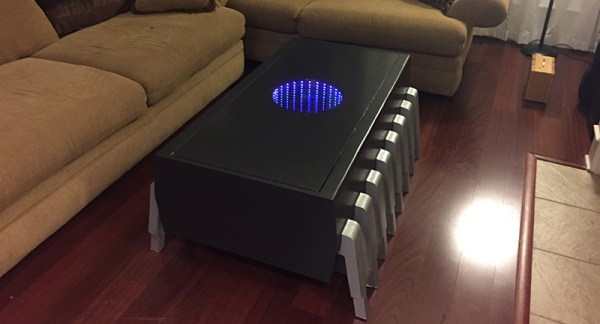
[Darren] is using a similar construction technique by forming the legs of the EPROM out of laminated plywood. Since this build is significantly larger, building the entire device out of solid, laminated plywood would result in an unwieldy and expensive piece of furniture. Instead, [Darren] constructed the legs and sides out of plywood laminations, covering the ends, top, and bottom with plywood panels. The result is a hollow EPROM/coffee table that’s still structurally sound.
If you’re a bit confused after counting the number of pins on the coffee table, you’re in good company. This is technically a scaled-up version of a 16-pin 0.600″ PDIP, something that a quick googling suggest isn’t historically accurate. Maybe there was an EPROM with a 4-bit wide data bus somewhere in the annals of electronics history, but we’re happy with saying that a completely accurate scaled-up ROM would be far too big for [Darren]’s living room.