NES Multi-cartridge

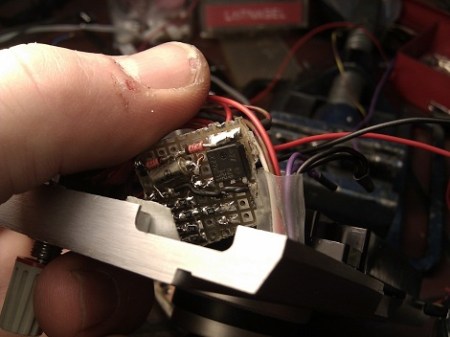
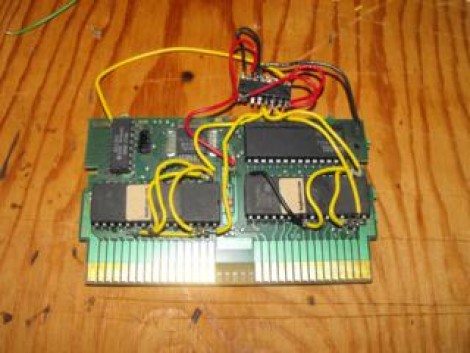
Here’s a mutlicartridge hack for the original NES that [Callan Brown] put together. He spent some time snooping around the signals on the circuit board seen above until he found the trace that maps the reset signal from the game console. This will be used to cycle through the various games stored on the cart’s memory chip. The ROM images that will be stored on this cartridge are concatenated, then burned to the EPROM. Since the donor cartridge (and the ROMs which were chosen) use memory managment, the hardware can be tricked into reading the ROM from a specific point in the EPROM.

The switching itself is handled by a 74HC161 binary counter chip. The reset signal from the on-board security chip acts as a clock trigger for the counter. Some clever wiring allows the output of the counter to select the starting address for the EPROM. Each time you press the reset button it increments the counter, thereby selecting a different ROM to load. See [Callan] demonstrate the finished hack in the video after the break.

Continue reading “NES Multi-cartridge”

Reverse Engineering A Cheap LED Message Marquee

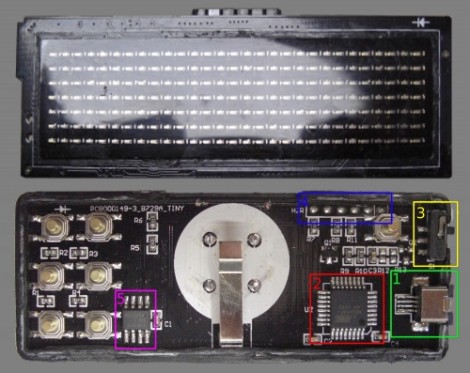
[Hugo] went all out when sharing his findings while reverse engineering this small LED marquee. He purchased the 29×7 LED matrix for under $12 but was surprised to find that the USB connector wasn’t a standard type and didn’t come with a cable. He first soldered a standard connector in place and then set out to make the device do his bidding (translated).

What he accomplished can be seen in the video after the break. He can now connect to the device via a USB cable, sending it new messages and adjusting the speed at which it scrolls. He can also adjust the spacing between letters, reverse the scrolling direction, read the on-board buttons, and write the settings to the device’s EEPROM. This is all thanks to some alternative firmware that [Hugo] wrote for the ATmega88. You can download a copy of that code from the wiki page he put together (translated). We really appreciate the time he spent putting that page together. The wealth of information he gathered during the hacking process serves as an example of the best way to share your projects with the world.

Continue reading “Reverse Engineering A Cheap LED Message Marquee”

A Computer-controlled Shutter For Polaroid Packfilm Cameras

[Georg] wanted to modify his old Polaroid land camera so he could have control over the exposure time. The resulting project is a neat hack, if we say so ourselves.

The stock electronics in Polaroid 100-series Packfilm cameras were a simple analog computer that integrates current through a light-sensitive resistor. This is a simple, low tech way to make sure the exposure time is correct. The usual mod would be to replace photoresistor with a potentiometer, but [Georg] had little success with this modification. After tearing the old hack out of the camera, [Georg] replaced the ancient electronics with a a PIC microcontroller, and is now able to control the shutter in increments down to 1/512th of a second.

Shutter timing is read by a PIC12F629 μC with a BCD encoder. [Georg] kept the shutter magnet setup, and also added a ‘BULB’ routine that holds the shutter open as long as the button is held down. The test photos are quite nice, even if from a 1960s Polaroid Land Camera. Check out the video of [Georg] running though the shutter settings after the break.

Continue reading “A Computer-controlled Shutter For Polaroid Packfilm Cameras”

An Alarm For Every Day Of The Week

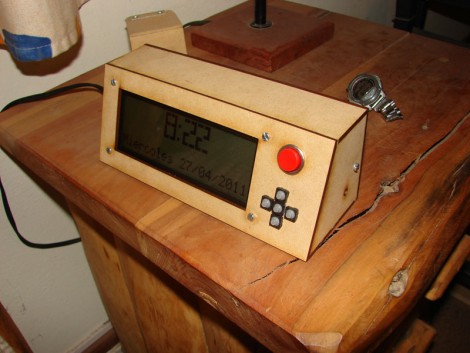
If you don’t have a 9-to-5 type of job you might find yourself constantly resetting your alarm clock as your calendar commitments change. [Lucas] finally got fed up with the nightly ritual and decided to build his own alarm clock which has unique settings for each day of the week (translated).

The display itself is an LM044L 20×4 character display. This provides a viewing area that is about 3″x1″ and since it’s an HD44780 compliant LCD screen, writing data to it takes very little effort (and RAM) compared to a graphic LCD. A PIC 18F2550 drives the device, taking input from a half-dozen buttons, driving the display, and turning on the enclosed buzzer when it’s time to get up. There’s a backup battery which will keep the settings when power is lost. The daily alarms, current time, and back light brightness can all be adjusted from the four screens that make up the settings menus. The only thing that it’s missing is a precision timekeeper, but that should be easy to add either by measuring the frequency of the mains or by using an RTC chip.

1Hz Timebase

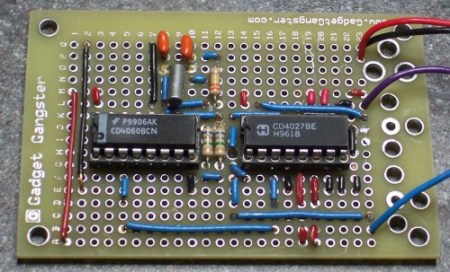
Check out this nice simple method of achieving a 1Hz timebase. This is basically a lesson in dividing crystal frequencies in circuits to get the desired result. In this case, they are starting with a 32.768KHz crystal and dividing it down. Instead of using an NE555 like many projects, he chose to go a direction that would yield results less prone to drifting with temperature variation. The method chosen was a CD4060 frequency divider, basically just a chain of flipflops. The divider is one step short of getting to the desired result so an additional flipflop has to be added. This is pretty basic stuff, but a great read. They go into detail as to how it all works and why you would use this method.

Pssst, hey, remember that time I told you to just use a 1Hz crystal? yeah, we can laugh at that again.

[via HackedGadgets]

Displaying Video And Gifs On RGB LED Matrices

led_matrix

[Mathieu] was on holiday in China and picked up some fun toys while perusing the numerous electronics markets there. The most interesting things he discovered were a pair of RGB LED matrices. They came in two different flavors, one made for indoor and one for outdoor displays, sporting a 64×32 and 32×16 resolution, respectively.

If you’ve read his blog before you know he is a big fan of LED matrices, so it’s only natural that bought a whole bunch of them and started experimenting once he got home. Using the same Atmel FPSLIC LED matrix control board he showed off in this previous hack, he was able to get the LED matrices up and running in no time. He adapted his webcam project to utilize the new panels, and he added a whole new feature as well. Via MatLab, he can now display any sort of animated gif on the panels, as you can see in the video below. The panels look great, and if we had a few of these around, there’s no doubt we would probably play this video on infinite repeat.

He says that the despite their somewhat questionable origins, the panels are of top notch quality, and he is willing to organize some sort of group buy if others are interested.

Continue reading “Displaying Video And Gifs On RGB LED Matrices”