Adding Heat Sinks To A Raspberry Pi

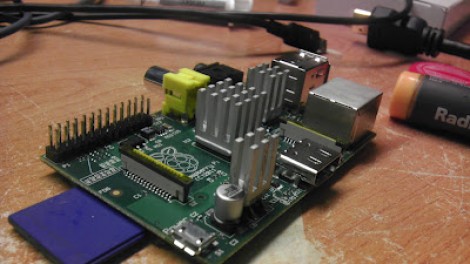
[Michael Dornisch] was surprised to find that the main processor of the Raspberry Pi reaches about 56 degrees Celsius (about 133 degrees F) while streaming video over the network. He thought it might help the longevity of the device if he was able to cool things off a bit. But why stop with just the processor? He added heat sinks to the SoC, Ethernet/USB chip, and voltage regulator.

From his parts bin he grabbed a small heat sink that was probably used on a graphics card. After measuring the three chips with his digital calipers he cut out the footprint he needed, resulting in three smaller heat sinks. We didn’t realize that thermal compound has enough gripping power to hold the sinks in place without any mechanical fastener, but apparently it does. [Michael] mentions that it’s possible to use other adhesives, like JB Weld. What’s important is that you use something (ie: thermal compound or a liquid adhesive) to prevent any air gap from coming between the chip surface and the aluminum.

He measured the result as a 17.3 degree C (31 degree F) drop in temperature. We looked around and it seems there’s no internal temperature sensor on the Broadcom chip so these surface readings will have to suffice. Do you think this will prolong the life of the board if it is used regularly to play back high quality video? We already know that these temperatures are within the specifications for the hardware.

[Thanks Simon]

Adding An OLED To A LEGO Set

Sure, as a very powerful and influential LEGO dictator you’re more than able to make the trains run on time, but how do you make your LEGO citizens realize the benefits of living under your regime? With an OLED LEGO train schedule, of course! [Dan] over at Adafruit put together a great guide to interfacing a very small OLED display to a LEGO setup, perfect for displaying which trains are on schedule and not displaying which trains are heading to a ‘camp.’

The build uses a 96×64 RGB OLED display that is just under an inch in size. After connecting the display to an Arduino, [Dan] crafted a bezel and mounted it inside a LEGO brick wall. Seems like just the thing for the Adafruit LEGO set.

Of course, the tiny Adafruit OLED display can be used for much more than showing the train schedule at a LEGO train station. We imagine this could be put to use in an awesome model train layout or even a small plastic security checkpoint.

Bench Supply Built In A Power Strip

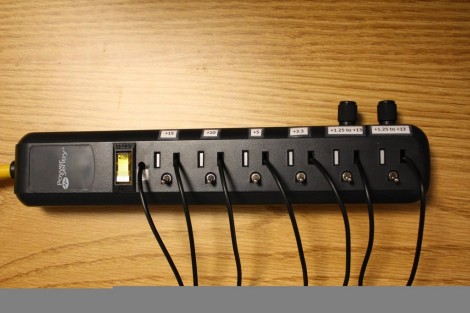
Back in his college days [Print_Screen] grew tired of always building a power supply on his breadboard. To make prototyping quicker he came up with the bench supply that is build into a power strip. This one is using linear regulators for power, and create much less noise on the lines than a supply made from a switch-mode PSU.

First thing’s first, he needed to step down from mains voltage and rectify the AC into DC. He gutted the smallest adapter he could find and managed to fit it into the gutted power strip. It puts out 15V which will work perfectly for the regulators he’s chosen. Each one gets its own slot where an outlet is on the case. The ground hole has been plugged by a toggle switch which routes power to the free-formed regulator/capacitors/heat sink modules. There is a slot for 15V (coming directly off of the converter), 10V, 5V, 3.3V, and two variable regulators which are controlled by the knobs above the outlet. We’ve never seen anything like this and find it most excellent!

[Thanks OverFlow636 via Reddit]

Salvaged Robot Arm Used For Light Painting And Pen Plotting

The members of Shackspace got their hands on an antiquated robot arm. It’s a Mitsubishi Movemaster RM-101 and was probably manufactured in the mid 1980’s. There’s almost nothing out there that tells you how to use the thing, and so they set out to figure out how to control the hardware.

This is a great example of how an EPROM dump can be really useful. After further inspection the team discovered that the arm is driven by a Z80 processor whose program is stored on an EPROM. The first thing the guys did was dump the memory since the aging storage will be useless if just a few bits become degraded. This dump will be really useful for others whose chip has already given up the ghost. The data from that dump was disassembled and painstakingly pawed through to figure out what commands were being sent to the arm. This technique worked, as the team was able to re-implement the control protocol and has already used the arm for some light painting and pen plotting (seen above). After the break you can see a control demonstration.

Continue reading “Salvaged Robot Arm Used For Light Painting And Pen Plotting”

Maker Faire NC 2012: Electrical Vehicles

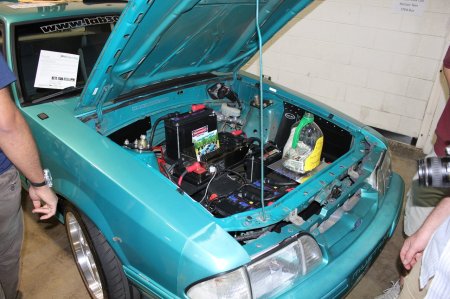
lab306-fox

Although I had no idea what to expect at the NC Maker Faire, I was pleasantly surprised to see several well made electrical vehicles. One of note was [Lab306]‘s Fox body electric Mustang. Although it would have been impressive by itself, it was made by a high school class and has been featured in several publications. Be sure to check out their excellent website, or the short video of it after the break! Don’t you wish you went to that high school?

Also of note were a few really cool cars seen after the break, including one built from a kit by [Green Cycle Design Group]. The other two were extremely small by traditional car standards and featured very unique designs. Continue reading “Maker Faire NC 2012: Electrical Vehicles”

Building A Bench Supply Without Altering The ATX Psu

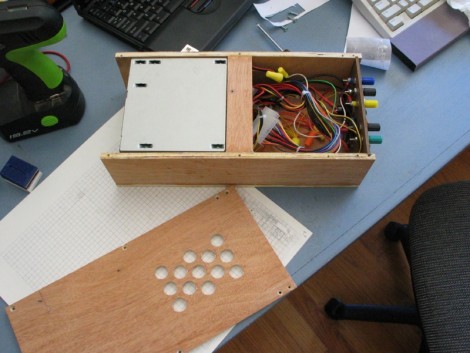
[FozzTexx] has been using a bench supply he made from an AT PSU for years. He put a lot of work into that one, removing unnecessary wires, mounting banana plug jacks on the metal case, and adding an on/off switch and labels. But if it ever dies on him it will be a major pain to do all that work again in order to replace it. When he set out to build another bench supply from an ATX PSU he decided to do so without altering the PSU. This way he can easily swap it out for a different one if he ever needs to.

The hardest part of the hack was sourcing connectors. But with the parts in hand he’s able to just plug the faceplate into the stock connector. This gives him access to all of the voltages, and provides an on/off switch and indicator light. He might also want to add the option of resetting the unit if the over-current protection kicks in.

Bike Cross Country In Your Basement With Google Streetview

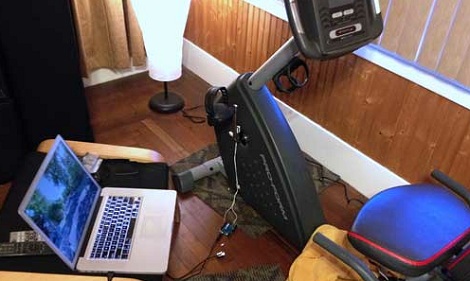
Biking cross-country is a worthwhile pursuit, but then you’ll have to deal with terrible drivers, rain, bugs, and heat. [Jeff Adkins] over at lowendmac has a neat solution to exploring the country via bicycle without ever leaving the safety and air conditioning of your basement.

For his build, [Jeff] used a magnetic reed switch attached to the frame of his stationary bike and the pedal crank. Whenever the pedal crank is turned, a reed switch closes on every revolution. This reed switch is connected to a new Arduino Leonardo programmed to transmit keyboard presses to a computer for every five revolutions of the pedal. From there, it’s a simple matter of loading up Google Streetview on a laptop and letting the Arduino automatically advance through Streetview images while pedaling.

The next part of [Jeff]’s project will be adding left and right buttons to his stationary bike to navigate Google Streetview images without taking his hands off the handlebars. You can check out a demo of [Jeff] cruising around after the break.

via reddit

Continue reading “Bike Cross Country In Your Basement With Google Streetview”