Hand drawing and laser etching - rocket

Converting Kids’ Hand-Drawings To G-Code

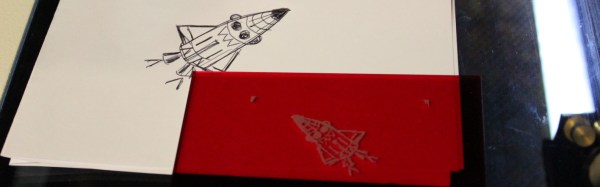
[Martin Raynsford] wrote a program that converts a black-and-white 2D image to G-code so that his laser printer could then etch the image. Not satisfied with just that, he used his laser printer to make a scanner that consists of a stand for his webcam and a tray below it for positioning the paper just right. The result was something he took to a recent Maker Faire where many kids drew pictures on paper which his system then scanned and laser etched.

Screenshot of Martin's scanning and G-code maker program
Martin’s scanning and G-code maker program

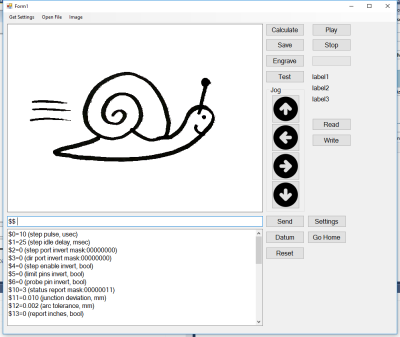
[Martin’s] program, written in C#, does the work of taking the image from the webcam using OpenGL and scanning it line by line looking for pixels that surpass a contrast threshold. For each suitable pixel the program then produces G-code that moves the laser to the corresponding coordinate and burns a hole. Looking at the source code (downloadable from his webpage) it’s clear from commented-out code that he did plenty of experimenting, including varying the laser burn time based on the pixel’s brightness.

While it’s a lot of fun writing this code as [Martin] did, after the break we talk about some off-the-shelf ways of accomplishing the same thing.

Continue reading “Converting Kids’ Hand-Drawings To G-Code”

DIY Newton’s Cradle Uses Parts Designed On A Smart Phone

Injection Molded Parts

As far as physics demonstrations go, the Newton’s Cradle is probably one of the most recognizable. Named after Sir Isaac Newton, the Newton’s Cradle demonstrates the law of conservation of momentum using swinging ball bearings.

[Scorchworks] decided he wanted to build his own Newton’s Cradle. The frame appears to be cut from MDF or particle board and then screwed together. That material is really easy to obtain and also to work with using inexpensive tools. The tricky part was the ball bearings. Most of the time when you see a Newton’s Cradle, the ball bearings have a small hole drilled in the top with an eye hook attached. The string is then attached to the eye hook.

[Scorchworks] decided to do something different. His plan was to make custom injection molded plastic rings that would fit perfectly around the ball bearings. The most interesting thing is that he designed the injection molding plates entirely on his smart phone while at his child’s baseball practice. To do this, [Scorchworks] used his own Android app, ScorchCAD. ScorchCAD is a free clone of OpenSCAD that is designed to run on Android devices. Most of the functionality of OpenSCAD has been implemented in ScorchCAD, though not all functions work yet. You can find a list of all the supported functions on the project’s website or in the Google Play store.

Once the plates were designed within ScorchCAD, [Scorchworks] exported the STL file and then used Meshcam to generate the gcode for his CNC milling machine. Once he had the plates machined, he just placed the ball bearing into the mold and injected the molten plastic around it. The plastic formed a perfectly shaped ring around the bearing with small loops for the string. [Scorchworks] repeated the process several times to get all of the ball bearings finished.

Finally, the bearings were strung up using some fishing line. A Newton’s Cradle is very sensitive to the positioning of the ball bearings. To account for this, [Scorchworks] tied each end of the fishing line to two different screws on top of the cradle. This way, each screw can be tightened or loosened to adjust the position of each ball bearing.