Design Diary: Varactor-Tuned Regen Receiver

[QRP Gaijin] likes to build regenerative receivers. If you’ve ever built a serious one, you know there are (at least) two problems: One is you need a variable capacitor (hard to find these days). The other annoyance is that if you cover a wide frequency range, you probably need more than one coil.

[QRP Gaijin’s] latest radio design doesn’t have either of these problems. He uses a coil with a single pole double throw switch to bandswitch a single coil. There is no traditional main tuning capacitor. Instead a 1SV149 varactor provides the radio’s main tuning capacity (the diode tunes between 35 to 500 pF).

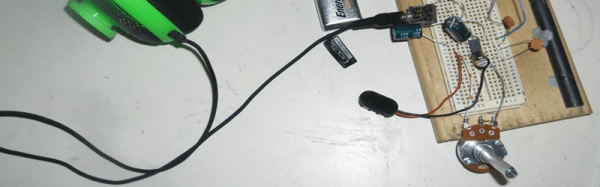
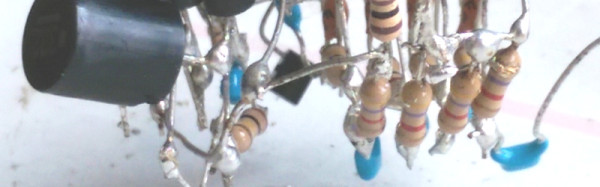
The post provides a nice design and a neat looking build in a Tupperware container (well… the outside is neat, at least; the inside is… best left inside the Tupperware). Better still, [QRP Gaijin’s] post details how he got to the final design, starting with the idea, and detailing the original design and the changes he made along the way. He also used data from an earlier build to limit how much the regeneration control has to be changed over wide frequencies and details how that changed the design. The prototype actually lacks the planned bandswitch, but will cover 3 to 30 MHz with the right coil.

There are certainly simpler regenerative receivers out there. However, the sophistication of this design along with the details of the designer’s thought processes makes this an interesting intermediate weekend project.

Continue reading “Design Diary: Varactor-Tuned Regen Receiver”

Simple One-Chip Regenerative Receiver

Crystal radios may be the simplest kind to make, but regenerative receivers are more practical and only a little more complicated. A recent design by [Selenium] is super simple because it uses a single LM386 audio amplifier IC.

You might be surprised that you can convert an audio amplifier to a receiver using just a handful of components (a variable capacitor, a coil, a handful of capacitors, and a speaker). However, [Selenium] realized he could subvert the gain and bypass pins to cause regeneration and wound up with a very simple receiver.

If you haven’t looked at regenerative receivers before, the principle is simple (and dates back to 1912). An oscillator is an amplifier that gets (theoretically) an infinite amount of gain at one particular frequency. A regenerative receiver is just an amplifier that is almost (but not quite) at the point of oscillation. This gives it very high frequency-specific gain and a measure of selectivity. You can also nudge the receiver just into oscillation to receive CW or SSB signals.

[Selenium] built his prototype on an old receiver chassis because it had the IC and the variable capacitor already in place. However, others have built successful copies on breadboards ([Austin Heller] created several good looking breadboard versions) and on PCB material. [Selenium] also released some other unique LM386-based designs that use more parts (and, probably, have better performance). Looks like a simple way to build a practical receiver.

Repairing A Damaged RC Rx Due To Reverse Polarity Power Input

Rx Receiver Repair

Once in a while all of us technocenti get a little complacent and do something that may be considered ‘dumb’ while working on a project…. like cutting the wrong side of a piece of wood or welding a bracket on in the wrong direction. [Santhosh] is human like everyone else and plugged in the power connector to his RC Receiver incorrectly, rendering the receiver useless. How will his Arduino-controlled Robot work without a functioning receiver?

[Santhosh] started by opening up the case to expose the circuit board and checking out the components inside. The first component in the power input path was a voltage regulator. Five volts DC was applied to the input side of the 3.3-volt regulator but only 1.21 came out the other end. Now that the problem was quickly identified the next step was to replace the faulty regulator. Purchasing an exact replacement would have been easy but cost both time and money. [Santhosh]’s parts bin contained a similar regulator, a little larger than the original but the pinout was the same.

Continue reading “Repairing A Damaged RC Rx Due To Reverse Polarity Power Input”

Basking In The Vintage Glory Of InfoAge

Last weekend’s Maker Faire wasn’t only about the latest and greatest. Some of the groups there brought up the latest and greatest from earlier eras. InfoAge is a historical science and technology learning center based out of the former Camp Evans in Wall, New Jersey, and they really know how to put on a show using old technology.

I made it to two booths at Maker Faire claimed by members or associates of InfoAge. First up is the booth from MARCH, the Mid-Atlantic Retro Computing Hobbyists. They’ve got a PDP-8, a PDP-11/20, a few VAXxen, IBM mainframes, entire kilobytes of core memory, and enough C64s, TRS-80s, Commodore PETs, teletypes, and punch cards to get to the moon several times over.

The feature of MARCH’s booth was a nearly 100% accurate Apple I reproduction. Yes, the same computer built by hand by [the Steves] who later went on to found Apple Computers. In the video (above, and after the break), a MARCH member demonstrates booting BASIC from a cassette interface with the help of an iPod and typing in a simple program.

Next up are the guys from the radio technology museum at InfoAge. They decided to celebrate the 100th anniversary of [Edwin Armstrong]’s invention of the regenerative radio receiver.

The regenerative radio receiver is an extremely simple device; it can be built out of baling wire and some variants use only one tube. In the video, [Al] shows off his recreation of a regenerative receiver with fancy olde tymie components that include a variable capacitor and a B cell battery (it’s a recreation using a bunch of 9 Volts, but yes, B batteries do exist).

It goes without saying that InfoAge is really cool, and certainly worth the visit if you’re ever in the area. Bonus: it’s only 20 miles away from where [Penzias] and [Wilson] earned their Nobel Prize for discovering the Big Bang.

Continue reading “Basking In The Vintage Glory Of InfoAge”