Back To The Future Prop Can Tell When It Hits 88 MPH

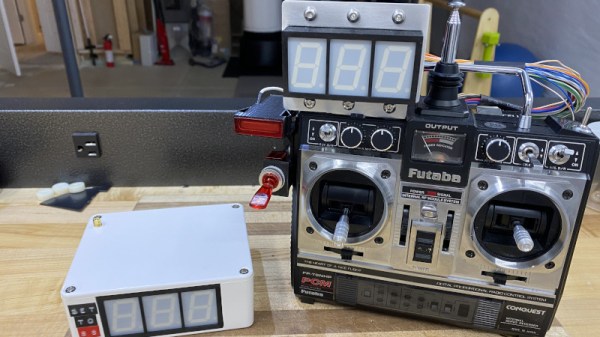
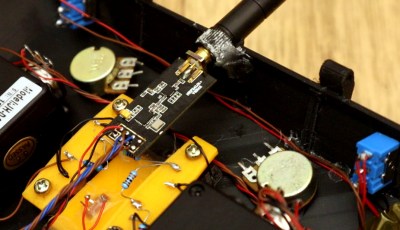
Obviously, the most iconic piece of fictional hardware from the Back to the Future films is Doc Brown’s DeLorean DMC-12 time machine. But we’d have to agree with [Jason Altice] of CodeMakesItGo that the second-most memorable gadget is the modified Futaba remote control used to control the DeLorean from a distance. Now, thanks to his detailed build guide, you can build your own version of the time machine’s controller — complete with working speed readout.

Now to be clear, [Jason] isn’t claiming that his build is particularly screen accurate. It turns out that the actual transmitter used for the prop in the film, the Futaba PCM FP-T8SGA-P, has become difficult to find and expensive. But he argues that to the casual observer, most vintage Futaba transmitters are a close enough match visually. The more important part is recreating the extra gear Doc Brown bolted onto his version. Continue reading “Back To The Future Prop Can Tell When It Hits 88 MPH”

Open Source Motion Controller For DIY Drones

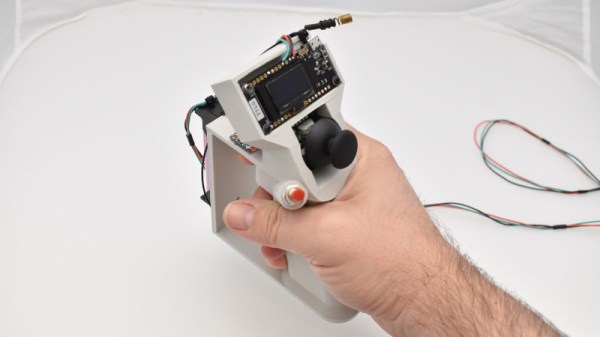
DJI recently introduced a slick motion controller that eschews the traditional dual-stick transmitter and allows you to fly their new “FPV Drone” with just one hand. The fact that it looks like it could double as the control stick for an X-Wing is just an added bonus. Unfortunately, that single model is the only thing the $199 USD controller is currently compatible with. Unwilling to get locked into the DJI ecosystem, [Paweł Spychalski] has developed an open source work-alike motion controller that brings gesture flying to home-built quadcopters and airplanes.

Now to be clear, you’ll still need a traditional transmitter to use this device. Rather than trying to reinvent the wheel, [Paweł] decided to implement his motion controller as an add-on for OpenTX hardware like the RadioMaster TX16S. It simply plugs into the trainer port on the back of the transmitter and acts as a secondary input. This greatly simplifies the design, as it essentially just needs to read angle data from its MPU-6050 gyro/accelerometer and forward it along to OpenTX over the serial port. Plus the fact that it’s connected to the trainer port means you can disable it and return to traditional controls in an instant if anything goes wrong.

Outside of the motion sensing gear, the ESP32-powered peripheral also has a thumb stick and a pair of push buttons nestled into its 3D printed frame. An OLED display provides some user feedback, and a holder for a 18650 cell is mounted to the back side as the controller will need its own power source when [Paweł] gets around to making its connection to the transmitter wireless.

In the video below, [Paweł] takes the motion controller for a test flight and comes away largely satisfied with the results. Some tweaks are in the works as you might expect for a first attempt, but nothing that would prevent you from building your own version today and experiencing what might be the next evolution of RC flying.

Continue reading “Open Source Motion Controller For DIY Drones”

Life-Saving Surgery For A Telescopic Antenna

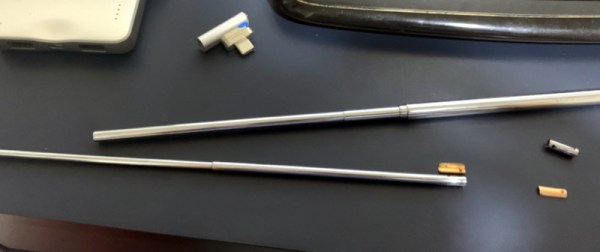
Whether it was as an impulsive youth or an impatient adult, there’s probably few among us who haven’t broken a telescopic antenna or two over the years. It doesn’t take much to put a bend in the thin walled tubing, and after that, all bets are off. So [The Amateur Engineer] couldn’t really be too upset when his son snapped the antenna off the transmitter of an old RC truck. Instead, he decided to take it apart and see how it could be repaired.

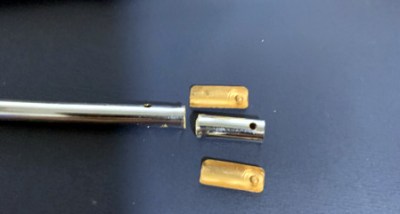
Taking a thin screwdriver to the antenna’s bottom most segment, he was able to widen up the opening enough to remove the upper sections as well as recover the broken piece and copper locking plates. He cut out the damaged area and drilled new holes for the pins on the copper plates to fit into. Inserting the repaired section back into the lowest segment was no problem, but he says it took a little trial and error before he was able to roll the edge over enough to keep the antenna from falling apart.

Buying a replacement would certainly have been easier, but as the radios in our devices have moved into the higher frequencies, these collapsible antennas have become a bit harder to come by. Modern RC vehicles operate on 2.4 GHz, so they don’t need the long antennas that the older 27 MHz systems utilized. [The Amateur Engineer] did find a few direct replacements online, but none for a price he was willing to pay.

We might have used the broken transmitter as an excuse to switch the RC vehicle over to WiFi control, but we appreciate [The Amateur Engineer] showing how this type of antenna can be disassembled and repaired if necessary.

Perfecting The Open Source RC Controller

Over the last few months we’ve seen an influx of homebrew RC controllers come our way, and we’re certainly not complaining. While the prices of commercial RC transmitters are at an all-time low, and many of them can even run an open source firmware, there’s still nothing quite like building the thing yourself. How else are you going to get exactly what you want?

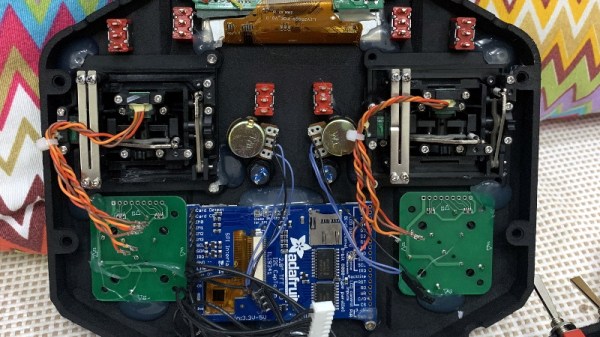
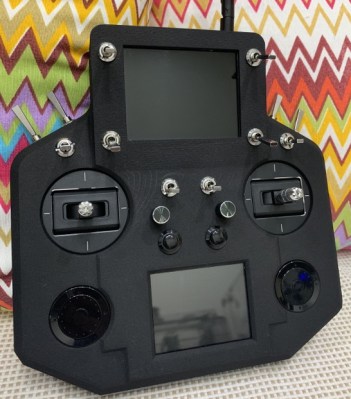
For this entry into the 2019 Hackaday Prize, [Vitor de Miranda Henrique] is working on his own version of the ultimate open source remote control. His design follows some of the trends we’ve already seen in terms of outward design and hardware expandability, but also branches off into some new territory with features such as dual integrated displays.

Why does your controller need two displays? The top 4.3 inch TFT is linked up to a 5.2 GHz video receiver, which makes it perfect for controlling vehicles in “first-person” view, such as drones. The lower screen is a 2.8 inch touch screen from Adafruit, which is intended to be used for navigating through menus and options once the firmware is fully fleshed out.

Powering the controller is a ESP32 and dual MCP23017 GPIO expanders to connect up to the array of input devices available to the user. The current iteration of the controller has ten switches, two encoders, some buttons, and a pair of scroll wheels for good measure. Oh, and of course there are a couple of joysticks in the mix as well. All the devices terminate at a custom PCB in the back of the controller which looks to make modifying and adding input devices simple and neat.

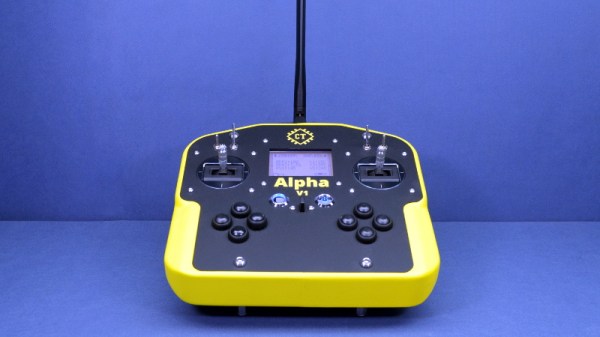
We’ve previously seen the Alpha V1, an open source controller with a fairly similar setup, albeit without the dual displays. If even that one is a bit more complex than you’d like, you can always just do it with an Arduino.

Developing The Ultimate Open Source Radio Control Transmitter

While we’ve come a long way in terms of opening up the world of radio control to open source software, a good deal of the hardware itself is still closed up. You can flash a cheap RC transmitter with a community developed firmware, in fact there’s a decent chance that’s what it ships with, but the hardware itself is still an immutable black box. That might be fine if you’re just flying an RC plane or quadcopter, but what if you’ve got something a bit more advanced in mind?

An in-development version of the hardware.

To address this issue, [Alireza Safdari] has spent the last several years working on a truly open source RC transmitter that can be modified and augmented to meet the user’s needs, called the Alpha V1. With the hardware and software nearing completion, he’s looking to get some community feedback on the system before the planned crowdfunding campaign kicks off.

From his personal experience, [Alireza] found that traditional RC transmitters have their limits when you start using them for robotics. You’ll often want input schemes or devices which would never occur to the remote’s designers, and you’ll almost certainly want to have more channels and functions than the original hardware will allow. One of the big advantages with the Alpha V1 is that the front and back of the controller are simple acrylic panels, meaning you can easily cut openings or drill holes in them to add more hardware without having to deal with the (relatively) ergonomic shapes of a traditional transmitter.

Of course, that’s only one half of the equation. When you add new hardware, you’ll need to make the software aware of it. To that end, [Alireza] says he and his team have developed a library of adaptable firmware modules which should make it very easy to add in new components without having to get bogged down with software configuration. In fact, he says the goal is to allow the user to add new hardware to the Alpha V1 without requiring them to write a single line of code.

The Alpha V1 communicates at 2.4 GHz using either XBee or Murata DNT24 radios, and supports as many as 72 individual channels as well as two-way telemetry. If your requirements aren’t quite so high, we recently covered a significantly less intimidating attempt at building an open source RC transmitter that might suit your needs.

DIY Six Channel Arduino RC Transmitter

It’s wasn’t so long ago that RC transmitters, at least ones worth owning, were expensive pieces of gear. Even more recently than that, the idea of an RC transmitter running an open source firmware would have been considered a pipe dream. Yet today buying cheap imported transmitters and flashing a community developed firmware (if it didn’t come with it pre-installed to begin with) is common place. It’s not much of a stretch to say we’re currently in the “Golden Age” of hobby RC transmitters.

But what if even cheap hardware running customizable software isn’t enough? What if you want to take it to the next level? In that case, [Electronoobs] has an Arduino powered RC transmitter with your name on it. But this is no scrap of protoboard with a couple of cheap joysticks on it, though he has made one of those too. The goal of this build was for it to look and perform as professional as possible while remaining within the hobbyist’s capabilities. The final product probably won’t be winning any design awards, but it’s still an impressive demonstration of what the individual hacker and maker can pull off today with the incredible technology we have access to.

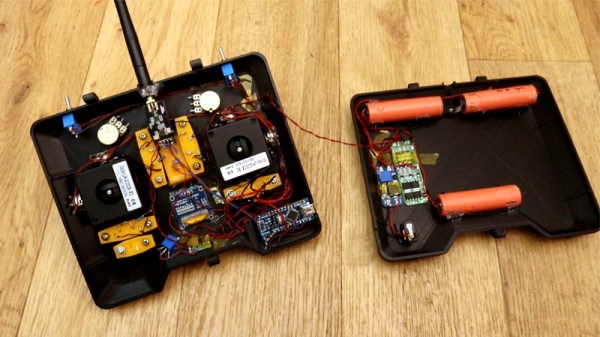
So what goes into this homebrew radio control system? Inside the back panel [Electronoobs] mounted the batteries, charging module, and the voltage regulator which steps the battery voltage down to the 3.3 V required to drive the rest of the transmitter’s electronics. On the flip side there’s an Arduino Nano, an NRF24 module, and an OLED display. Finally we have an assortment of switches, buttons, potentiometers, and two very nice looking JH-D202X-R2 joysticks for user input.

As you might have guessed, building your own transmitter means building your own receiver as well. Unfortunately you won’t be able to bind your existing RC vehicles to this radio, but since the receiver side is no more complicated than another Arduino Nano and NRF24 module, it shouldn’t be hard to adapt them if you were so inclined.

Low-cost consumer RC transmitters can be something of a mixed bag. There are some surprisingly decent options out there, but it’s not a huge surprise that hackers are interested in just spinning up their own versions either.
Continue reading “DIY Six Channel Arduino RC Transmitter”

Terrible RC Transmitter Made Less Terrible

It should probably go without saying that we’ve got nothing against the occasional bout of elaborate troubleshooting and repair, in fact it’s one of the most common things we cover here. As it turns out, people aren’t overly fond of being fleeced, and there are a lot of smart people out there who will put a lot of work in to keep from having to toss a favorite piece of gear into the trash. We can’t fault them for that.

But we have to say, we generally don’t see those kind of elaborate repairs for something brand new. Unfortunately, that’s exactly what [Marek Baczynski] had to do when trying to review the new iRangeX transmitter for his YouTube channel “dronelab”. He found a transmitter that was so poorly designed and constructed that he had to address a laundry list of issues to make the thing halfway tolerable. As you might expect, he’s not suggesting anyone go run and pick this one up.

The biggest problem is a fundamental flaw with how the gimbals are constructed. Due to poorly mated surfaces between the potentiometer and the stick itself, the accuracy of the controller is very low. The potentiometers don’t even return to zero when the sticks are released. Some tape was used to tighten up the connection and make the controller usable, but such poor tolerances are hard to forgive when accurate control is essentially the whole point of the device.

The other issues took a bit more debugging to figure out. The TX made an absolutely terrible screeching sound when turned on, but [Marek] was sure he was hearing a little bit of melody under the din. Putting the signal through the oscilloscope, he was able to confirm his suspicions. As it turns out, the buzzer used in the TX has a built in tone generator that was overriding the intended melody. Switching it out for a basic buzzer fixed the issue. Similarly, an issue where the radio wouldn’t turn on if it was recently turned off was tracked back to a resistor of the wrong value. Putting a higher lower value resistor in its place sorted that out as well.

It’s hard to imagine how this device made it out of the factory with so many wrong or unsuitable components, but here we are. Not that this would be acceptable at any price point, but as [Marek] points out in the video, it isn’t as if this radio is even all that cheap. For nearly $90 USD, it doesn’t seem unreasonable to expect something that actually works.

This isn’t the first time he’s put “cheap” RC hardware through the wringer. We recently covered his efforts to quantify latency in different transmitters. As the RC transmitter world gets increasingly competitive, detailed analysis like these help separate the real gear from the toys.

Continue reading “Terrible RC Transmitter Made Less Terrible”