I Went To The Moon And All I Got Was This Lousy T-Shirt

It’s been a long time coming but [Fran] finally has a DSKY display, a replica of the user interface display found in the Apollo Guidance Computer. The best part? It’s a t-shirt.

This build is a long, long, time in the making first beginning in 2015 when Fran started investigating the DSKY of the Apollo Guidance Computer. At the time, there were reproductions, but honesty they were all terrible. The reproductions used off-the-shelf seven-segment LEDs or light pipes. The real DSKY was a work of art and at the time probably the most complex electroluminescent display ever created. This led [Fran] to a very special trip to the annex of the Air and Space Museum where she was allowed to inspect a real DSKY display. She got all the measurements, and with some non-destructive investigation, she was able to piece together how this very special display was put together.

With that information, [Fran] was able to figure out that this display was a fairly complex series of silk screens. If it’s silk screen, you can put it on a t-shirt, so that’s exactly what [Fran] did. This used a DIY silk screen jig with phosphorescent inks. It’s not an electroluminescent display, but it does glow in the dark.

While this DSKY t-shirt does glow in the dark, that means it’s not an electroluminescent display like the original DSKY. That said, screen printed electroluminescent displays on a t-shirt aren’t unheard of. Several years ago, a screen printing company did a few experiments with EL displays on wearables. Of course, if you want a real electroluminescent DSKY display, [Ben Krasnow] has a very modern reproduction of the screen printed display. The electronics of [Ben]’s project do not resemble what flew to the moon in any way whatsoever; the original DSKY had relays. That said, we’ve never been closer to a modern recreation of the display from an Apollo Guidance Computer, and we have [Fran] and [Ben]’s work to point us forward.

Continue reading “I Went To The Moon And All I Got Was This Lousy T-Shirt”

Do-It-Yourself Scratch Cards

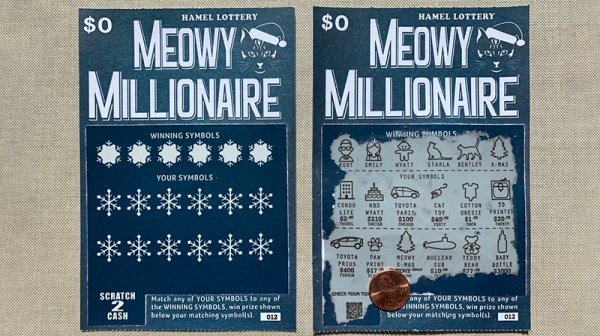
The lottery is to some a potential bonanza, to others a tax on the poor and the stupid. The only sure-fire way to win a huge fortune in the lottery does remain to start with an even bigger fortune. Nevertheless, scratch-off tickets are the entertainment that keep our roads paved or something. [Emily] over on Instructables came up with a way to create your own scratch-off cards, and the process is fascinating.

For [Emily]’s scratchers, there are five layers of printing on the front of the card. From back to front, they are the gray ‘security confusion layer’ printed with a letterpress, black printing for the symbols and prize amounts, also printed on a letterpress, a scratch-off surface placed onto the card with a Silhouette cutter, the actual graphics on the card, printed in blue with a letterpress, and a final layer of clear varnish applied via screen printing. There’s a lot that goes into this, but the most interesting (and unique) layer is the actual scratch-off layer. You can just buy that, ready to cut on a desktop vinyl cutter. Who knew.

After several days worth of work, [Emily] had a custom-made scratcher, ready to sent out in the mail as a Christmas card. It’s great work, and from the video below we can see this is remarkably similar to a real scratch-off lottery ticket. Not that any of us would know what scratching a lottery ticket would actually be like; of course that’s only for the gullible out there, and of course none of us are like that, oh no. You can check out a video of the scratch-off being scratched off below.

Continue reading “Do-It-Yourself Scratch Cards”

Adventures In Photopolymers With Ben Krasnow

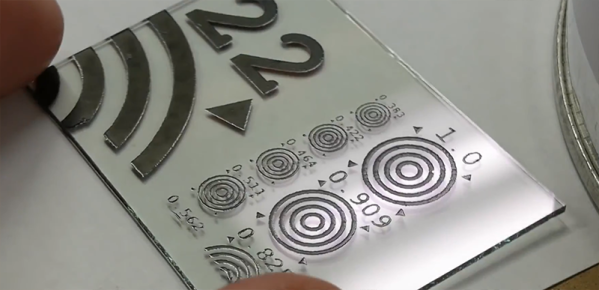
There is a technology that will allow you to add inks, resins, and paints to any flat surface. Screen printing has been around since forever, and although most of the tutorials and guides out there will tell you how to screen print onto t-shirts, [Ben Krasnow] had the idea of putting patterns of paint on acrylic, metal, or even ITO glass for electroluminescent displays. With screen printing, the devil is in the details, but lucky enough for all of us, [Ben] figured everything out and is sharing his knowledge with us.

The ten thousand foot view of screen printing is simple enough — put some ink on a screen that has some photoemulsion, and squeegee it through onto a t-shirt. While this isn’t wrong, there’s a lot of technique, and things will go wrong if this is your first time doing it. Screens are easy, and the best way to get those is by buying a pre-stretched frame. The photoemulsion is a bit different. The old way of applying a photoemulsion is by squeegeeing it on with a bizarre tool. It’s almost impossible to get a thin consistent layer with this technique, so [Ben] recommends just buying some photoemulsion film.

Once the photoemulsion is on the screen and dry, you need to put an image on this. The photoemulsion cures hard with UV, so the traditional technique is using transparency (actually, the real old-school way is using a camera obscura…). Transparency sheets for laser printers work, but 30-lb vellum is actually more transparent to UV light than clear acetate sheets. This is then applied print side down to the dry screen, and believe me when I say this is the most important part. You will not get a good screen print if there is not direct contact between your photomask and your photoemulsion. This is so important, it may be worth considering some experiments in vinyl cutting to create the photomask.

With the screen developed, it’s simply a matter of globbing on some ink and pressing it onto a piece of acrylic. [Ben] used regular oil paints, an unmixed artists’ oil paint, and the professional solution, epoxy-based screenprinting paint. By far, the epoxy paint gave the best finish, but it’s a stinky mess that is nearly impossible to clean.

With a somewhat successful screenprinting setup, what will [Ben] be able to do? Well, he’s been working on electroluminescent displays, and the first EL displays were screenprinted anyway. More than that, you could use screen printing to create a resist for copper etching for creating your own PCBs. There’s a lot you can do when you can put epoxy down in a thin layer, like make a blockchain of Tide pods, and this is the best tutorial we’ve ever seen on using photoemulsions.

Continue reading “Adventures In Photopolymers With Ben Krasnow”