Review: XHDATA D-219 Short Wave Radio Receiver

As any radio amateur will tell you, the world of radio abounds with exciting possibilities. Probably the simplest pursuit of them all is that of the SWL, or short wave listener, who scours the airwaves in search of interesting stations. SWLs will often have fully-featured setups with high-end general-coverage communications receivers and tuned antenna arrays, but it can start with the cheapest of radios at its bottom end. Such a radio is the subject of this review, the XHDATA D-219 is a miniature portable receiver that costs under ten dollars, yet is currently the talk of the town in SWL circles. This interest is in no small amount due to its being an especially low-price way to get your hands on a shortwave radio using one of the SIlicon Labs integrated software-defind radio receiver chips. We don’t often review a consumer radio here at Hackaday, but with an avid eye for unexpected gems at the cheaper end of the market this one’s worth a second look.

What Do You Get For Your Tenner?

A picture of the radio on my bench
This form factor is very typical for cheap “world band” radios.

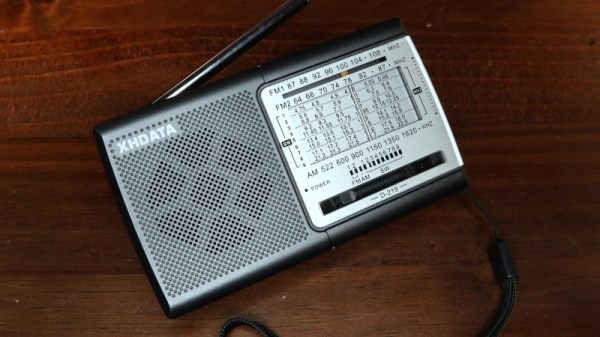
I ordered my D-219 from the XHDATA website, spending about £10 including the postage from China. The usual wait ensued before the package landed on my doormat, and inside was the radio in its box with an instruction leaflet. It’s a small unit about 135 mm x 75 mm x 30 mm, and it follows closely the form factor of other similar radios.

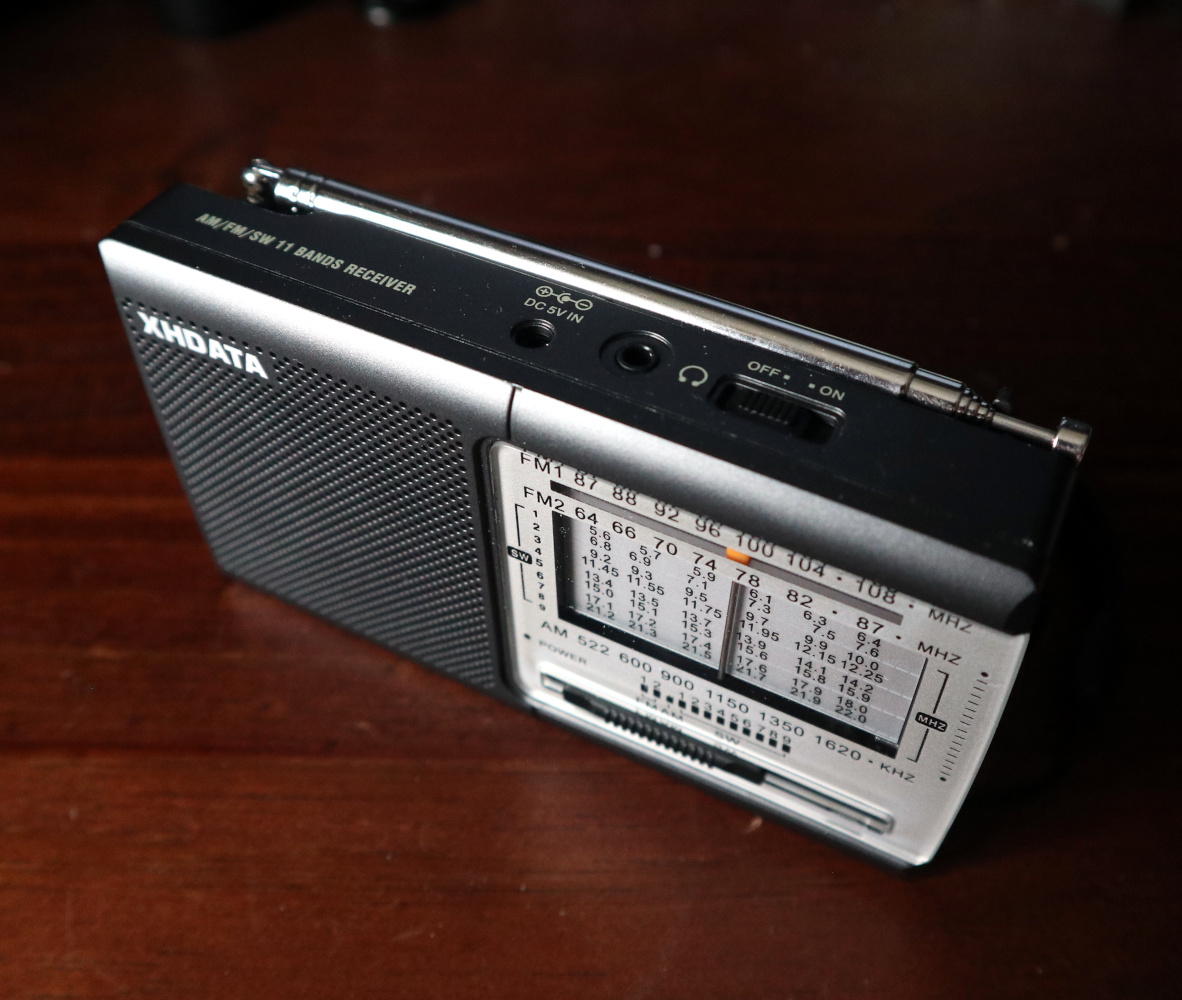
On the top is the extensible antenna with an on-off switch and sockets for headphone and 5 V power, on the side are side-on knobs for tuning and volume, while on the front is the speaker and old-style multi-band tuning display.

On the back is a flip-up stand and a hatch for a pair of AA cells. There’s a band switch covering AM, nine different shortwave bands from 4.75 MHz to 22 MHz, the east Asian FM band from 64 MHz to 87 MHz, and the international FM band from 87 MHz to 108 MHz. The tuning indicator is very old-school, a vertical bar that moves across a frequency scale with the tuning knob. Continue reading “Review: XHDATA D-219 Short Wave Radio Receiver”

Hands-On: BornHack’s Light Sabre Badge

A badge modelled after the handle of a light sabre? Yes Please! This Star Wars themed hardware is the work of hardware designer Thomas Flummer for the 2019 BornHack conference held in Denmark last month. (Check out my roundup of the event if this is the first you’ve heard of it.)

It's not a badge but a light sabre! The front of the BornHack 2019 badge.
It’s not a badge but a light sabre! The front of the BornHack 2019 badge.

It fits the hand nicely, and with clever side-on placement of the two AA battery holders (a trick we first saw with the 2016 Hackday Superconference badge) it also keeps any protruding solder joints away from clothing. In the centre of the badge is the 240×240 pixel colour display that also hides the Silicon Labs Happy Gecko processor and its surrounding components. Three buttons at the edge of the board to the left of the screen are a nice fit for your thumb when holding it in your left hand — a good choice if you happen to leave your right hand behind on a visit to the Cloud City of Bespin.

Between the battery holders lies a four-way joystick, two buttons, and a 6-pin add-on connector. Above it is a micro SD card socket and a micro USB socket, and above them are an IR emitter and receiver. All of the hardware is on the front of the PCB, with no components on the reverse (other than the solder joints for the batteries). But it is there you will find a set of exposed pads for serial and I2C interfaces. Continue reading “Hands-On: BornHack’s Light Sabre Badge”

An FM Transceiver From An Unexpected Chip

The Si47xx series of integrated circuits from Silicon Labs is a fascinating series of consumer broadcast radio products, chips that apply SDR technologies to deliver a range of functions that were once significantly more complex, with minimal external components and RF design trickery.  [Kodera2t] was attracted to one of them, the Si4720, which boasts the unusual function of containing both a receiver and a transmitter for the FM broadcast band and is aimed at mobile phones and similar devices that send audio to an FM car radio. The result is a PCB with a complete transceiver controlled by an ATmega328 and sporting an OLED display, and an interesting introduction to these devices.

The Si4720 internal block diagram, from its data sheet.

A look at the block diagram from the Si4720 reveals why it and its siblings are such intriguing devices. On-chip is an SDR complete in all respects including an antenna, which might set the radio enthusiasts among the Hackaday readership salivating were it not that the onboard DSP is not reprogrammable for any other purpose than the mode for which the chip is designed. The local oscillator also holds a disappointment, being limited only to the worldwide FM broadcast bands and not some of the more useful or interesting frequencies. There are however a host of other similar Silicon Labs receiver chips covering every conceivable broadcast band, so the experimenter at least has a good choice of receivers to work with.

If you need a small FM transmitter and have a cavalier attitude to spectral purity then it’s easy enough to use a Raspberry Pi or just build an FM bug. But this project opens up another option and gives a chance to experiment with a fascinating chip.

Christmas Bauble Is Neither Spherical Nor Runs Arduino

[Jordan Wills] was tasked by his company, Silicon Labs, to build some Christmas Baubles to give away to co-workers. While the commissioned units were designed to be simple battery and LED affairs, he decided to make one of his own with bells and whistles. His Mario themed Christmas Ornament uses a Silicon Labs FM972 micro controller, capacitive sensing, PWM controlled 8 bit audio, and blinky lights.

The interesting part is some of the construction techniques that he used. The finger-joint style cube is built from circuit boards. Electrical connections between panels were routed using solder wicking copper braid. That’s a interesting trick which we’ll keep in mind along with some of our favorite creative structural uses of PCB.

The top of the cube has four LED’s which light up the Mario “Question Mark” symbols on the four sides of the cube while the base contains all of the electronics. The outside of the base piece was a large copper plane to act as the capacitive sensing element. This meant all electronics needed to be surface mounted with tracks laid out on one side – which posed some layout challenges. Adding the Capacitive sense function was a cinch thanks to support from the in-house design team. PWM output from the micro controller takes care of audio, and the output is routed through a buffer to boost the signal. A bandpass filter then cleans up the PWM output before feeding it to the speaker.

Continue reading “Christmas Bauble Is Neither Spherical Nor Runs Arduino”