Getting Geared Up For Home Powder Coating

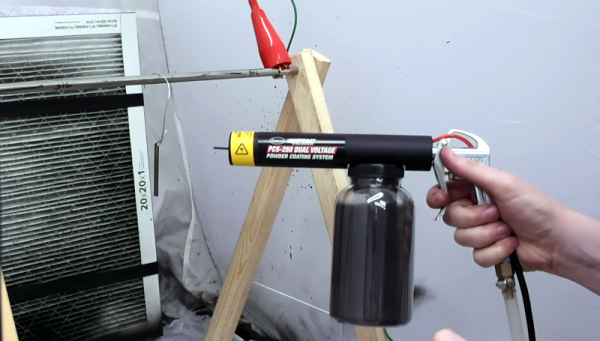
[Blondihacks] wanted to do powder coating for a model train without a lot of special equipment. She started with an Eastwood kit that runs about $230. Depending on the options, you can get the gun by itself for between $110 – $170. However, you will need more than just this kit. You can see how [Blondihacks] used the kit in the video below.

The idea behind powder coating is simple: an electrostatic charge attracts a powder — usually some polymer — and makes it stick to an item. Then heat or UV light turns the powder into a hard finish much tougher than paint. Powder coating can be thicker than paint and doesn’t run, either.

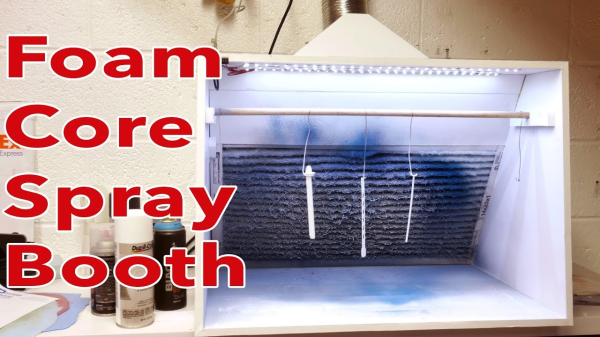
The gun requires a small air compressor, and you need an electric oven, which could be a toaster oven. It probably shouldn’t be an oven you plan to use for food. It should also be in a well-ventilated area, plus you’ll want a respirator or dust mask. [Blondhacks] used a portable paint booth so as not to spew powder everywhere, which looked nice, although you could just use a big cardboard box. A custom jig to hang the parts while spraying, and she was ready to go.

If you are on a budget, by the way, you can get a kit from Harbor Freight for a bit less. It probably has fewer accessories, and we don’t know how it compares, but it is an option for much less money. Either way, you need a small air pressure regulator, and you also need a dryer and a filter for the air because you need dry and clean air so as not to contaminate the powder.

The part is grounded, and the gun charges the powder as it sprays. Once coated, you stick the part in the oven for about 20 minutes. The results look good and, compared to a painted part, the coating was super tough. For intricate parts, you can heat the part and then dip it in fluid-like powder. If you prefer to stick to regular powder coating, we have some tips.

Continue reading “Getting Geared Up For Home Powder Coating”

DIY Spray Booth Is Both Light And Lit

Industrial designer [Eric Strebel] has access to big, walk-in spray booths, but bigger isn’t always better. For small jobs, it’s overkill, and he wanted his own spray booth anyway. If you’re ready to upgrade from that ratty old cardboard box in the garage, look no further than [Eric]’s spray booth how-to after the break.

If you don’t already know, [Eric] is something of a foam core legend. He has several videos about model building techniques that produce really slick results, so it’s no surprise to see these skills transfer to a larger build. The booth is built from a single 40″ x 60″ sheet of 1/2″ foam core board, a furnace filter, and a vent fan modified to fit his shop’s system. The whole thing cost less than $200, most of which goes toward the fan.

[Eric] modified an existing spray booth plan to fit his needs and added some really nice touches along the way. All the edges are beveled and the unfinished faces are taped, so at first glance it looks like it’s made out of painted wood or melamine board. The furnace filter slides out one side for easy replacement and is braced with foam scraps so it won’t fall forward. The best part of this booth is the LED strips—they make for way better working conditions than the dim recesses of a cardboard box.

If you’d rather build a walk-in spray booth, why not make your own sliding barn doors, too?

Continue reading “DIY Spray Booth Is Both Light And Lit”

Making A Spray Booth From An Old Dishwasher

For several years, [Randy]’s spray paint booth was a simple cardboard box. Sure, it kept the overspray contained to a small area, but there was a lot of room for improvement. Luckily, after replacing his dishwasher he had the makings of an excellent spray paint booth that can be put together in a few hours.

The build began by tearing apart the old dishwasher and getting rid of just about everything; the door, plumbing, and electrical were all discarded leaving [Randy] with a plastic husk. After installing a small fluorescent light, plugging the drain hole, and making a simple lazy Suzan, [Randy] had a proper spray booth on his hands.

[Randy] opted not to put in a ventilation system; he was, after all, working with non-toxic vapors. If you’re planning on gutting a dishwasher for use with some nasty chemicals, it might be a good idea to use the drain hole as a ventilation port.