Trash Bag And Foam Board Hovercraft Doesn’t Fail To Succeed. Or Fail.

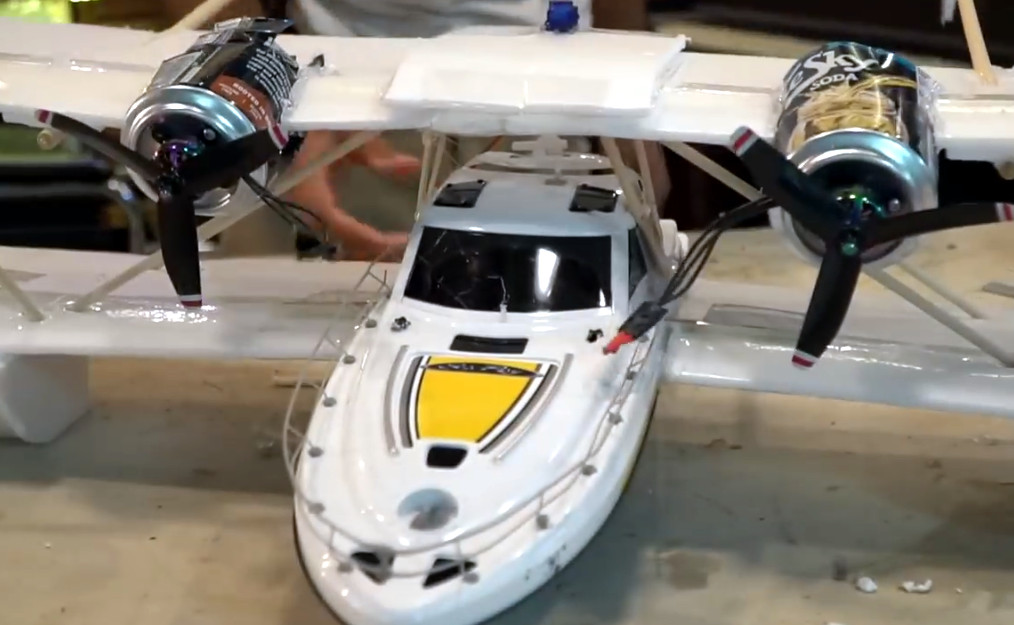
When you think of a vehicle that can do it all- water, land, ice, snow and more- the hovercraft often comes to mind. And while they might not be ubiquitous, hovercraft catch the imagination of many a hacker just as it has for [JamesWhomsley] of [ProjectAir]. [James] has built a small, but just big enough hovercraft as you can see in the video below the break.

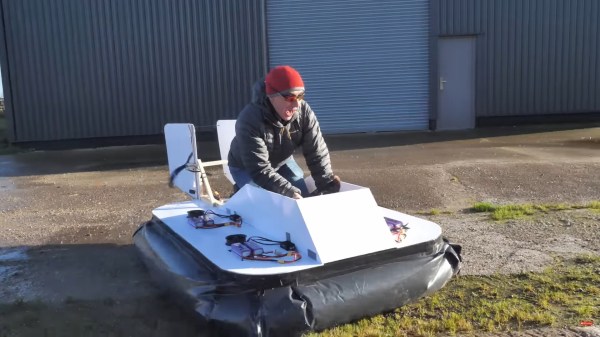
Starting with a small RC proof of concept, [James] tested out some of his favorite construction materials: foam board, trash bags, duct tape, and our personal favorite: hot glue! After a successful run with the radio controlled model, [James] set out to build a hovercraft big enough to carry a human.

The resulting hovercraft was definitely enough to take a human for a spin, despite still using RC airplane parts for power. Sure, there were a couple of instances of parts going flying, foamboard being shredded, and loss of control. Even so, the trash bag air skirt stayed intact, and the aforementioned damage was nothing some tape and hot glue couldn’t fix. [James] was back on the air in no time.

Of course, some of the very reasons that we don’t see hovercraft roaming the streets come up in the video, namely off-camber paths. But the build itself is quite good, and for those of us who’ve wondered what it takes to make a hovercraft, this video shows how the sausage is made.

This isn’t the first garbage bag based hovercraft, and we featured another RC/Arduino controlled version just a while back.

Continue reading “Trash Bag And Foam Board Hovercraft Doesn’t Fail To Succeed. Or Fail.”

Add-On Lets FDM 3D Printer Wash And Cure Resin Parts

The dramatic price reductions we’ve seen on resin 3D printers over the last couple of years have been very exciting, as it means more people are finally getting access to this impressive technology. But what newcomers might not realize is that the cost of the printer itself is only part of your initial investment. Resin printed parts need to be washed and cured before they’re ready to be put into service, and unless you want to do it all by hand, that means buying a second machine to do the post-printing treatment.

Not sure he wanted to spend the money on a dedicated machine just yet, [Chris Chimienti] decided to take an unusual approach and modify one of his filament-based 3D printers to handle wash and cure duty. His clever enclosure slips over the considerable Z-axis of a Anet ET5X printer, and includes banks of UV LEDs and fans to circulate the air and speed up the drying process.

Looking up into the curing chamber.

The curing part is easy enough to understand, but how does it do the washing? You simply put a container of 70% isopropyl alcohol (IPA) on the printer’s bed, and place the part to be washed into a basket that hangs from the printer’s extruder. Custom Python software is used to generate G-code that commands the printer to dip the part in the alcohol and swish it back and forth to give it a good rinse.

Once the specified time has elapsed, the printer raises the part up into the enclosure and kicks on the LEDs to begin the next phase of the process. The whole system is automated through an OctoPrint plugin, and while the relatively low speed of the printer’s movement means the “washing” cycle might not be quite as energetic as we’d like, it’s definitely a very slick solution.

[Chris] provides an extensive overview of the project in the latest video on his YouTube channel, Embrace Racing. In it he explains that the concept could certainly be adapted for use on printers other than the Anet ET5X, but that it’s considerable build volume makes it an ideal candidate for conversion. Of course it’s also possible to use the foam board enclosure by itself as a curing chamber, though you’ll still need to wash the part in IPA ahead of time.

This is perhaps one of the most unusual wash and cure systems we’ve seen here at Hackaday, but we appreciate the fact that [Chris] based the whole thing on the idea that you’ve probably got a FDM printer sitting nearby that otherwise goes unused when you’re working with resin. If that’s not the case for you, putting together a more traditional UV curing chamber is an easy enough project.

Continue reading “Add-On Lets FDM 3D Printer Wash And Cure Resin Parts”

Two Way Mirror Improves Video Conferencing

Like everyone lately, [Matt] has been spending more time doing video conferencing lately. The problem is you naturally want to look at the screen, but that means you aren’t looking at the camera and, thus, you aren’t making eye contact. If you use a laptop, there is a relatively easy fix, although it isn’t particularly stylish. [Matt] built a black shroud out of foam board and put in two-way mirror. How does that help? Well, with the set up, you can put a very thin black web camera pointing up towards the mirror. Because the shroud is dark, you can see the screen through the mirror, but the camera sees you.

Where do you get a thin black web camera? You make one from an old laptop camera. They are tiny and easy to repurpose, a trick [Matt] has shared before. As a bonus, the post shows an easy way to take an LED strip and make a diffused light for lighting up your webcam call.

Continue reading “Two Way Mirror Improves Video Conferencing”

A Foam Core Stand Against Tablet Design

We hadn’t considered how challenging it might be to try drawing long-term on a tablet, and it sounds as though Apple didn’t, either. According to [Eric Strebel], who normally designs products for other people, there are many problems to solve. The camera area creates a bump on an otherwise flat backside, so it wobbles on the table. It’s thick. It’s too easy to run your stylus off the side.

Yes there are tablet holders out there, even a few with cup holders, but almost none of them have a kickstand for holding the thing vertically. If you want something done right, you have to do it yourself. And so [Eric] designed his ideal stand to solve all of these problems (video, embedded below). It’s mostly made of laser-cut foam core board, with some layers of poster board added to make the bezel totally flush with the tablet.

[Eric] can snap the tablet in place and use it flat, or fold back the upper half into a stand. It even works well over on the couch, or sitting up in bed. We particularly like the window gasket feet and all the versions of his hinges, which start with strips of cheesecloth and end in grosgrain ribbon. [Eric]’s approach to design always reminds us to keep an open mind about materials and methods. If you try using what you already have, the results may surprise you. Check out the build video after the break.

Maybe you don’t need or want a tablet stand. How about a foam core spray booth?

Continue reading “A Foam Core Stand Against Tablet Design”

Cheap RC Boat Turned Weirdly Capable Seaplane

What do you get when you combine a cheap RC boat from Walmart, foam board, a couple powerful motors, and some aluminum cans? Most people would just end up with a pile of garbage, but we’ve already established [Peter Sripol] is fairly far from “most people”. In his hands, this collection of scraps turns into an almost unbelievably nimble seaplane, despite looking like something out of a TailSpin and Mad Max crossover episode.

In his latest YouTube video, [Peter] takes viewers through the process of turning one of these rather lame RC boats into an impressive flying machine. His took inspiration from the Sikorsky S-38, an American amphibious aircraft introduced in 1928. The S-38 looked like a fairly traditional boat bolted to the bottom of a set of huge wings, so it’s little surprise that he patterned this build after it.

The construction of the seaplane is very simple, and boils down to cutting some big wings out of foam board, using some sticks to give it some rigid framing, and putting a tail on it. The biggest problem is that the boat’s hull lacks the “steps” that a seaplane would have, so it’s not an ideal shape to lift out of the water. But with enough thrust and a big enough control surface, it all works out in the end.

Which is in effect the principle by which the whole plane flies. There’s a large elevator cantilevered far astern to help leverage the boat out of the water, but otherwise all other control is provided by differential thrust between the two top mounted motors. The lack of a rudder does make its handling a bit sluggish in the water, but it obviously has no problem once it’s airborne.

If [Peter] and his foam board artistry seem familiar, it’s probably from the not one but two homemade aircraft he built with shockingly similar techniques to this current project.

Continue reading “Cheap RC Boat Turned Weirdly Capable Seaplane”

DIY Spray Booth Is Both Light And Lit

Industrial designer [Eric Strebel] has access to big, walk-in spray booths, but bigger isn’t always better. For small jobs, it’s overkill, and he wanted his own spray booth anyway. If you’re ready to upgrade from that ratty old cardboard box in the garage, look no further than [Eric]’s spray booth how-to after the break.

If you don’t already know, [Eric] is something of a foam core legend. He has several videos about model building techniques that produce really slick results, so it’s no surprise to see these skills transfer to a larger build. The booth is built from a single 40″ x 60″ sheet of 1/2″ foam core board, a furnace filter, and a vent fan modified to fit his shop’s system. The whole thing cost less than $200, most of which goes toward the fan.

[Eric] modified an existing spray booth plan to fit his needs and added some really nice touches along the way. All the edges are beveled and the unfinished faces are taped, so at first glance it looks like it’s made out of painted wood or melamine board. The furnace filter slides out one side for easy replacement and is braced with foam scraps so it won’t fall forward. The best part of this booth is the LED strips—they make for way better working conditions than the dim recesses of a cardboard box.

If you’d rather build a walk-in spray booth, why not make your own sliding barn doors, too?

Continue reading “DIY Spray Booth Is Both Light And Lit”

Mini Millennium Falcon Is Envy Of The Neighborhood

Here’s a tip for any readers who may be expecting a child in the near future: there’s about a two year period where you can basically use your child as a Halloween prop. They’re too young to express any serious interest in what they want to dress up as, and as an added bonus, they generally spend most of their time being rolled around in a wheeled contraption anyway. As long as you can keep the little one warm and securely seated in the thing, you’ve essentially got free reign to put them into all sorts of elaborate vehicles.

Case in point, the awesome build that [shnatko] has dubbed the “Millennium Flyer”. Built atop his daughter’s plastic Radio Flyer wagon, the Millennium Flyer is constructed out of wood and foam board. By using the mounting holes in the wagon originally intended for an optional canopy, the ship itself can be removed to fly again next year.

[shnatko] notes that he possess no particular talent for the fine arts, so he decided to skin his build by printing out a high resolution image of the Millennium Falcon he found online. The amount of patience (not to mention printer ink) that this method took is considerable, but we think the final results speak for themselves.

To finish off his build [shnatko] found a blue cold cathode light from his PC modding days and rigged it up with a laptop battery he had laying around. Some foam ribs and wax paper to diffuse the light give it that iconic look from the “real” Falcon.

Between this build and the AT-AT rocking horse from a few weeks back, it seems we are in the golden age of childhood Star Wars conveyances. Though we wouldn’t mind seeing this get mounted to a racing Power Wheels either.