BGA Soldering With A Paint Stripper And Stopwatch

Having just received a shiny set of PCBs from the fab-house [Devbisme] needed a way to solder the main chip in place. It has a Ball-Grid Array footprint which is notoriously difficult to populate in a home lab. But he makes it look pretty easy and decided to share a video tutorial of the process.

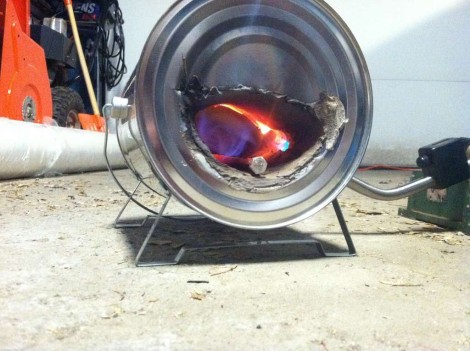
The main tool he used is the paint stripper (heat gun) seen above. Since he didn’t have his own fancy reflow oven he made things work with the gun as his heat source. First he applies a generous layer of liquid solder flux to the BGA footprint on the board. Next he melts some solder onto the tip of his iron and uses it to tin all of the board’s BGA pads. Then it’s time for the critical step of positioning the chip. He uses vacuum tweezers to set it in place, and traditional tweezers to fine-tune its position. From here he heats with the paint stripper for two minutes, starting far above the board and slowly moving closer, with the reverse at the end of the soldering process. Once cool the board is cleaned with distilled water and blown dry with compressed air. After a visual inspection he finishes the application with a 30 minute stay in a 300 degree oven. We’ve included the video after the break for your convenience.

We’ve seen a similar technique used for replacing a chip on an already populated board.

Continue reading “BGA Soldering With A Paint Stripper And Stopwatch”

A Desktop Binary Clock

This is the desktop binary clock which [Tim the Floating Wombat] recently finished building. He calls it the Obfuscating Chronoscope since it’s a bit more difficult to read than your traditional analog or digital timepieces. But the simple design looks neat and it’s a great way to learn about board layout and microcontroller code.

He started by solving a few questions about the display technique. He wanted to use as few LEDs as possible. He settled on just four, and to prevent unnecessary confusion, decided to make sure each type of display (seconds, minutes, hours) would have at least one LED on at a time. Hours are easy enough to display, but with just four bits how can minutes be shown? He uses a 5-minute resolution, always rounding up to the next division of five. This way the first bit will be illuminated on the hour.

A PIC 24F16KA102 microcontroller keeps time using its built-in RTC and a clock crystal. It puts itself into deep sleep mode after displaying the time. The black knob at the bottom is a push-button which resets the chip, waking it up just long enough show the time once again.

Reverse Engineering A Syma 107 Toy Helicopter IR Protocol

Half the fun of buying toys for your kids is getting your hands on them when they no longer play with them. [Kerry Wong] seems to be in this boat. He bought a Syma S107G helicopter for his son. The flying toy is IR controlled and he reverse engineered the protocol it uses. This isn’t the first time we’ve seen this type of thing with the toy. In fact, we already know the protocol has been sniffed and there is even a jammer project floating around out there. But we took a good look at this because of what you can learn from [Kerry’s] process.

He starts by connecting an IR photo diode to his oscilloscope. This gave him the timing between commands and allowed him to verify that the signals are encoded in a 38 kHz carrier signal. He then switched over to an IR module designed to demodulate this frequency. From there he captures and graphs all of the possible control configuration, establishing a timing and command set for the device. He finishes it off by building a replacement controller based on an Arduino. You can see a video of that hardware after the break.

Continue reading “Reverse Engineering A Syma 107 Toy Helicopter IR Protocol”

Making Images And Videos Using A Diy Fluoroscopic X-ray

[Jozef] has been playing around with X-rays. Specifically, he’s been using his own setup to make fluoroscopic images, a type of x-ray photography that allows for video images to be made. If you’ve ever seen those x-ray movies of someone swallowing, that’s fluoroscopy (we’re fans of the other oddities like this video of a skeleton playing the trumpet).

The image above is [Jozef’s] own hand. He exposed it for about one second, filming the event from the opposite side of a Curix Ortho Regular Screen. The screen fluoresces when hit by the particles from an x-ray tube he picked up on eBay. This particular event dosed his hand with about 10 rads. We have no clue as to what levels are safe (and a quick search didn’t enlighten us) so talk amongst yourselves in the comments section.

Of course [Jozef] didn’t stop with still images, he put a turntable between the tube and the screen and took a bunch of x-ray videos of revolving electronics. You’ll find the video embedded after the break.

Continue reading “Making Images And Videos Using A Diy Fluoroscopic X-ray”

Build Your Own Forge Inside A Gallon Paint Can

If you’d like to try your hand with the art of Blacksmithing but don’t want to go all-in on your first project this may be for you. It’s a forge which you can build for under $100. [Mike O’s] creation has some great features, like the option of using the forge as a pass through, and he finds it’s possible to heat metal up to 4″ wide.

He bought an empty paint can at the home store (we guess you don’t want fumes from any paint residue). The business end of the forge is actually the bottom of the paint can. He cut a small opening, then lined the inside of the can with Insulwool, a fabric used as heat shielding. From there the inside was lined with several layers of Satanite Refractory Cement. The same applications were made to the paint can’s original lid, which serves as the back of the forge. This way it can be removed for that pass-through we mentioned earlier.

A propane torch brings the heat for this project. [Mike] mentions that you’re going to want to do the first few firings outside as the cement really stinks until it’s been through a few heating cycles. This creation should get him started but we bet he’ll upgrade to something like this coal forge before long.

[via Reddit]

Control Your House By Moving Your Arms Like You’re Directing Traffic

This home automation project lets you flap your arms to turn things on and off. [Toon] and [Jiang] have been working on the concept as part of their Master’s thesis at University. It uses a 3D camera with some custom software to pick up your gestures. What we really like is the laser pointer which provides feedback. You can see a red dot on the wall which followers where ever he points. Each controllable device has a special area to which the dot will snap when the user is pointing close to it. By raising his other arm the selected object can be turned on or off.

Take a look at the two videos after the break to get a good overview of the concept. We’d love to see some type of laser projector used instead of just a single dot. This way you could have a pop-up menu system. Imagine getting a virtual remote control on the wall for skipping to the next audio track, adjusting the volume, or changing the TV channel.

Continue reading “Control Your House By Moving Your Arms Like You’re Directing Traffic”

The ShockerDrone; A Shocking Mod For The AR Drone


You’ve all seen taser like devices built from disposable cameras. We have seen them mounted to rubber gloves, finger tips, even potato gun ammo! We had not yet seen them on a quadcopter. This was quickly remedied once we had one to play with. Meet the shockerDrone, a Parrot AR Drone with built in shocker attachment.

Continue reading “The ShockerDrone; A Shocking Mod For The AR Drone”