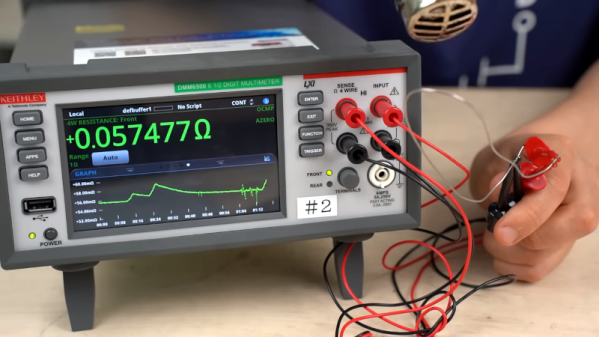
Decades ago, electronic components were not as easy to acquire as they are today. Sure, you could get some things at Radio Shack. But you might not have many choices, and the price would be on the high side. TV repair components were another option, but, again, big bucks. Some places sold surplus parts, which could be cheap. These often came from manufacturing runs where a company bought 10,000 components and made 8,000 products. But today, you can order parts inexpensively and get them on your doorstep in a day or, sometimes, even less. Are these inexpensive parts really any good? [Denki Otaku] likes to find out. In a recent video, he checks out some Amazon-supplied 1% resistors to find out how good they are. You can watch his results below.
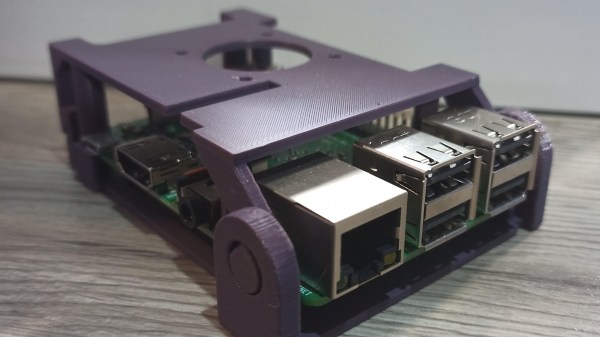
[jcprintnplay] has challenged himself to making Raspberry Pi cases in different ways, and his Fold-a-Pi enclosure tries for a “less is more” approach while also leveraging the strong points of 3D printing. The enclosure prints as a single piece in about 3 hours, and requires no additional hardware whatsoever.
The design requires no screws or other fasteners, and provides a mounting hole for a fan as well as some holes for mounting the enclosure itself to something. All the ports and headers are accessible, and the folding one-piece design is not just a gimmick; in a workshop situation where the Pi needs to be switched out or handled a lot, it takes no time at all to pop the Raspberry Pi in and out of the enclosure.
Microsoft’s 3D Builder has a pretty useful measurement tool for STLs.
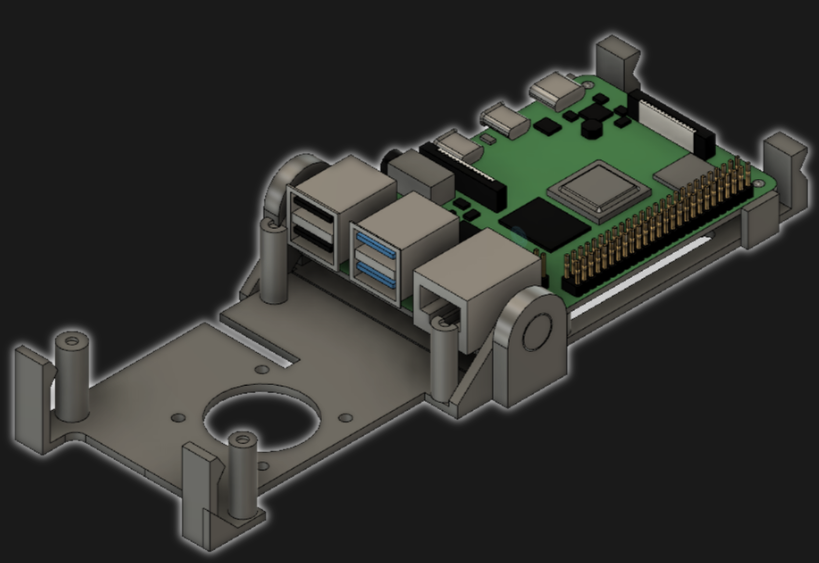
[James] points out that the trick with a print-in-place hinge like this is leaving enough space between the parts so that the two pieces aren’t fused together, but not so much space that the print fails. He doesn’t go into detail about how much space worked or didn’t work, but an examination of the downloadable model shows that the clearance used looks like 0.30 mm, intended to be printed with a 0.4 mm nozzle.
[James] also demonstrates the value of being able to do quick iterations on a design when prototyping. In a video (embedded below) The first prototype had the hinge not quite right. In the second prototype there was a lack of clearance when closing. The third one solved both and shows the final design.