An Achievable Underwater Camera

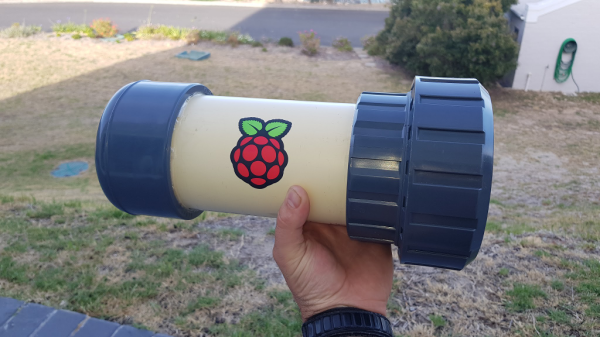
We are surrounded by sensors for all forms of environmental measurement, and a casual browse through an electronics catalogue can see an experimenter tooled up with the whole array for a relatively small outlay. When the environment in question is not the still air of your bench but the turbulence, sand, grit, and mud of a sea floor, that pile of sensors becomes rather useless. [Ellie T] has been addressing this problem as part of the study of hypoxia in marine life, and part of her solution is to create an underwater camera by encasing a Raspberry Pi Zero W and camera in a sturdy enclosure made from PVC pipe. She’s called the project LoBSTAS, which stands for Low-cost Benthic Sensing Trap-Attached System.

The housing is simple enough, the PVC has a transparent acrylic disk mounted in a pipe coupler at one end, with the seal being provided at the other by an expansion plug. A neopixel ring is mounted in the clear end, with the Pi camera mounted in its centre. Meanwhile the Pi itself occupies the body of the unit, with power coming from a USB battery bank. The camera isn’t the only sensor on this build though, and Atlas Scientific oxygen sensor  completes the package and is mounted in a hole drilled in the expansion plug and sealed with silicone sealant.

Underwater cameras seem to have featured more in the earlier years of Hackaday’s existence, but that’s not to say matters underwater haven’t been on the agenda. The 2017 Hackaday Prize was carried off by the Open Source Underwater Glider.

PipeCam: Shallow-Water Exploration With Raspberry Pi

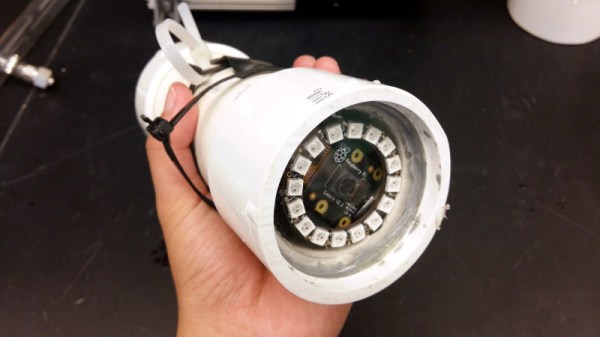
In what began as a personal challenge he issued to himself, [Fred] is in the process of building an underwater camera that’s capable of long-term photography in shallow waters. He’d like it to last about five hours on a charge while taking a photo every five minutes. Ideally, it will be as cheap as possible and constructed from readily available parts. Solving the cheap/available equation would theoretically make the camera easily to replicate, which is the third major requirement.

[Fred] has recently made great strides, both in the circuitry and the capsule design. The latest version uses a Raspberry Pi 3 with a V2 camera module and runs on a 12 V, 2.4 Ah rechargeable lead-acid battery. Everything is mounted on a piece of hardboard that slides into a 110mm piece of PVC. At one end, the camera looks out through a 10mm  acrylic lens fixed into a heavy-duty PVC fitting, and a DS1307 RTC provides a handy clock for shooting time lapses. With a friend’s help, he pressure-tested the housing and found that it can withstand 4 bar without leaking. He is still doing dry tests and trying hard to resist the urge to throw it in the water.

PipeCam is a work in progress, and [Fred] has many ideas for improvements. He’d like to add an Arduino to govern the battery use and provide its vital signs back to the Pi, and add an LDR to decide whether there’s enough light to warrant turning the Pi on to take pictures.

PVC is great for custom capsule building. But if you want to get started with underwater photography a little faster and want to build something instead of just buying a GoPro, try sealing your camera in something that’s already watertight.

Gliding To Underwater Filming Success

If you are a fan of nature documentaries you will no doubt have been wowed by their spectacular underwater sequences. So when you buy a GoPro or similar camera and put it in a waterproof case accessory, of course you take it with you when you go swimming. Amazing footage and international documentary stardom awaits!

Of course, your results are disappointing. The professionals have years of experience and acquired skill plus the best equipment money can buy, and you just have your hand, and a GoPro. The picture is all over the place, and if there is a subject it’s extremely difficult to follow.

[Steve Schmitt] has an answer to this problem, and it’s a refreshingly simple one. He’s built an underwater glider to which he attaches his camera and launches across the submerged vista he wishes to film. Attached to a long piece of line for retrieval, it is set to glide gently downwards at a rate set by the position of the camera on its boom.

Construction is extremely simple. The wing is a delta-shaped piece of corrugated plastic roofing sheet, while the fuselage is a piece of plastic pipe. A T-connector has the camera mount on it, and this can slide along the fuselage for pre-launch adjustments. It’s that simple, but of course sometimes the best builds are the simple ones. He’s put up a video which you can see below the break, showing remarkable footage of a test flight through a cold-water spring.

Continue reading “Gliding To Underwater Filming Success”