Giving An Apartment Keyless Entry

The key for [rybitski]’s apartment is a copy of a copy of a copy, and the landlord lost the original key years ago. The lock itself still works, but opening it with [rybiski]’s key is a chore. He wanted to make it easier to get into his apartment, and with Arduinos and such he figured he could make a keyless entry device for his front door.

After figuring out how to open his deadbolt with an Arduino and a rather powerful servo, [rybiski] looked into wireless control options. He found a keyless entry remote, complete with receiver, that integrated perfectly to just about any microcontroller project.

After mounting the Arduino, receiver, and servo on a piece of plastic, he attached his contraption to the deadbolt. In the video after the break, you can see his key fob remote locking and unlocking the deadbolt, all without jamming an ill-fitting key into the lock.

Continue reading “Giving An Apartment Keyless Entry”

Turning The Hexbug Spider Into A Line-following Robot

[youtube=http://www.youtube.com/watch?v=quDHhuEsxEg&w=470]

You may be familiar with the Hexbug Spider, a small electronic robot toy sold at Target and Walmart for $20. While they’re able to be commanded to move forward, backward, and spin around on a dime, there aren’t any external sensors to make it really exciting. [Eric] sought to remedy this and came up with a line-following board replacement for the Hexbug Spider.

The stock Spider has a small circuit board that allows for the control of two motors with a remote. [Eric] removed this control board and replaced it with his own, powered by a TI MSP430 microcontroller. On this board, [Eric] included a pair of IR LEDs, able to detect the path of a white line drawn on the ground. With just a little bit of code, [Eric] made his $20 Hexbug Spider into a very cool looking robot.

[Eric] figured out how to improve his robot toy, but the power of the MSP430 microcontroller he used doesn’t limit him to only following lines. By using an MSP430 Launchpad, anyone can upload new code to the improved Spider, and even add new sensors to this creepy walking robotic toy.

$4 Volt Meter From A Dollar Store Pedometer

[Paulo]’s got a few solar panels on his shed, and while he does have a fairly nice setup with a battery charge controller, he found himself looking around for a panel voltmeter. Of course you can buy a panel voltmeter for under $20, but [Paulo] wanted something that fit his 4-4-4 plan; his voltmeter should cost under $4, draw less than 4mA, and last for 4 years. The jury is still out on the 4 year qualifier, but he did manage to meet his other goals by repurposing a dollar store pedometer as a voltmeter.

The pedometer in question is a very simple device. After inspecting the PCB, [Paulo] found it operates by looking at a trigger pin and incrementing the number on the display each time the circuit closed. [Paul] designed a very small PIC12F-powered circuit that reads the voltage of his batteries and triggers the pedometer’s LCD for every 10th of a volt. To display 12.6 Volts, [Paulo]’s code triggers the LCD 126 times, for example.

After wiring up the reset button so the display will go back down to zero for each new reading, [Paulo] encased his new volt meter in a plastic box. It’s not exactly a fast way of measuring voltage, but seeing as how that won’t change very fast, it’s the perfect solution for [Paulo]’s solar charger setup.

Steam-powered Pickup Winder

[Valve Child] has been building a few three-string cigar box guitars. Of course he’ll need a few pickups, but three-string guitar pickups aren’t exactly easy to come by. To solve this problem, he’s built a guitar pickup winder powered by a steam engine.

The pickup winder is powered by a Wilesco D20 model steam engine, connected to the actual winding mechanism via a rubber belt. To the right of the bobbin bracket is a mechanism built out of Meccano – Erector sets for us americans – that provides a mechanical counter for the number of wire turns and a wire traverse to keep each layer of wire somewhat even across the width of the bobbin.

Previously, we’ve seen [Valve Child]’s really sweet sounding lap steel build from a log using a hand-wound pickup and a preamp tube as the bridge. It’s questionable if the guitar signal came from this lap steel via the pickup or the microphonic tube, but now [Valve Child] has a really, really good method of improving his pickup production abilities.

Video after the break.

Continue reading “Steam-powered Pickup Winder”

Linux On A Nspire CAS CX Calculator

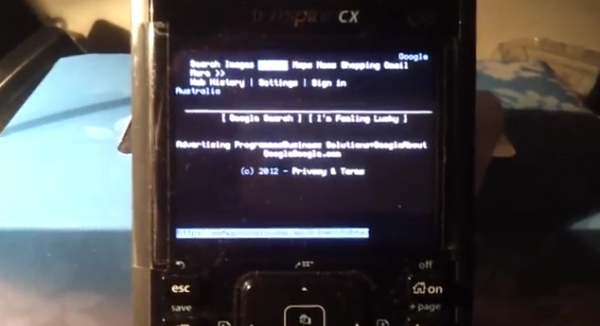
It’s great to see Linux running on a device in a way that was never intended. [tangrs] has successfully run a Linux kernel on the ARM based Nspire CAS CX graphing calculator. He’s developed an in-place bootloader that allows a kernel to be loaded from within the stock Nspire OS. It also allows for peeking and poking at memory for debugging.

[tangrs] also managed to get USB host mode working on the calculator. This allows for a USB keyboard and Wifi dongle to be connected. At this point, the calculator can connect to the internet and browse using a text-based browser: Links. The calculator runs a SSH server for remote access, and graphical browsing is in the works.

It looks like this calculator is on the way to being a handheld Linux device. All of the source for the kernel and bootloader are available on [tangrs]’s Github and updates on his blog. After the break, check out a video of text-based browsing using a full keyboard.

Continue reading “Linux On A Nspire CAS CX Calculator”

Lucky Cat Hit Counter

[Jan] was looking for a way to monitor web site hits while sitting on the couch. This lead to the Lucky Cat Hit Counter. The hack gives a stock Lucky Cat some new hardware: a servo, a RGB led, a light sensor, and a 7 segment display. The added components are controlled by an Arduino Ethernet.

The Arduino Ethernet is set up as a web server. When a visitor fetches [Jan]’s site, a GIF is requested from the Arduino. This trigger changes the RGB LED color, increments the seven segment display, and of course, makes the cat wave by actuating the servo. The light sensor is used to make the cat silent at night. When the light value is below a threshold, night mode is engaged and the cat doesn’t wave.

After the break is a video walk through of the Lucky Cat receiving some HTTP requests.

Continue reading “Lucky Cat Hit Counter”

WAV Music Player Uses An ATtiny

We’re very accustomed to seeing small media player builds, but [txyz]’s ATtiny-powered audio player is one of the smallest and most feature-packed we’ve seen.

The audio player is powered by the very small and very inexpensive ATtiny2313. The music is stored on an SD card – a maximum of 2GB of WAV files recorded in mono at 32kBps at an 8-bit depth. On boot, the ATtiny loads the first audio file from the card and outputs it through a speaker connection.

To make things interesting, [txyz] made the audio player controllable via a serial connection. Once a small FTDI adapter is connected to the player, [txyz] can connect to it through a terminal and run through his playlist.

Even though the player is controllable through a serial port, there are a few pins left over that [txyz] could attach to buttons, if so desired. With a battery pack, this would turn his music player into the homebrew equivalent of an iPod shuffle. With the low component count, it might actually be cheaper than the shuffle, if [txyz]’s time is free, that is.

Video after the break.

Continue reading “WAV Music Player Uses An ATtiny”