After months of promises, the Raspberry Pi camera is finally heading out to hackers and makers across the world. Of course the first build with the Pi cam to grace the pages of Hackaday would be removing the IR filter, and it just so happens [Gary] and his crew at the Reading hackerspace are the first to do just that.
As [Gary] shows in his video, the process of removing the Pi cam’s IR filter is extremely fiddly. Getting the filter out of the camera involves removing the sensor, gently cutting it open with a scalpel, and finally gluing the whole thing back together with a tiny bit of superglue. Not for the faint of heart, and certainly not for anyone without a halfway decent bench microscope.
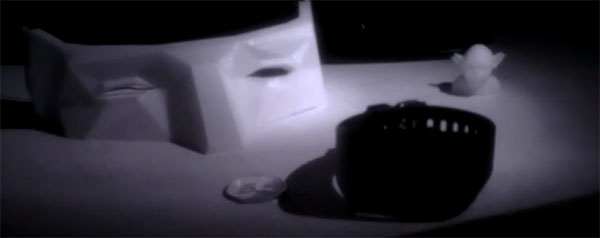
If you’re looking for a Raspberry Pi-powered security camera, game camera, or something for an astronomy application, this is the way to make it happen. You might want to be careful when removing the IR filter; [Gary] broke one camera on their first attempt. They got it to work, though, and the picture quality looks pretty good, as seen in the videos below.
[youtube=http://www.youtube.com/watch?&v=QlYKBdueH-Y&w=580]
[youtube=http://www.youtube.com/watch?&v=ZW1YQkkZOLE&w=580]
[youtube=http://www.youtube.com/watch?&v=SHWmEBRKHZo&w=580]


Nice work on getting the filter off but the video doesn’t really show anyone anything of any use with regard to dismantling it,not having a go, just pointing out that the bits where the host said ‘as you can see’, you couldn’t actually see anything, either the thing you’re looking at was too small to give any kind of detail or it was blown out by too much light or someones hands were in the way.
The sound of the filter being removed in the 2nd attempt sounded like crunching glass, something you need to be incredibly careful of when attempting filter removal, you don’t want that getting anywhere near the sensor, or any dust, hair etc. so doing this in a clean environment is essential.
I would probably look at getting the filter warm in some way to see if that will help removing it, depending on the type of glue used to attach it in the first place.
I would be incredibly reluctant to use superglue anywhere near the sensor once the filter is removed.
Look for dslr IR filter removal on google, it’s a well trodden path in astronomy circles, you may well gain some insight from those + an idea at some interesting uses/projects for a pi camera.
Its quite hard to film something fiddly like that, they haven’t done a bad job. Check out http://www.raspberrypi.org/archives/4088 there is some more info on the process there.
I appreciate it’s not easy, perhaps stills would’ve been a much better way to get the information out? the link you’ve given doesn’t give any more information than is actually here.
BTW. I’m not being picky, This is a great project and it’s always cool when someone does stuff like this. I would just like to see more information for people out there, I *know* how difficult it is to remove filters from camera sensors, I wouldn’t want anyone to break theirs attempting this :-)
This is a fixed focus cellphone module, removing the filter from one of those usually only involves unscrewing the lens and prying the filter loose from a couple of dots of glue.
Digital cameras with larger sensors, focusing mechanics, shutters etc. are harder, those filters are usually held in place with more fiddly mechanics, and you need to get past all the other stuff without damaging it.
It was quite fidley and we had limited resources it was filmed via a laptop and it wasn’t planned. We felt it was important to get the info out there and let others make a better video. We done this conversion several times and I can confirm no glass was harmed during this video… The conversion before… Thats a different story!
So a few tips… and we take no responsibility for you hurting yourself (if you haven’t got adequate experience ask someone to help you or visit a hackspace) or damaging your camera! IR light will damage your eyes so research that too before starting.
When taking off the enclosure you will need the finest blade scalpel you can get your hands on a stanley knife won’t do it. You are not cutting you are scoring and prying. So be careful with the blade!
You need to sit the camera on its side (with the ribbon cable denoting the bottom of the camera) then slowly run the blade through the TOP of the enclosure between the plastic and metal plate. If you use too much force you will go through and damage the sensor – it doesn’t take much. Essentially you need separate the units without the blade entering the enclosure, if the blade goes inside the enclosure you’ve had it. Once the top is scored, do the sides and then you should be able to prise the unit open very gently from the top being biased near a side edge.
The next factor you have to deal with is dust and dirt, if you get any on the sensor you’ll never get it all off. We had this issue on our third conversion and a compressor got all but a tiny dot off the sensor which we’ll live with but the rest were fine.
When you remove the enclosure there are 4 very fine recesses in each corner a very sharp fine scalpel can carefully prise it out. This is for most a one way conversion so it doesn’t matter if it cracks but if it shatters you may get dust in the lens or even scratch it.
We then assembled the units back together using the smallest amount of superglue possible – on the outside edges one the unit had been held in place (you may want to try the camera before gluing it?).
We didn’t need to do this step but you can then lightly score the glue tack on the outside lens ring and with a pair of pliers adjust the ring- be careful not to over tighten as you’ll crack the sensor.
Barnaby did on one camera we converted sand the enclosure down just under a mm before gluing it in place, this did allow much longer focal distances but the standard conversion was more than okay for us.
Hope this helps and someone can post up a more detailed pics/movie – ours didn’t come out so great.
Barnaby done the demo movies which are fab – thanks!!
Good luck
Gary
I have one comment for this, do not use superglue anywhere near optics, it tends to evaporate and condense on all surfaces in reach causing a milky white coating.
Use some other type of glue such as contact adhesive, polyurethane rubber glue or any other glue who’s vapors don’t coat nearby surfaces.
Stay away from silicone (it will make it impossible to use any other glue on the same area later) and hot glue (breaks down fast in sunlight, and tends to fall off spontaneously)
Lastly, this isn’t adding nightvision, it’s increasing the IR sensitivity, big difference, it still requires an IR light source for you to see in low light.
The RasPi really is the new Arduino… A simple IR filter removal gets featured just because it’s for the RasPi…
No it’s far FAR better than an arduino because it runs an actual OS. You can do things that Arduinos could never ever do. Like have ethernet for under $40.00
This feature is Removing the IR filter from the recently released Raspberry Pi Camera Module… it’s not being tagged with the “Raspberry Pi hype”… take a look at the Raspberry Pi page for the camera… hmmm looks like a similar video about removing the IR filter. http://www.raspberrypi.org/archives/tag/camera-board
I had no idea a standard CMOS sensor could pick up heat (mid-infrared?) I guess new backside-illuminated sensors have a much higher sensitivity than the last webcam I pulled apart.
I’m a little surprised that it wasn’t completely saturating without a visible light filter, I assume the crappy framerate/ghosting is a result of the sensor automatically compensating.
I have pulled the filter from several cameras, one cheap VGA cellphone/webcam module, an early 3Mpix compact and a current cheap MILC, they all start to detect matte metal objects (soldering iron) around 400 celsius.
The crappy framerate is due to low light, and the ghosting looks like the storage method rather than the camera sensor.
Now it can be used to see through clothing.
Yes if the lens is a plastic that is transparent to IR. Glass is not – http://www.youtube.com/watch?v=wsjjdwLFNIM
People have been making IR photos using glass lenses for decades you know, and this linked video is far-IR not the kind a normal cam like the camera we are talking about which is near-IR.
Far-IR cams are a few thousand bucks incidentally and yeah those have issues with glass.
But no, don’t expect it to see clothes ‘Amazed’
I a word.
‘See through’ I meant to say.
That’s a myth with a small grain of truth, a grain that has been turned in to several grain ships by the media.
A normal camera without the IR filter can see through very specific clothes, such as very thin dark colored synthetic clothes. Basically such clothes that would already be see-through if they weren’t colored dark. Think black pantyhose or very thin black silk.
This is because most pigments used in coloring clothes are transparent to IR.
Yes but some plastics are IR opaque like nylon, so dark clothing with a high percentage of nylon in them are not IR transparent.
Opaque or not doesn’t really matter since it’s made from lots of small fibers it would scatter light either way.
You can basically see shapes very close to the cloth as you would any object close to an opaque film. So let me add to the previous that the clothes also have to be tight…
Night vision. Meh, that was interesting news in the ’90s. Wait, Raspberry Pi night vision?! Wooow amazing, new hotness, this changes everything, revolutionary!!!1
…Fuck Raspberry Pi. It’s a tacky piece of low quality hardware.
So, I can get a RasPi and the 2 MP camera, and then do this hack, and then hack in a varifocal lens mount, add a motorized varifocal zoom lens and IR filter changer… or just go buy a damn IP camera…
Pretty much. The only thing you don’t get is blog cred from riding the hype train.
Nice hack! Way better than the complete lack of hacking and lack of intelligence by the lazy haters posting comments. I would suggest these jealous noobs put their hacker skills where their mouth is but then we’d get a bunch of crappy homemade cards for mommy. Get a life you negative nancys. Go troll a video game or something!
Again, thanks for the hack!
I’ll second the no superglue comment, this cost me an expensive Bluray writer diode as once the fumes got on the window it burned itself out within minutes.
I even tried decapping it but when it burned the window the diode was evidently heat damaged because it never worked at its full power and eventually went open circuit.
Better off using PVA glue, that stuff also sets hard and is somewhat nicer to optics.
I tried the same thing under a video microscope for more detail. I ended up shorting the darned camera out by accident after the filter was removed, but the procedure worked. 3rd time will be the charm….
http://youtu.be/HtjkNyEt4xU
If you are unable to film it why bother showing something that provides no use whatsoever?