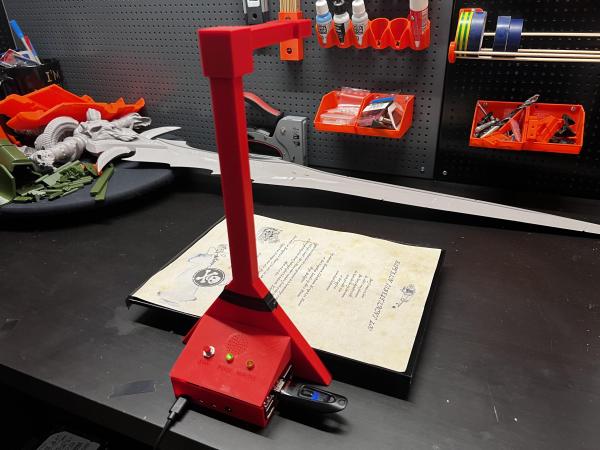
A red 3D-printed Raspberry Pi-based document scanner

Raspberry Pi Scanner Digitizes On The Cheap

It’s pretty important in 2024 to be able digitize documents quickly and easily without necessarily having to stop by the local library or buy an all-in-one printer. While there are plenty of commercial solutions out there, [Caelestis Cosplay] has created a simple document scanner that takes documents, as [Caelestis Cosplay] puts it, from papers to pixels.

The build is probably what you’re expecting — it’s essentially a Raspberry Pi (in this case a 4B), a V2 Pi camera, and a handful of custom 3D-printed parts. [Caelestis Cosplay] says they had never designed anything for printing before, and we think it looks great. There’s also a buzzer to indicate that the scan is starting (one beep) or has completed (two beeps), a ‘ready’ indicator, and a ‘working’ indicator.

Everything you’d need to build your own is available over on Instructables, including document scanner and controller scripts. Be sure to check it out in action after the break, and see it quickly scan in a document and put it on a thumb drive.

Looking for a 3D scanner? Check out the OpenScan project.

Continue reading “Raspberry Pi Scanner Digitizes On The Cheap”

New Raspberry Pi Camera With Global Shutter

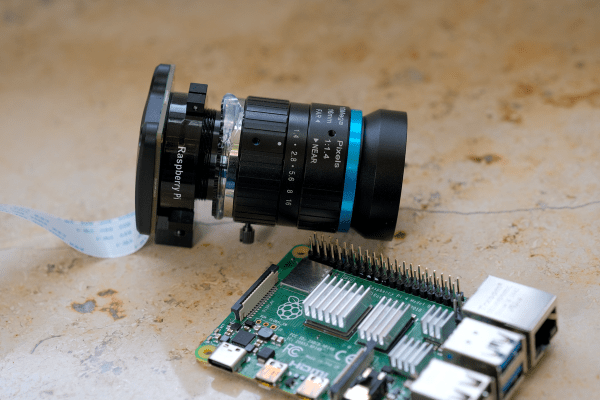
Raspberry Pi has just introduced a new camera module in the high-quality camera format. For the same $50 price you would shell out for the HQ camera, you get roughly eight times fewer pixels. But this is a global shutter camera, and if you need a global shutter, there’s just no substitute. That’s a big deal for the Raspberry Pi ecosystem.

Global vs Rolling

Most cameras out there today use CMOS sensors in rolling shutter mode. That means that the sensor starts in the upper left corner and rasters along, reading out exposure values from each row before moving down to the next row, and then starting up at the top again. The benefit is simpler CMOS design, but the downside is that none of the pixels are exposed or read at the same instant.

Continue reading “New Raspberry Pi Camera With Global Shutter”

Do You Need The Raspberry Pi Camera Module V3?

This month came the announcement of some new camera modules from Raspberry Pi. All eyes were on version 3 of their standard camera module, but they also sneaked out a new version of their high quality camera with an M12 lens mount. The version 3 module is definitely worth a look, so I jumped on a train to Cambridge for the Raspberry Pi Store, and bought myself one for review.

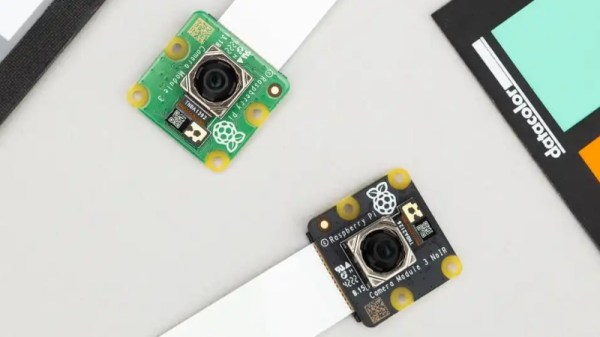
There’s nothing new about a Pi camera module as they’ve been available for years in both official and third party forms, so to be noteworthy the new one has to offer something a bit special. It uses a 12 megapixel sensor, and is available both in autofocus and wide angle versions in both standard and NoIR variants. Wide angle and autofocus modules may be new in the official cameras, but these are both things which have been on the third-party market for years.

So if an autofocus camera module for your Pi isn’t that new, what can we bring to a review that isn’t simply exclaiming over the small things? Perhaps it’s better instead to view the new camera in the context of the state of the Pi camera ecosystem, and what better way to do that than to turn a Pi and some modules into a usable camera! Continue reading “Do You Need The Raspberry Pi Camera Module V3?”

ERRF 22: Building A Library Of Filament Colors

If you’ve ever paged through the color samples at the hardware store trying to match a particular color, you know how hard it can be. Not only are there nearly limitless color variations, but each manufacturer has their own formulas and tints. Often times, the only way to get the exact color you need is to get it custom mixed.

Unfortunately, that’s not really an option when it comes to filament for your 3D printer. Will that roll of orange from Hatchbox actually match the orange from Overture? That’s where the Filament Librarian comes in. Created by [Joe Kaufeld], the project aims to catalog and photograph as many 3D printer filaments as possible so you can see exactly what you’re getting.

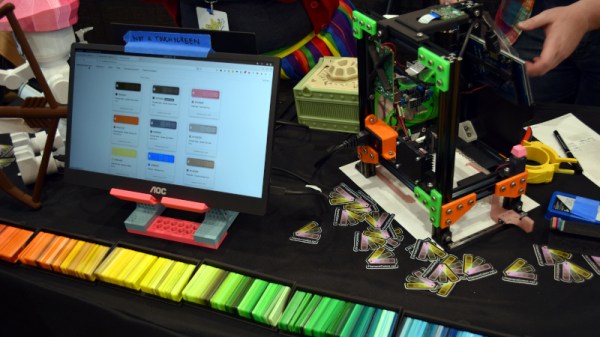
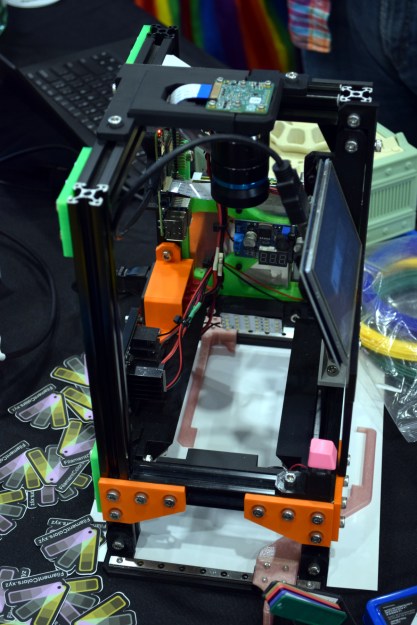
Now of course, if it was as easy as looking at pictures of filament swatches on your computer, you wouldn’t need this service to begin with. So what’s the trick? A custom automated camera rig, powered by the Raspberry Pi, is used to position, light, and photograph each filament sample in the library. So while [Joe] can’t promise your monitor is showing a perfect representation of each filament’s color, you can at least be sure they will all look correct in relation to each other. So for example, the site can help you figure out if the local Microcenter stocks anything that comes close to matching Prusament’s Galaxy Silver PLA.

[Joe] brought a collection of his samples along with his slick camera setup to the 2022 East Coast RepRap Festival so attendees could see first-hand how he adds a new filament to the database. With an easy-to-use touch-screen interface, it takes just seconds to get the camera ready for the next shot.

Now that he’s got the hardware and the procedure down, [Joe] is asking the community to help out by providing him with filament samples to process. It doesn’t take much: all he asks is you snip him off a couple meters of filament, write down what it is and who makes it on a pre-made form, and drop it in the mail. If you’re in the US, you can send it directly to his address in Indiana, and for those on the other side of the globe, he’s got a drop point in the Netherlands you can use.

We love a good passion project here at Hackaday, so here’s hoping that the Filament Librarian receives plenty of new filament samples from all over the planet to feed into that fancy camera setup of his.

A Pi Camera To Be Proud Of

The Raspberry Pi HQ camera has appeared in a variety of builds since its introduction back in 2020, and has brought with it many opportunities for photographic projects to compete with the professionals. The latest we’ve been sent is from [Kevin McAleer], who has taken the camera with a full-size Pi and clothed it in a case very similar to the crop of mirror-less compact cameras.

Inside the box is a Waveshare touchscreen that fits on the GPIO header, and a NanoWave 5000 mAH USB battery pack. The camera module fits on the front of the unit, with the C-mount ready to take a lens. Software is still a work in progress and is promised to be a Python script controlling the various camera programs. There are enough Pi camera projects for software to be a matter of choice and taste.

We like the form factor and we like the use of the very compact NanoWave battery, so we think this is a design with some possibilities. Perhaps a cover over the Pi ports might be of use though for general robustness in the face of everyday photography. The question remains though, whether it can come close to the performance of even a budget mirror-less compact camera, and we’re guessing that will depend as much on the operator skill, lens quality, and software capabilities as it does on the Pi HQ module. We look forward to seeing what comes of this project, but meanwhile you can see a video with all the details below the break.

Continue reading “A Pi Camera To Be Proud Of”

A robot that detects whether you are awake and gently taps you if not.

Wake-Up Robot Does It Gently

For hundreds of years, people have fallen asleep while reading in bed late at night. These days it’s worse, what with us taking phones to the face instead when we start to nod off. At least they don’t have pointy corners like books. While you may not want to share your bedroom with a robot, this wake-up robot by [Norbert Zare] may be just the thing to keep you awake.

Here’s how it works: a Raspberry Pi camera on a servo wanders around at eye level, and the Pi it’s attached to uses OpenCV to determine whether those eyes are open or starting to get heavy. The bot can also speak — it uses eSpeak to introduce itself as a bot designed not to let you sleep. Then when it catches you snoozing, it repeatedly intones ‘wake up’ in a bored British accent.

We were sure that the thing was designed to slap [Norbert] in the face a la [Simone Giertz]’s robot alarm clock, but no, that long-fingered hand just slowly swings down and gently taps [Norbert] on the arm (or whatever is in the path of the slappy hand). Check out the short demo and build video after the break.

Do you want to be awoken even more gently? Try a sunlight lamp. We’ve got dozens in stock, but this one gradually gets about as bright as the sun.

Continue reading “Wake-Up Robot Does It Gently”

Using A Laser To Blast Away A Bayer Array

A Bayer array, or Bayer filter, is what lets a digital camera take color photos. It’s an array of tiny color filters that sit on top of a camera’s CCD. The filter makes it so that each sub-pixel in the image sensor only sees red, green, or blue light. The Bayer filter is an elegant tool that gives us color digital photos, but what would you do if you wanted to remove one?

[Les Wright] has devised a way to remove the Bayer filter from the Raspberry Pi Camera. Along with filtering red, green, and blue light for their respective sensors, Bayer filters also greatly reduce the amount of UV and IR light that make it to the CCD sensor. [Les] uses the Raspberry Pi camera in his Pi-based Spectrometer, and he wants to remove the Bayer filter to improve and expand its sensitivity.

Of course, [Les] isn’t the first one to want to do this. Some have succeeded in physically scratching the filter off of the CCD, but because the Pi Camera has vital circuitry around the outside of the sensor, scratching the filter off would likely destroy the circuitry. Others have stripped it off using chemical means, so [Les] gave this a go and destroyed no small number of cameras in his attempt to strip the filter off with solvents like DMSO, brake fluid, and industrial paint stripper.

A look at the CCD, halfway through the process.

Inspired by techniques used in industry, [Les] eventually tried to use a several-kW nitrogen laser to burn off the filter (which seems appropriate given his experience with lasers). He built a rig that raster scans the laser across the sensor using stepper motors to drive micrometer bases. A USB microscope was included to allow progress to be monitored, and you can see a change in the sensor’s appearance as the filter is removed.

After blasting off the Bayer filter, [Les] plugged his improved camera into his home-built spectrometer and pointed it outside. The new camera gives the spectrometer much more uniform sensitivity and allows [Les] to see further into the IR and UV bands. The spectrometer can even detect the Fraunhofer lines—subtle dips in the sun’s spectrum from absorption by molecules in the atmosphere.

This is incredible for a DIY setup and instrument, and we can’t wait to see what [Les] does next to improve his measurements. If your spectrometry needs are more mass than visual, take a look at this home-built mass spectrometer. Home spectrometers aren’t just for examining light spectra—they can also be used to judge the ripeness of fruit!

Continue reading “Using A Laser To Blast Away A Bayer Array”