By far the most popular use for a Raspberry Pi is an emulation console. For an educational device, that’s fine – someone needs to teach kids how to plug a USB cable into a device and follow RetroPi tutorials on the Internet. These emulation consoles usually have one significant drawback: they’re ugly, with wires spilling everywhere. Instead of downloading a 3D printed Pi enclosure shaped like a Super Nintendo, [depthperfection] designed his own. It looks great, and doesn’t have a donglepocalypse hanging out the back.
The biggest factor in building an enclosure for a Pi Zero is how to add a few USB ports. There’s only one USB port on the Pi Zero, although if you’re exceptionally skilled, you can solder a hub onto the test points on the bottom of the board. This stackable USB hub solves the problem with the help of pogo pins for the power and USB pair. It’s only $17 USD, too.


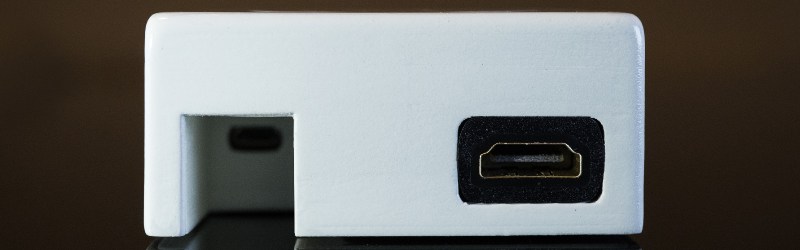
With the USB and power sorted, [depthperfection] set out to design an enclosure. This was modeled in Fusion360, with proper vent holes, screw bosses, and cutouts for all the ports. It’s designed to be 3D printable, and with a little ABS smoothing, this enclosure looks great.
For software, [depthperfection] turned to Recallbox, a retrogaming platform that also doubles as a media player. It’s simpler than a RetroPi installation, but for playing Super Mario 3, you don’t really need many configuration options. This is a great project that just works and looks good doing it. The world — and the Raspberry Pi community — needs more projects like this, and we’re glad [depthperfection] sent this one in.


It’s nice looking and well designed, but the zero doesn’t offer the best emulation performance? Try emulating an N64 and you will have a bad time!
I get what you are saying but it also depends on which systems you like, The best emulation box in the world will be different for different people. Me I like N64 games too so this isn’t for me however the design is really great. It looks tidy and almost looks commercial (need some tacky brand splashed over it).
Yeah. I don’t mean to belittle this guy’s effort, but this seems like the wrong use for a Zero.
By the time he’s spent the money for that extraordinarily expensive USB hub and the mini-HDMI adapter, you’re most of the way to the price of a Pi 3, which comes with both of those items effectively “built-in”, plus onboard wifi, bluetooth, ethernet, double the RAM, and 4x the CPU power. And the size difference is negligible, once you embed the hub and adapter inside the case as he’s done anyway.
For 8bit/16bit era emulation the Pi Zero W with bluetooth controllers works great. No need for extra USB ports.
Then you charge your controllers in some other device USB ports.
Why skimp and limit yourself to 8/16 bit when you can go all the way to 128?! :)
I get it, the Zero W is $10 and the 3B is $40, but the difference in computing power is massive. Sysbench prime to 10,000 on Pi Zero W is in the order of 9 minutes, on the Pi 3 it’s about 3 minutes. If you go multicore on the Pi 3, you’re at less than a minute.
I know synthetic benchmarks aren’t everything, but if you decide to go further in your emulation or if you re-purpose the Pi for something else, you don’t feel like you’ve made a mistake.
The Pi Zero W is great for embedded or single use projects where you need low power low heat but the emulation, media center or portable PC projects are best left to the Pi 3 in my opinion.
what about the Zero W?
There’s a wealth of resources available allowing anyone to get a little creative with hardware and case design. The ability to turn a vision into a tangible object was something that had me toying with building my own retro Pi experiance a couple of years ago. The end result being used primarily for ZX81 emulation. https://tinyurl.com/kgyjczp Nothing ground breaking about the project, it was kust for some fun, t also owes a large debt to the works of others.
Tell me, have you heard the good word of St. Benchoff? He shall lead us into salvation and eh doesn’t afraid of anything.
Come, my child, and take this idol of St. Benchoff. Go Forth and Reverse Polish.
The tipline is always open.
The authors only have so much time and their own interests two investigate. Find a well detailed and/or interesting project and you’ll probably get it on HaD.
*to. Ugh.
More like, “by far the most popular use for a filler post are Raspberry Pi running and emulation software.”
Bleh, just a pi.
https://www.youtube.com/watch?v=bhWTfATkg6w
https://www.youtube.com/watch?v=_vMHeCARaYg
Looks like the ‘Pi emulating XYZ’ is the new ‘look I blink a LED with Arduino’. :'(
Hey! “So many ways to blink LEDs, so little time!” ;) Understand your sentiment, though, since I’ve been there (i.e. reading all these posts about blinking and then full stop) – blink by poll, interrupt, headed, headless, switch,…
Glad that [depthperfection] enjoyed this project. Reminds me of the old rugby scrum sentiment: never mind the ball, let us get on with the game.
This thing is ugly as a “retro” console (too modern) but slick as a media center. Now add an embossed Kodi/OSMC logo on the top and (re)move the vent holes on the sides.
There could be a built-in WiFi adapter (Zero W anyone?), an IR sensor, a microcontroller to switch the Pi on or off using a button and maybe a display connected to that microcontroller. I’m doing something similar with a Pi 3 and a STM8 retrofitted into a broken DVD player, using the existing case, display, remote and power supply. (No, I won’t use it for game emulation, and I’m not spending $20 on a three-port USB hub.)
Also, Benchoff wrote this post. Aside from “the most popular use for a Raspberry Pi is an emulation console”, RetroPie and Recalbox are (of course) spelled incorrectly. Hopefully he didn’t mention any media center software (OMSC? Kody? OpenELC?).
And a kid doesn’t need help to plug a USB cable in. He can plug it into his phone for charging so he should be able to plug it into the Pi too.