Cheap Modules Upgrade Home Security System

[gw0udm] had an ancient monitored alarm system fitted to their home, and decided it was time to upgrade to something a little more modern. They chose a system from Texecom, but when it came time to hook it up to their computer, they were alarmed at the costs – £40 for what amounted to a USB-to-Serial cable! There were other overpriced modules too. But [gw0udm] wanted to upgrade, so it was time to hack the system.

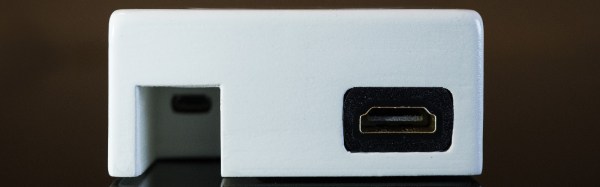
The first step was grabbing a £4 USB-to-Serial board and wiring it up – a simple job for the skilled hacker.  As we always say – everything speaks serial. [gw0udm] then set their sights higher – they wanted the Ethernet interface but weren’t about to cough up the coin. After some research, it was determined that a Raspberry Pi could be used with a utility called ser2net with the existing serial interface to do pretty much the same job. It was a simple matter of figuring out the parity and messaging format to get things up and running.

From there, the project moves on to tackling the creation of a GSM module for monitoring in the absence of a local network, and on flashing the firmware of the system itself. It’s great to see a project continually grow and expand the functionality of a product over time.

We see a lot of security systems here at Hackaday – high prices and proprietary hardware tend to inspire the hacker spirit. Check out this reverse engineering of an obsolete 1980s system, resplendent with Eurostile font.

Converting An Easy Bake Oven To USB

[Jason] converted an Easy Bake Oven to USB. If you have to ask why you’ll never know.

Easy Bake Ovens have changed a lot since you burnt down your house by installing a 100 Watt light bulb inside one. Now, Easy Bake Ovens are [bigclive] material. It’s a piece of nichrome wire connected through a switch across mains power. Part of the nichrome wire is a resistor divider used to power a light. This light assembly is just a LED, some resistors, and a diode wired anti-parallel to the LED.

This is a device designed for 120 V, but [Jason] wanted it to run on USB-C. While there are USB-C chargers that will supply enough power for an Easy Bake Oven, the voltage is limited to 20V. Rather than step up the USB-C voltage, [Jason] added some nichrome wires to divide it into six equal segments, then wired all the segments in parallel. This lowers the voltage by one sixth and increases the current by a factor of six. Good enough.

The power supply used for this hack is the official Apple 87W deal, with a USB-C breakout board (available on Tindie, buy some stuff on Tindie. Superliminial advertising) an Arduino Uno connected to the I2C pins. A few bits of code later, and [Jason] had a lot of power coming over a USB cable.

With the Easy Bake Oven fully converted, [Jason] whipped up a batch of cookie mix. After about 15 minutes the cookies crisped up and started to look almost appetizing.

While the result is weird — who on Earth would ever want a USB-powered Easy Bake Oven — this is honestly a fantastic test of [Jason]’s USB-C PHY breakout board. What better way to test a USB-C than a big resistive load, and what better resistive load is there than an Easy Bake Oven? It’s brilliant and hilarious at the same time.

Hackaday Links: March 19, 2017

This is from the Daily Fail, but a working Apple I is going up on the auction block. It’s expected to bring in $317,693 USD. In other news, we’re going to be at the Vintage Computer Festival East at the end of the month. There is usually an Apple I there.

The most popular crowdfunding campaign of the month is Lego tape. It’s an adhesive-backed tape with studs on the top, allowing you to clip Lego pieces into place. How easy would this be to create at home? It’s really just a silicon mold and some 3M stickytape. Anyone up for a home casting challenge?

You guys know the Hackaday Overlords have a Design Lab, right? What’s a Design Lab? It’s a place filled with tools where we allow residents to come in for free, build stuff, give them training, and let them keep all their IP. It’s like a hardware accelerator, but focused on Open Source hardware. It is our gift to the community and we ask nothing in return. But that’s not important right now. We’re doing shots.

2017 will be the first year Maker Faire will have three flagship faires. New York is a given, as is the Bay Area. and A few weeks ago, Chicago grabbed the third flagship faire. If you’ve already bought tickets and scheduled your trip, terrible news: the Chicago Maker Faire has been postponed until late fall.

Flip clocks are cool. What’s a flip clock? The clock in Groundhog Day, or a bunch of flaps, gears, and a synchronous motor that displays the time. You know what’s not cool about flip clocks? They’re usually stuffed in horrible 70s plastic enclosures painted Harvest Gold or Avacado. [bentanme] found a flip clock and stuffed it in a glass jar. It’s kept in place by a few 3D printed parts that ingeniously keep the clock from moving around while still allowing you to see the gears. Neat.

Animated Picture Frame Needs Charging Once Per Month

[Kyle Stewart-Frantz] took one look at a black and white photo of a mountain stream, and decided it was way too boring. How much cooler would it be if the water was moving! Like any good hacker worth his weight in 2N2222s, [Kyle] set out to make his idea a reality. After discovering some pricey options, he found a Kindle Paperwhite with a display that had decent resolution and 16 levels of grey. But would 16 levels be sufficient to produce an animation that’s pleasing to the eye?

After stumbling upon a community dedicated to hacking Kindles, [Kyle] got to work. Using a custom Amazon command called eips, he was able to access the display’s memory location and paint images to it. The next trick was to write a script that called the command multiple times to produce a GIF-like animation effect.  This… didn’t work so well. He then found some code from [GeekMaster] (thanks for the tip!) that ran a specialized video player on the Kindle that used something called ordered dithering. After a few more tweaks, he got everything working and the end result looks like something straight out of the world of Harry Potter.

The animated picture frame can run for three to four weeks between charges. This is a hack that would make a great gift and look nice in your office. If you make one, be sure to put the skull and wrenches on it first and let us know!

Continue reading “Animated Picture Frame Needs Charging Once Per Month”

The Best Pi Emulation Console You Can Build

By far the most popular use for a Raspberry Pi is an emulation console. For an educational device, that’s fine – someone needs to teach kids how to plug a USB cable into a device and follow RetroPi tutorials on the Internet. These emulation consoles usually have one significant drawback: they’re ugly, with wires spilling everywhere. Instead of downloading a 3D printed Pi enclosure shaped like a Super Nintendo, [depthperfection] designed his own. It looks great, and doesn’t have a donglepocalypse hanging out the back.

The biggest factor in building an enclosure for a Pi Zero is how to add a few USB ports. There’s only one USB port on the Pi Zero, although if you’re exceptionally skilled, you can solder a hub onto the test points on the bottom of the board. This stackable USB hub solves the problem with the help of pogo pins for the power and USB pair. It’s only $17 USD, too.

With the USB and power sorted, [depthperfection] set out to design an enclosure. This was modeled in Fusion360, with proper vent holes, screw bosses, and cutouts for all the ports. It’s designed to be 3D printable, and with a little ABS smoothing, this enclosure looks great.

For software, [depthperfection] turned to Recallbox, a retrogaming platform that also doubles as a media player. It’s simpler than a RetroPi installation, but for playing Super Mario 3, you don’t really need many configuration options. This is a great project that just works and looks good doing it. The world — and the Raspberry Pi community — needs more projects like this, and we’re glad [depthperfection] sent this one in.

Do You Know The CR816?

Hackaday readers (and writers) are an odd bunch. While the rest of the tech press falls over for the newest, shiniest CPU on the market, we’re the type who’s more interested the unexplored dark corners of metaphorical Silicon Alley. So when someone comes to us with a good writeup of a chip that we’d never heard about, we’re all ears.

[Remy]’s writeup of the CoolRISC 816 microcontroller CPU makes it obvious that he shares our taste for the esoteric. It has a 22-bit “RISC” instruction set. It has a dedicated 8-to-16 bit multiplier. Some of the instructions are so un-reduced that [Remy] calls bunk on its RISC claims. All of the operations, including the un-RISC ones, run in a single cycle. And the CoolRISC does this by cheating — the last stages of the pipeline run not on every clock tick, but on the rising and falling flanks of the clock respectively.

Why all these odd bits? They make the job of the assembly programmer, or compiler designer, a lot easier. With all single-cycle instructions, counting cycles is the same as counting lines of code. The not-really-RISC instructions are great for compiling C into. So what happened? [Remy] speculates that the MSP430, another not-really-RISC microcontroller that came out about the same time, ate the CoolRISC’s lunch. The MSP430 is a 16-bit machine, and chances are good that you’ve heard of TI. The same may not be true of Xemics, maker of the CoolRISC.

But still it’s nice to have someone saying the eulogy for this strange little chip. Or maybe the reports of the CR816’s death are premature — it seems to be inside TI’s bq20x80 chip that’s used in a number of battery power monitors. Oh, the irony! Indeed, watch [Charlie Miller] tear into a battery and find a CR816.

Have any of you used a CR816? What’s the strangest microcontroller architecture that you’ve ever seen?

Morbid Battery Uses Blood Electrolyte

Building a battery out of common household products is actually pretty simple. All that is required is two dissimilar metals and some sort of electrolyte to facility the transfer of charge. A popular grade school science experiment demonstrates this fairly well by using copper and zinc plates set inside a potato or a lemon. Almost anything can be used as the charge transfer medium, as [dmitry] demonstrates by creating a rather macabre battery using his own blood.

The battery was part of an art and science exhibition but it probably wouldn’t be sustainable on a large scale, as it took [dmitry] around 18 months to bank enough blood to make a useful battery. Blood contains a lot of electrolytes that make it perfect for this application though, and with the addition of the copper anode and aluminum cathode [dmitry] can power a small speaker which plays a sound-generating algorithm that frankly adds a very surreal element to the art installation.

While we can’t recommend that you try to build one of these batteries on your own without proper medical supervision, the video of the art piece is worth checking out. We’ve seen a few other hacks that involve blood, but usually they are attempting to use it for its intended purpose rather than as an alternative energy source.