RetroPie NES Clock Tells You When It’s Game Time

We’ve all seen the 3D printed replicas of classic game consoles which house a Raspberry Pi; in fact, there’s a pretty good chance some of the people reading this post have one of their own. They’re a great way to add some classic gaming emulation to your entertainment center, especially compared to the bare PCB chic of just having a Pi hanging off your TV’s HDMI port.

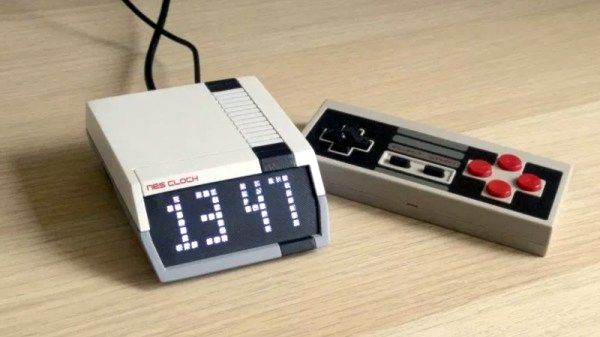
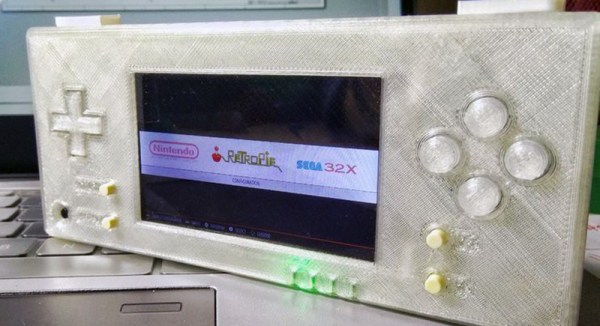
[Victor Heid] loved the look of these miniature consoles, but wanted to challenge himself to design something that was also multi-functional and unique. So he decided to create an NES-inspired case for the Raspberry Pi 3 A+ that doubles as a LED matrix clock with a decidedly retro feel. Frankly, even if it was just a clock we would have been impressed with the final product; but the fact that it’s also a fully functional RetroPie build really goes above and beyond.

It should be obvious just looking at the completed product that [Victor] put a lot of effort into sanding and finishing the 3D printed case. But we don’t have to imagine the process, since he was kind enough to thoroughly detail the steps and materials he used. As you might have guessed, the short version is a lot of filler and a lot of time; but it’s worth looking at the complete write-up if you’ve ever considered trying to make your own printed parts look less…printed. His method of applying the lettering on the front of case using a laser printer, some Mod Podge, and a healthy dose of patience is also something you might want to file away for a future project.

The electronics for this project are exceptionally simple, as [Victor] used the Pimoroni Scroll pHAT HD rather than trying to roll his own LED matrix in such a limited space. So it was just a matter of connecting up the wires to the Pi’s GPIO header and getting the various bits of software talking to each other, which he also details for anyone who might be interested.

It’s been a few months since the Raspberry Pi 3 A+ was unveiled, and we’re finally starting to see projects that make use of the new board’s reduced footprint. The ability of hardware like the A+, combined with the lackluster attempts by manufactures to produce official “mini” systems, seems to have set the stage for hackers to once again outshine commercial offerings. Not that we’re complaining, of course.

The Better RetroPie Handheld

The Raspberry Pi has become the best video game console on the planet. With RetroPi, anyone can play Super Mario 3, Doctor Mario, and even Doki Doki Panic. Adafruit’s PiGRRL Zero and [Wermy]’s reconfabulation of an old brick Game Boy to house a Raspi Zero and display have made the Raspberry Pi portable, along with all those retro games we love so dearly.

There’s a problem with these builds, though. They only use the Raspberry Pi Zero, and with that the limitations on emulation performance, and the Raspi 3 is far too big for a portable console. What’s the solution? It’s the greatest homebrew console ever created. For this year’s Hackaday Prize, [DeanChu] is building the Retro-CM3. It’s a retro handheld with a 3D printed enclosure, that’s powered by the Raspberry Pi Compute Module 3. Stand back, folks. We have a winner that will top the Raspberry Pi and 3D printing subreddits.

The key feature for this build is, of course, the raw processing power of the Raspberry Pi Compute Module 3. This is a Raspberry Pi 3 with 4 GB of eMMC stuffed onto a board that fits into an SODIMM socket. The pins on this device give you access to the GPIOs and the DSI connector. All you really need to turn this into an amazing vintage emulation console is a breakout board with a few buttons, power supply, and a display.

The extra components for this build include a 3.2 inch LCD using the DPI interface. There’s a speaker, and a 2000mAh battery. The real tricky part here is the custom PCB, breaking out the DPI pins on the Compute Module, adding a small speaker, and throwing a small STM32 to read the buttons. It’s an entire system, ready to be housed in a 3D printed enclosure.

This is, simply, the best Raspberry Pi portable you’ll ever see, at least until we get a Rasberry Pi Zero with the capabilities of the Pi 3. It’s an excellent use of the very small Compute Module, and one of the most polished Hackaday Prize entries we’ve seen thus far.

Discontinued Nintendo Consoles And Raspberry Pis

Nintendo has discontinued a Classic gaming console. It’s a pity, yes, but with the release of Nintendo’s new gaming console, they probably have bigger fish to fry. That doesn’t mean these discontinued Nintendo consoles will die a slow, miserable death locked away in a closet; at least one of them will live on with the heart of a Raspberry Pi.

This is a project [Liam] has been working on since 2012, just after he got the first edition of the Raspberry Pi. While some people were figuring out how to stuff the Pi inside a Nintendo Entertainment System or a Super Nintendo Entertainment System, [Liam] decided to embed the Pi inside a console of a more recent vintage: the Nintendo GameCube.

The first phase of this project was simply to get the Pi running inside the enclosure of the non-working GameCube he picked up. The power supply in this console was well designed, and after a quick perusal through some online documentation, [Liam] found a stable 5V with enough amps to power the Pi. After ripping out the internals of this console with the help of a quickly hacked together ‘Nintendo screwdriver’, [Liam] had a perfectly functional Pi enclosed in a Nintendo chassis.

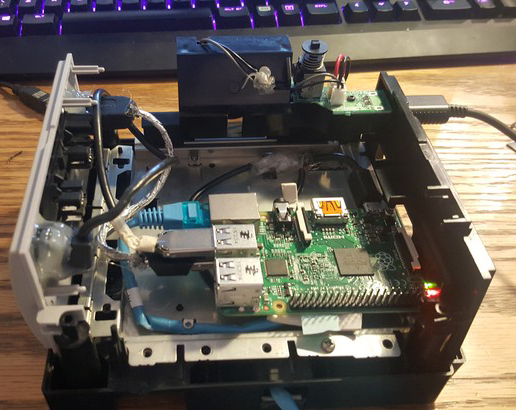
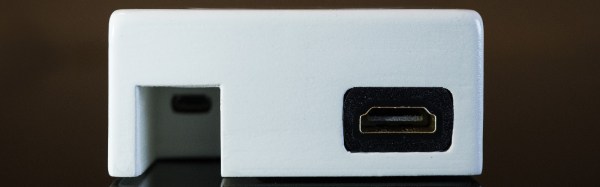
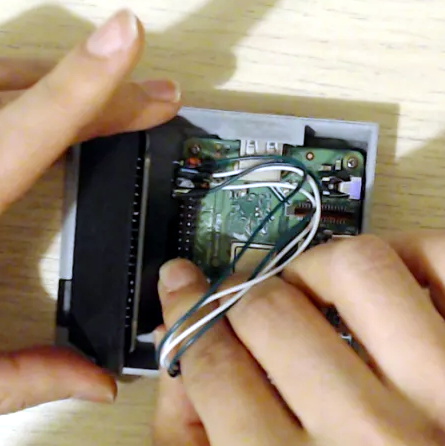
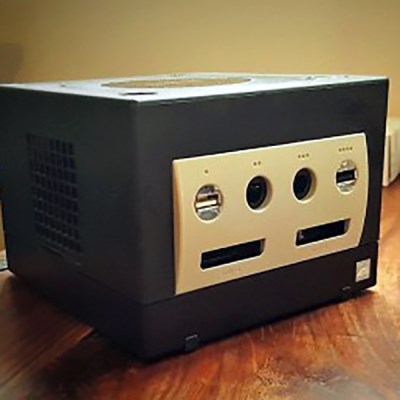
Time marches on, and after a while, the Raspberry Pi 2 was released. By this time, retro emulation was hitting the big time, and [Liam] decided it was time for an upgrade. He disassembled this Nintendo console again, routed new wires and inputs to the original controller ports, and used a Dremel to route a few holes for the HDMI and SD card slot.

With the addition of a few SNES-inspired USB controllers, RetroPi, and a few ROMs, [Liam] has a wonderful console full of classic emulation goodness, packaged in an enclosure Nintendo isn’t making any more.

The Best Pi Emulation Console You Can Build

By far the most popular use for a Raspberry Pi is an emulation console. For an educational device, that’s fine – someone needs to teach kids how to plug a USB cable into a device and follow RetroPi tutorials on the Internet. These emulation consoles usually have one significant drawback: they’re ugly, with wires spilling everywhere. Instead of downloading a 3D printed Pi enclosure shaped like a Super Nintendo, [depthperfection] designed his own. It looks great, and doesn’t have a donglepocalypse hanging out the back.

The biggest factor in building an enclosure for a Pi Zero is how to add a few USB ports. There’s only one USB port on the Pi Zero, although if you’re exceptionally skilled, you can solder a hub onto the test points on the bottom of the board. This stackable USB hub solves the problem with the help of pogo pins for the power and USB pair. It’s only $17 USD, too.

With the USB and power sorted, [depthperfection] set out to design an enclosure. This was modeled in Fusion360, with proper vent holes, screw bosses, and cutouts for all the ports. It’s designed to be 3D printable, and with a little ABS smoothing, this enclosure looks great.

For software, [depthperfection] turned to Recallbox, a retrogaming platform that also doubles as a media player. It’s simpler than a RetroPi installation, but for playing Super Mario 3, you don’t really need many configuration options. This is a great project that just works and looks good doing it. The world — and the Raspberry Pi community — needs more projects like this, and we’re glad [depthperfection] sent this one in.

observercade

Observercade, Portable MAME System Of The Future.

[GarageMonkeySan] wrote in to tell us about his latest project. It’s a MAME arcade emulator, but not just any MAME arcade emulator, it is housed in a briefcase. And if that was not interesting enough, it was built in the style of the TV Show “Fringe”, specifically like the Observer briefcases. He calls it the Observercade.

The hard-shelled Samsonite briefcase was taken apart to assess the best way to move forward. A Sintra frame was added to the top half of the briefcase and would hold a scavenged laptop LCD screen. A monitor faceplate was then made from 1/16″ polystyrene sheet to fill the gap around the screen.

The bottom half of the case holds the remaining electronics, which consists of a Raspberry Pi Model B (running RetroPie), power supply, speakers and LCD driver board. They are all mounted to the bottom of the control surface which also supports the controller joystick and buttons. Notice that the buttons are labeled in Observer symbols. These symbols are as accurate as possible roughly translating to ‘credit’, ‘player’… etc. This is a wonderfully done project that shows [GarageMonkeySan] pays extreme attention to detail.

If the Observercade rings a bell, you may be remembering the project that gave [GarageMonkeySan] his inspirations: the Briefcade.

Continue reading “Observercade, Portable MAME System Of The Future.”

Hackaday Links: August 24, 2014

hackaday-links-chain

Remember those ‘cocktail’ arcade cabinets? The Ikea Lack table has existed for years, so why not make one into an arcade table? Raspberry Pi with RetroPie as the brains,  and an ancient 4:3 monitor as the display.

Old Unixes! Running on PDPs, Novas, and IBMs! Thanks to Simh, you can emulate these old machines. [Matt] put up a guide to getting Simh running on a Pi that includes running Unix V5 on an emulated PDP-11.

Ever wanted to run your own telecom? The folks at Toorcamp did just that, 50 lines, 10,000 feet of 1-pair, and 1,500 feet of 2-pair. There’s a facebook album of all the pics.

Remember last week when Sparkfun said they shipped 2000 Microviews without a bootloader? Make interviewed [Marcus Schappi], the guy behind the MicroView. There’s also a tutorial on how to fix the issue.

Barbie needs an exorcism.

Remember the [Lord Vetinari] clock from way back when? It’s a clock that ticks 86400 times a day, but the interval between each second is just slightly random and enough to drive people insane. Here’s a kit on Tindie that makes it pretty easy to build a Ventinari clock, or a variety of other clocks that are sufficiently weird. There’s also a martian clock that’s 39 minutes and 36 seconds longer than normal, perfect for the folks at JPL.

0x1f 0x000 IZO EMESS 1407981609

The Raspi GameBoy For The Rest Of Us

We’ve seen quite a few casemods that stuff a Raspberry Pi into a Game Boy with all the required to turn it into a very cool portable Pi and retro gaming device. Most of these builds use a modified 20-year-old Game Boy for the enclosure, and if you have an attachment to your old green screened friend, you might not want to cut it up for a Pi project. [Noe] over at Adafruit has a solution – a 3D printed Game Boy enclosure that turns a Pi and TFT screen into a barely pocketable Raspberry Pi, with all the buttons and batteries required for taking an installation of RetroPi on the road.

The PiGRRL, as this build is called, uses the Adafruit touchscreen TFT kit for the Pi, effectively turning the Pi into a very tiny tablet. This allows for normal desktop interaction with the Pi, and it’s also small enough to fit in the smallest of enclosures.

The 3D printed enclosure is the star of the show here, allowing complete access to most of the Pi’s ports, while allowing enough space in the rest of the enclosure for a largish battery, charging circuit, and buttons taken from an SNES controller.

The end result is a very usable portable Pi that just happens to be in the perfect form factor for loading up a few ROMs and playing some classic video games. Video below.

Continue reading “The Raspi GameBoy For The Rest Of Us”