There are times when I feel the need to really make a mess. When I think of making messes with a degree of permanency, I think of fiberglass. I also really like the smell, reminds me of a simpler time in 8th grade shop class. But the whole process, including the mess, is worth it for the amazing shapes you can produce for speaker pods and custom enclosures.
Utilizing fiberglass for something like a custom speaker pod for a car is not difficult, but it does tend to be tedious when it comes to the finishing stages. If you have ever done bodywork on a car you know what kind of mess and effort I am talking about. In the video below, I make a simple speaker pod meant for mounting a speaker to the surface of something like a car door.
You can also use a combination of wood and fiberglass to make subwoofer cabinets that are molded to the area around them. You can even replace your entire door panel with a slick custom shaped one with built in speakers if you’re feeling adventuresome.
The Basic Form
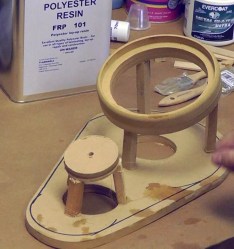 For a contoured pod I start with speaker rings cut out of Medium Density Fiberboard (MDF). These can be purchased or you can cut them out yourself. I typically buy some rings and then use them as templates for use with a flush cut router bit, or I go ahead and cut them out using a jig saw. MDF also makes a good backboard for the pod.
I could do a whole post on using a small table router to do things like recess the speaker or rounding off the speaker ring, however the same things can be accomplished using two different size rings or by hand sanding the ring to round it off. I do show my table router in the video but do not turn it on due to the noise and mess it would make in the middle of shooting a video.
Positioning the speaker rings to angle the speakers in the desired direction and height can be done any number of ways, I use little sticks cut from MDF to build supports for the rings using hot glue or epoxy to hold them in place. Hot glue? Yes, once the resin sets it will be the resin holding everything in place.
The Contours
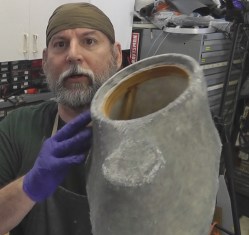
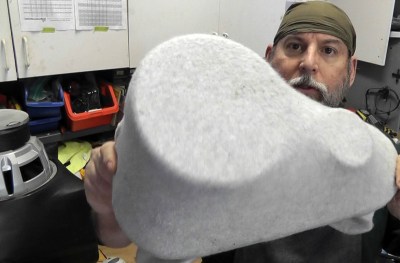 Next a fabric is stretched over the frame formed by the rings, my favorite being a polyester based fleece that can be purchased at craft/sewing stores. Being polyester, the fleece melds well with the resin and becomes fairly solid. In the old days we would use speaker grill cloth which was hard to get the resin to soak into or to stick to it.
The fabric is pulled down over the edges and stretched until no major wrinkles are present. A staple gun or even cyanoacrylate glue can be used to affix it, I use an air powered staple gun that puts down an impressive rate of fire. See the video for the trials and tribulations on pulling all of the wrinkles out and how to fasten it down.
Resin
It’s all about the polyester resin, which is used to impregnate a variety of materials including matting made of glass fibers and/or polyester fleece.
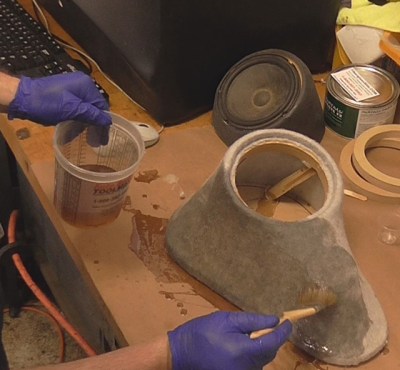 Unfortunately those little cans of resin you see at auto parts shops or even marine supply stores are not ideal as it may be old resin, resin of unknown quality, or even outright junk. The preferred way to buy resin is to find a source that talks about the freshness of their resin as resin has a shelf life of 3-4 months typically. I buy my resin from fiberglasssite.com and then write the date on the can. I buy a new gallon every summer, though I have hit a few years where I may not have gotten around to actually using it that year, don’t tell my wife.
As far as the type of resin I use, I usually use resins marked as layup or laminating resin, and almost always labeled as a “premium” resin (though I haven’t seen that there is an official classification). The implication is that a premium resin is from a production run and not the odds and ends of other production runs. I learned many years ago from watching a video by Robert Garza of Select Products that premium resins are red in color; green is an indication of a mixed batch of leftovers.
Hardener and Hardening
I have a big bottle of hardener lying around and then I also get little bottles with each order. The hardener is Methyl Ethyl Ketone Peroxide (MEKP) and is mixed in the ratios of 1-2% MEKP to resin, so for 400ml of resin I usually ad 1.5% or 6ml.
I buy my mixing cups by the box as well as my stir sticks. Somewhere around here is my favorite stirring screwdriver, but a throw away stir stick works also. Once the resin is properly mixed a change in color and opacity indicates when it’s getting ready to use.
The Fun Part
I buy cheap paint brushes by the box, the foam kind also works. The idea is to soak the fleece with the resin until there are no light spots which indicate the presence of air bubbles. The resin can be stippled in using the brush or poured on directly and then spread with the brush making sure it soaks in thoroughly.
Bodywork Isn’t Just for Car Bodies
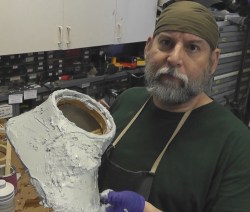
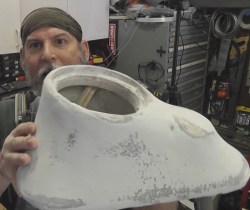
I use Rage Gold polyester body filler applied very liberally to the project. Then sand it down, add another coat, repeat. I use Roloc sanding discs in an air sander to remove the huge chunks of filler and then an electric orbital sander to smooth it out. Sanding sucks, wear your mask and eye protection and be prepared to get covered in a fine powder.
The Last Steps
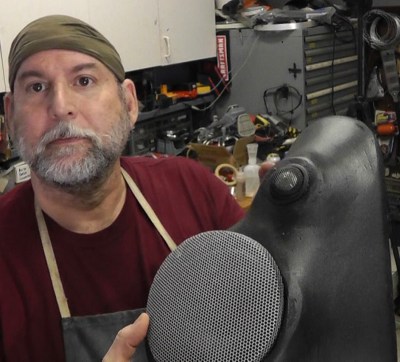 Depending on the finish desired you could use metal glaze and high build primer and repeat sanding until it’s smooth as glass, then paint with a high quality automotive paint. I went the other way in the video and sprayed it with a rocker panel textured spray product by SEM. The idea is that the texture helps hide some minor sins.
Old Fashion Fiberglass
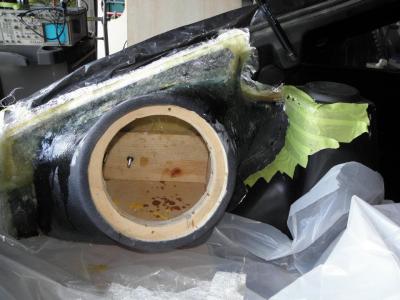
Custom fiberglass is also good for molding structures like sunken subwoofer panels and the like, where a very irregular surface needs to be turned into an airtight container for the sake of audio quality. One note is that a big subwoofer requires a lot of rigidity which might take an immense amount of fiberglass to achieve by itself, so it’s common to combine MDF and fiberglass (and acoustic dampening material) for the best effect
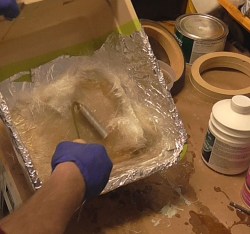
Commonly a glass strand mat is used for building up thicker structures. The mat comes in big pieces that are torn into smaller manageable piece and then impregnated with resin, building up the structure while eliminating trapped air bubbles. A paintbrush can be used to work the air out, but I usually use a roller made for the purpose with the downside that it’s one more thing that then needs to be cleaned. Production houses that do layup fiberglass professionally usually use a applicator that shreds glass fibers and mixes the resin all in one step while blowing it on to the mold.
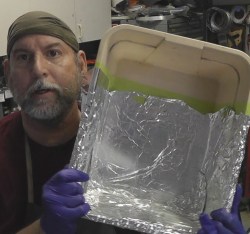
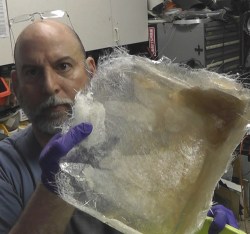
A primary concern when getting resin anywhere near the interior of a car is protecting the car from all parts of the permanent mess of the resin. I tape down a drop cloth and then cut a hole and tape the edges. I then cover the entire exposed surface with the good green masking tape. I have seen some people coat the tape with mold release wax or spray Polyvinyl Alcohol (PVA) as a release agent. Instead of that, a trick I picked up from the Car/Audio magazines is to use spray adhesive and cover the tape with a layer of aluminum foil as it forms an excellent liquid-proof barrier and then separates easily when needed. Once removed the tape is peeled up leaving a clean original surface and a newly created fiberglass piece.
Last Words
I do my own custom fiberglass because I enjoy it, (not the part with pinholes that mess with the finish) and if I do it right I have a custom look that could have otherwise cost some serious cash. It does take a little practice to get things right and getting two pieces to match can require some patience. But at the end of the day I usually get something similar to what I envisioned and that looks cool and unique.




I haven’t watched your video, just read it here.
Does the work release from the mold easy enough? I would think the resin would seep through the fleece and stick it to the MDF.
There is no mold, the fleece is polyester and gets soaked with resin, sanded and painted.
Well, I meant the MDF you stretched the fleece over.
Or does it become part of the final product?
It becomes part of the speaker.pod. Thinner MDF can be used or plywood, Masonite sucks.
BTW, I usually use my belt sander with a real aggressive belt and make the base a lot thinner and flat, or add a bit of contour if needed.
If you want to save weight and for some things have more room inside the housing, go to the extra time and work to make a mold from the piece then layup a new part in the mold. Great for if you’re going to do more than one item and it will also be a stronger part and much more resistant to damage.
Most of those custom cars you see at shows with fancy molded interiors are hiding many pounds of MDF, wood and bondo. The builders aren’t looking for long term durability. Once they’ve run one around the show circuit for a year or two it begins to look a little tired so they’re off to do the next car.
If you’re intending to do custom stuff like this for a daily driver into which you’ll be stuffing things that bump and bang, go the extra mile and do the mold and production part. What’s also better about that is if something breaks one of the parts you can simply lay up a new one in the mold and it’ll fit precisely like the original.
Yeah lots of MDF out there which swells when it gets damp. My last set of pods used thinner, less heavy plywood. Subwoofer stuff needs to be extremely thick and not vibrate or flex.
You do have me thinking about making a streamlined body for my quadracycle.
You can also lay up carbon fiber and epoxy resin, though it helps to have a big autoclave.
You can also work with carbon fiber with the vacuum bag method. That eliminates the need for an autoclave. At least if you do not need aerospace level parts.
Yeah I was thinking of the vacuum bag method, I guess I was thinking about heating it also.
No autoclave necessary. A good epoxy resin, under a vacuum bag to get rid of bubbles and give a more consistent thickness, cured somewhere between 150*F and 190*F, will give an excellent result. Even room temperature cures, given enough cure time, can be totally fine. Autoclaves are nice, but only really necessary if you are really concerned with weight and want to get the best possible material properties out of the composite.
There must be a ton of stuff on the internet about home-made pre-preg carbon parts, but the one that springs to mind for me is this one http://www.danstuff.info/furybuild2.htm on the “interior panels” section “http://www.danstuff.info/panels.htm” He describes how he made his oven out of MDF and bits of an electric hob.
You never cease to amaze me Bil. Back in 2007 I did a spare-tire subwoofer/car pc project. It was pretty sweet with a VIA C7 mini-itx, but these days the factory head unit is much better than most home-brew solutions. http://imgur.com/a/09CDu
Very cool.
were you on mp3car? i’m don’t recall an rsx build like that there at any point, though via c7 boards were a little before i got involved in carpc’s
Heh, I forgot all about mp3car, used to be I was always planning for the ultimate car computer.
I always leave any extra resin in my mixing container and set it near the part so it has the same cure conditions. Then, once it’s cured, just pop it out of the mix container and go again. I have used the same mix container for a looooong time. And it gives a descent idea of when the part is ready for another layup, although the container of resin will cure a little faster than a big layup.
4 shirt changes, what’s my prize?
I think its over 6. It took me 5 weekend to get all of the shots.
You change shirt more than once a week? Hand in your geek card.
I wasn’t going to get shirty about this… we can’t all be like Sir David Attenborough and keep to the same outfit for the sake of consistency.
Don’t forget to write the date on the MEKP catalyst too (and keep it out of sunlight)
Been there, done that.. got into a lively debate with the boss as he thought I’d forgotten to add it to the resin when it failed to harden. Had to clean the mold down twice, as the boss took over and did the next layup himself only to find his mix didn’t set either!
Yeah I have been guilty of assuming it will just keep.
Cool Just goes to show you the proper way to do things isn’t always the easiest or most accessible. Id still prefer a CNC mold and woven glass as opposed to chop fiber or polyester felt. With proper w/w % of glass to resin and a vacuum bag to properly consolidate the composite..
Still a good demo for the DIY’er who probably doesn’t want to go through the learning curve.
You can see my CNC mill in some shots. :)
Could you use the original as a vacuuform buck as well?
Yup. BTW thats the partial answer to the question I ask at the end of the video where I mention why I keep an oven in my garage.(That and powder coat)
So the title of both the video and article say fibreglass, but in the first (and biggest) example you don’t even use fibreglass? You just use polyester fleece and resin. No fibreglass.
Yeah I mention that to some degree in video, but wherever I go we called the custom resin work “Fiberglass” (or fibreglass) in general. If I had titled it Custom Resin Impregnation I don’t think people would have had an intuitive understanding of what I meant.
I haven’t seen the video (payg internet) but the article is great.
I haven’t done fiberglass in a long while, I’ve done many a sub woofer box in the past, can’t say I miss the mess and the stink. However, I am planning on purchasing and modifying a scamp fiberglass travel trailer, so i might just have to revisit my fiber glassing days. Nice to see a mix of articles on hackaday.
Yeah the stink is mostly nostalgia for me at this point.
You can use two layers of an old t-shirt to do this job. You can even use denim. This is where going to the local salvation army for supplies makes sense as well. :)
you got me thinking, what about parachute fabric and army surplus? The fabric is thin and strong, but does it behave with the resins?
The way it was explained when I first got into this was that the polyester fleece sort of “melts” into the polyester resin. When using a different fabric I think you end up the possibility of delamination as you just have resin coated fabric.
Sorry guys, but what about safety? I known fiberglass causes lungs cancer if microfibers reach them. Doesn’t you wear suit and gloves to avoid contact with it? I was always fascinated about how easily you can build structures with fiberglass, but its dangerousness always scared me a bit
I talk about safety in the video.Not just the glass part but care must be taken when sanding bondo. As my son had raided my stock of really good masks I ended up with my half face filter mask when the video wasn’t running. Then wait for the sweat to dry and the marks to leave my face and then roll camera.
If you really like the smell, go with polyester resin, but… epoxy has a number of advantages besides being low-odor (you can work indoors). I’ve used six-year-old laminating epoxy with no problem. Laminating epoxy is thinner than polyester resin and wets cloth/mat more quickly. Slow, medium, and fast epoxy curatives are available so you can select what’s best for your working time and temperature. Less guesswork in measuring amounts of resin/curative. True, epoxy is more expensive, but not prohibitively so ($75 for 1.5 gallon kit at U.S. Composites).
Absolutely! I can’t stand polyester resin. Once you work with a good epoxy resin you’ll never want to go back. I used to hate working with composites, but that was before I knew of the different kinds of resins so I just used the cheap stuff at the hardware store. Never again.
Absolutely awesome. Stretching a fabric over a supporting structure will give you “class A” surfaces w/o the hassle of modelling it in CAD or hand-craping it in automotive clay & making a plaster negative (learnt the stuff from scratch in a industrial / automotive design course).
.
About the praise for epoxi: yes. I use it too but since I had a professional laminating guy on my team I am *SUPER* careful with the stuff – bisphenols are screwing up a lot of hormonal processes in the human body with effects ranging from allergies, diabetis to cancer. The low acute toxicity and the rather pleasant odor fool a lot of people into thinking that epoxy systems are “healthier” than the old and smelly polyesters – alas, this is not the case… We have banned most epoxies from our shop, going back to plaster, PU (yuck), polyester and acrylic resins.
A Winning Article! Thank you.
Excellent article and video. I learned a lot…thanks.
Excellent tutorial, do you ever use a bit of acetone to thin the resin in the first stage of coating the fleece?
I havn’t but it sounds interesting. The polyester fleece melts a little with the resin, I assume that acetone is to increase wettability? Personally I spend enough on fresh resin that I didn’t want to risk it not setting right. (wet spots)
I did a dash and center console, the dash I didn’t thin acetone and ended up with several wet spots and a lot of areas that didn’t penetrate the fleece. Probably because I rushed it I’m assuming. The center console I thinned with maybe a 5% acetone to resin ratio and it soaked into the fleece quite nicely. Now I’m rebuilding the dash for round two…????
Good article & excellent way to articulate. Keep it up.
Apart from the above post, fiberglass is used in many other areas, such as construction. Construction is the business that connects and runs 24 other businesses. Piping of fiberglass increases its life and safe from leaking.
Just curious if there is any disadvantage to using epoxy? I am working on a stich and glue kayak and will have enough left over for my sub box. I know it is more expensive, but it is stronger and easier to mix.
I learned to make fiberglass molds from poliester resin it’s cheaper