Fiberglass Mesh For Stronger 3D Prints

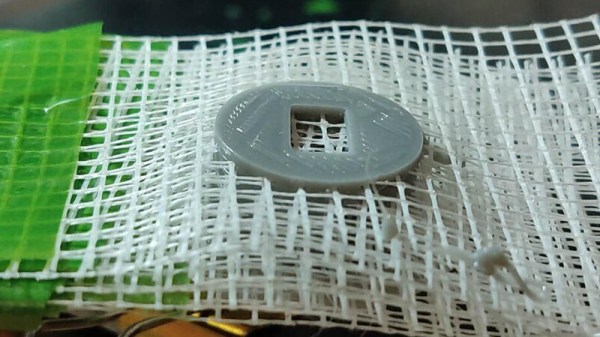
There are many clever ways to make stronger 3D prints, be they by the use of special slicing algorithms or by unusual filaments. [Brtv-z] has taken a more straightforward tack, by making glass-reinforced prints using painters fiberglass mesh tape.

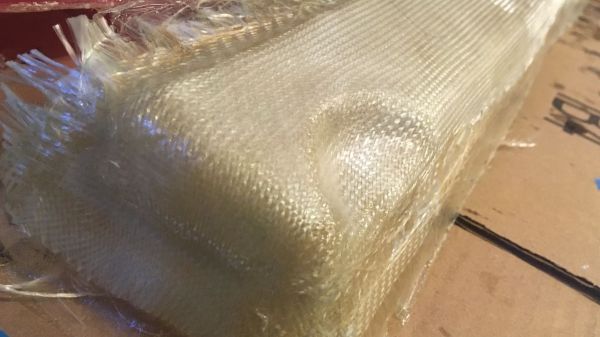
It’s a laborious technique that involves stopping the print to manually place the fiberglass at each successive millimeter of print. The resulting test piece comes off the print bed festooned with fiberglass mesh, and once it’s been trimmed, he subjects it to some tests which you’ll see in the video below the break(Russian language, but there are subtitles).

The tests are fairly rough and ready involving a hammer (we winced at the hammering in a vice, but of course this piece isn’t forged steel!) and standing on a flat piece of print balanced between two blocks. As you’d expect, the reinforced piece appears the stronger, but these tests would benefit from a calibrated set-up to quantify the strength.

So if you’re of a mind to experiment, this certainly seems like an accessible if rather tedious way to make glass reinforced 3D prints. If you then want to characterize them, remember this can be done with a bit of farmyard engineering if you have nothing better.

Continue reading “Fiberglass Mesh For Stronger 3D Prints”

Recycled Speed Boat Beats The Barnacles Out Of Your Average Rebuild

There’s an old saying that says “Anything is possible with enough Time, Money, or Brains. Pick two.” For [Mr HỒ Thánh Chế], the choice was obvious: Time, and Brains. This is evident by the impressive DIY boat build shown in the video below the break.

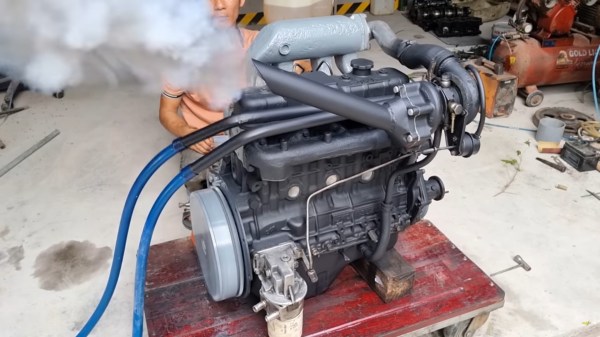
[Mr HỒ] starts with an Isuzu marine diesel engine that was apparently found on the beach, covered in barnacles and keel worms (and who knows what else). A complete teardown reveals that the crankcase was miraculously spared the ravages of the sea, and somehow even the turbo survived. After a good cleaning and reassembly, the engine rumbles to life. What’s notable is that the entire engine project was done with only basic tools, save for a lathe. Even generally disposable parts such as the head gasket are re-used.

Moving onto the hull, half of an old damaged boat is used and a new top is built. Car seats out of a Toyota sit behind a steering column also from a car, while the deck is built from scratch out of square tubing, foam board, and fiberglass.

What we liked about the project isn’t so much the end result, it has some build quality issues and it looks like the steering is far too slow, but what project of our own hasn’t been knocked together for fun with some obvious flaws? In fact, that’s very often the epitome of the Hacker spirit- doing it quick, dirty, having fun, and iterating as we go. For that, our hat is off to [Mr HỒ].

If boat recycling puts the wind in your sails, check out this boat-turned-sauna project.

Continue reading “Recycled Speed Boat Beats The Barnacles Out Of Your Average Rebuild”

3D Printing A Full Scale Fiberglass Speedboat

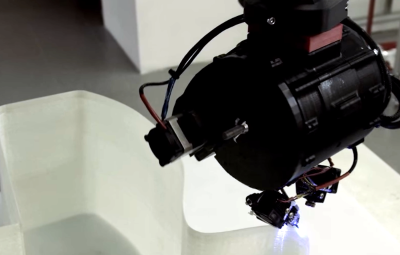
It’s an age-old problem. You draw up a nice 6.5-meter long motorboat and then discover the shape won’t allow for a fiberglass mold. What do you do? If you’re [Moi], you grab a few Kuka robots and 3D print it using thermoplastic with embedded glass fibers. A UV light cures the plastic and you wind up with printed fiberglass. That’s the story behind the MAMBO, a 3D printed powerboat.

Despite the color, the fiberglass isn’t blue out of the gate — the boat is painted. Still, it looks nice with lines inspired by [Sonny Levi]’s Arcidiavolo design from 1973. MAMBO stands for Motor Additive Manufacturing BOat. It has a dry weight of about 800 kg and is fitted with a cork floor, white leather seats, and an engine. We presume none of those things were 3D printed.

Although it wasn’t fiberglass, we’ve seen a 3D printed boat before. In particular, the University of Maine’s giant 22,000 square foot printer cranked one out. We’ve also seen boats printed in standard PLA filament, which then had fiberglass cloth and resin applied after printing. True that one was only RC, but there’s no reason the concept couldn’t be scaled up if you had the patience.

Friendly Fiberglassing: Can Hide Glue Replace Epoxy?

Hide glue has been around for thousands of years, and some of it is holding wood pieces three thousand years after application. It is made from animal protein, so vegetarians may want to stick to the petroleum-based adhesives. [Surjan Singh] wanted to see if its longevity made it a contender with modern epoxy by casting a couple of fiberglass car parts with the competing glues. In short, it doesn’t hold up in this situation, but it is not without merit.

Musical instrument makers and antique restorers still buy and use hide glue, but you would never expose it to heat or moisture. To its credit, hide glue doesn’t require a ventilator. All you need is boiling water and a popsicle stick, and you are in business. [Surjan] writes his findings like a narrative rather than steps, so his adventures are a delight to read. He found that a car part made with fiberglass and epoxy will withstand the weather better than the alternative because heat and humidity will soften hide glue. His Saab 96 isn’t the right application, but since it is nearly as strong as epoxy once set, you could make other fabric shapes, like a flannel nightstand or a lace coffee table, and you could shape them in the living room without toxifying yourself

No matter how you want to work with glues and substrates, Bil Herd has you covered, and here is an excellent tip for a cheap degassing setup.

Puttering Around In A Converted Golf Cart

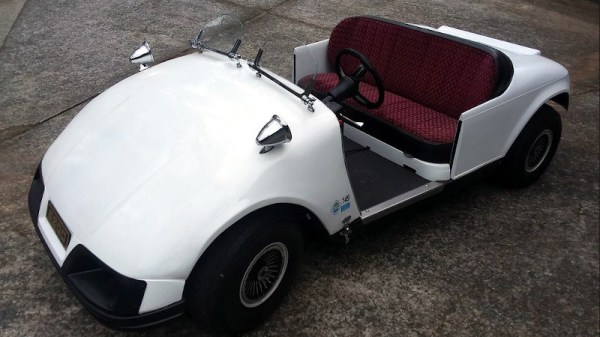
Technically speaking, golf carts are already sports cars, they’re just not very sporty in themselves. When [rtkerth] went to trade in his old golf cart for a new one, he found that it would be more valuable to hang on to the old one and have a bit of fun with it. The result is retro-styled kart that would not look out of place at a micro car show.

Before getting to the really fun bits, he had to do a bit of prep work, such as relocating the six large batteries so that super cool stock seat can sit lower. Now the batteries are distributed throughout the vehicle, including one that’s been cleverly disguised as center console. Since the cart won’t be hitting the links anymore, there’s no need for a place to put clubs. Two of the batteries are now in the back, supported by a platform made from old bed frames.

We love the fiberglass fab work [rtkerth] did to the front and rear — it looks great, especially considering he’d never done it before. The rear is done more traditionally with a foam mold, but the front is fiberglassed directly over expanding foam insulation framed with cardboard. The local body shops refused to paint this baby roadster, so [rtkerth] did it himself before adding the killer touches — 1930s Brooklands-style windscreens and 1950s bullet mirrors that look great together.

Believe it or not, this isn’t the first amazing golf cart mod we’ve seen. Go see this baby DeLorean before you’re outta time.

3D Printed Catamaran Eats Benchy’s Lunch

If we’ve learned anything, it’s that 3D printers are exceptionally well suited to printing little boats. According to the Internet, 3D printers are at their best when pumping out cute PLA boats in all the colors of the rainbow; perfect for collecting dust on a shelf somewhere. Ask not what your Benchy can do for you, ask what you can do your Benchy.

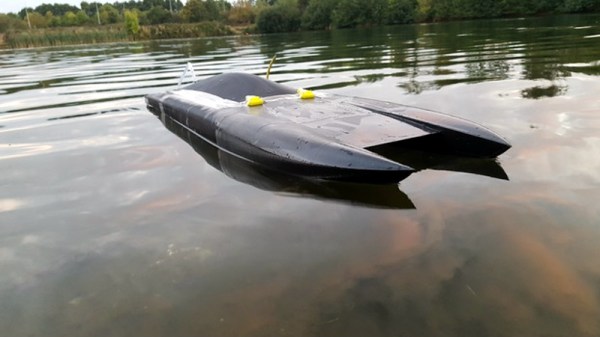
But this 3D printed boat isn’t so cute and cuddly. In fact, it’s an absolute beast. Built by [Wayne Andrews], this nearly meter long 3D printed racing catamaran looks more Batman than Popeye. In the video after the break you can see a recent run of the boat on the lake, and we think you’ll agree it definitely has the performance to back up its fierce looks.

Impressively, the hull isn’t printed out of some expensive high-tech filament. It’s the cheapest PLA [Wayne] could get his hands on, and glued together with nothing more exotic than Loctite Super Glue Gel. The secret is the internal “West System” fiberglass cloth and resin work, which is the same stuff used on real boat hulls. It took about 5 days of continuous printing to produce all the pieces needed to assemble the hull, which is a scaled up version of a design by [Thomas Simon].

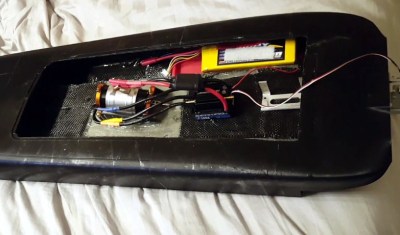
The internal layout is about what you’d expect in a fast RC boat. It’s running on a 1900 Kv motor powered by dual 6S batteries and a water cooled 180 A Seaking ESC which provides 5 BHP to the Octura x452 propeller. On the business end of his boat, [Wayne] used a commercial aluminum strut and rudder unit. Running gear printed out of something strong like nylon would be an interesting experiment, but perhaps a tall order for this particular motor.

We recently covered a 3D printed jet boat that’s no slouch either, but if you’re looking for a more relaxed ride you could always 3D print a FPV lifeboat.

Continue reading “3D Printed Catamaran Eats Benchy’s Lunch”

Epoxy Fix For A Combusted PCB

When the Magic Smoke is released, chances are pretty good that you’ve got some component-level diagnosis to do. It’s usually not that hard to find the faulty part, charred and crusty as it likely appears. In that case, some snips, a new non-crusty part, and a little solder are usually enough to get you back in business.

But what if the smoke came not from a component but from the PCB itself? [Happymacer] chanced upon this sorry situation in a power supply for an electric gate opener. Basking in the Australian sunshine for a few years, the opener started acting fussy at first, then not acting at all. Inspection of its innards revealed that some unlucky ants had shorted across line and neutral on the power supply board, which burned not only the traces but the FR4 of the board as well. Rather than replace the entire board, [Happymacer] carefully removed the carbonized (and therefore conductive) fiberglass and resin, leaving a gaping hole in the board. He fastened a patch for the hole from some epoxy glue; Araldite is the brand he used, but any two-part epoxy, like JB Weld, should work. One side of the hole was covered with tape and the epoxy was smeared into the hole, and after a week of curing and a little cleanup, it was ready for duty. The components were placed into freshly drilled holes, missing traces were replaced with wire, and it seems to be working fine.

This seems like a great tip to keep in mind for when catastrophe strikes your boards. There are more extreme ways to do it, of course, but perhaps none so flexible. After all, epoxy is versatile stuff.