At this point, we’ve seen the Raspberry Pi jammed into what amounts to every retro game system, handheld or otherwise, that was ever released. While they’re always fun builds, invariably somebody will come along who is upset that the original hardware had to be gutted to create it. It seems as if with each post, a classic gaming aficionado out there has his or her heart broken just a bit more. Will no one put an end to the senseless slaughter of Game Boys?
As it so happens, not all hardware modders are such unconscionable brutes. [Starfire] recently sent his latest creation into the tip line, and it’s designed specifically to address the classic gaming massacre in which Hackaday has so shamefully been a collaborator. His build sacrifices a portable Genesis built by AtGames, and turns it into a Raspberry Pi Zero portable running RetroPie.
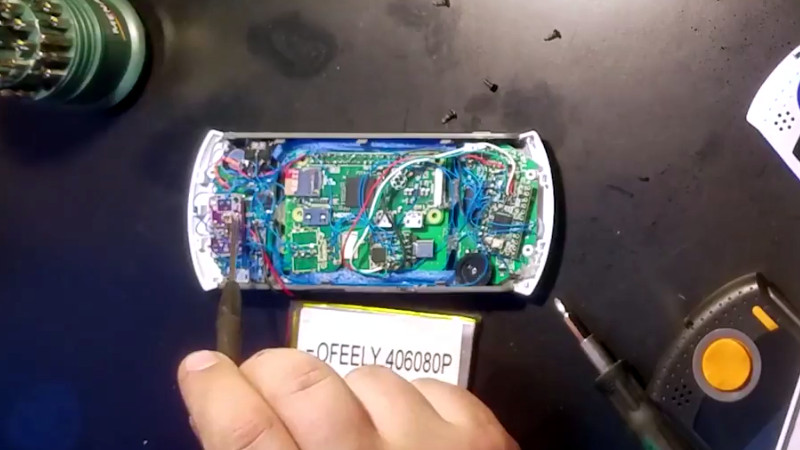
Opening up the back panel of his portable Pi shows an incredible amount of hardware smashed into the tiny package. Beyond the obvious Pi Zero, there’s a iUniker 2.8-inch LCD, a 2,200 mAh battery, a two-port USB hub, a Teensy microcontroller, a USB sound card, an audio amplifier, a LiPo charging module, and a boost converter. [Starfire] measured peak power consumption to be 500 mA, which should give about a 3.5 hour run time on the 2,200 mAh battery.
This is all the more impressive when you realize the original AtGames PCB is still in the system, albeit with the center cut out for the Pi’s LCD to fit in. Rather than having to figure out a new way to handle input, [Starfire] simply connected the existing inputs to the digital pins on the Teensy and used some code to convert that into USB HID for the Pi. A few case modifications were necessary, namely the removal of the battery compartment from the back panel and covering up the original SD card slot and ports; but otherwise the finished product looks completely stock.
If you don’t mind tearing into a real Game Boy to make your portable Pi, you can check out a few of the stand out examples which we’ve covered here in the past.


I had picked up one of these used around Xmas on the tip that some of these were of an older arm based design capable of running other emulators besides the genesis. Sadly the one i scored used atgames proprietary RedKid processor. This may be the answer to my hopes of having a portable retro nintendo system.i am curios however if it would have been possible to reuse the existing battery charging circuitry built into the stock pcb
That’s never been done before…
Aren’t reproduction GameBoy shells readily available at this point?
Yes, they are.
” While they’re always fun builds, invariably somebody will come along who is upset that the original hardware had to be gutted to create it. ”
Pretty much everything that has a nostalgic factor like say old radios in wooden cabinets.
Not to take away from Starfire’s hack; he did a really great job! However, at one point I really wanted to build my own portable retro gaming console. But once I learned that you can software mod the portable PSP consoles I never looked back. Every emulator is ported to the PSP and you can even play PS1 games flawlessly. In my opinion it is really hard to beat, great battery life, great sound, totally enjoyable experience every time.
I’m the maker, and sure you could get a Gameboy shell and make one, but this is pretty small for a handheld, it really fits the pocket nice and is quite thin. It really is crammed about as much as one could fit in there. Not sure about the word cheap in the title, the are 45-50 dollars new I just found the broken on ebay for 19 bux.
The screen is what really makes this build, 640×480 in 2.8″ is really nice and fits the pi zero perfect.
I saw Ben Heck’s first vid on a Pi portable without using HDMI and wanted the challenge my self to do the same, this was the outcome.
Where do you source the screen?