3D Printed Magnetic Stirrer Could Hardly Be Simpler

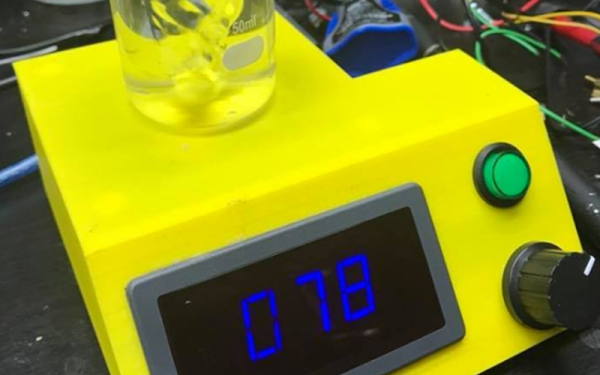
If you’ve spent much time in a chemistry or biology lab, you’ve probably seen a magnetic stirrer. This is a little table that you put a beaker on. A little bar (often called a flea or a pill) goes in the solution and spins to stir the beaker’s contents. Simple versions are not that expensive, but nicer ones can cost a bit. [John] decided to build his own using 3D printing and the design is delightfully simple.

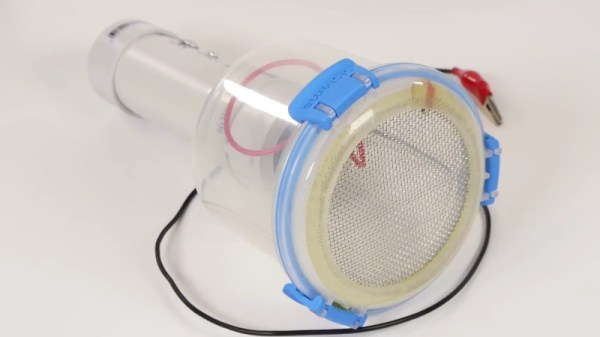
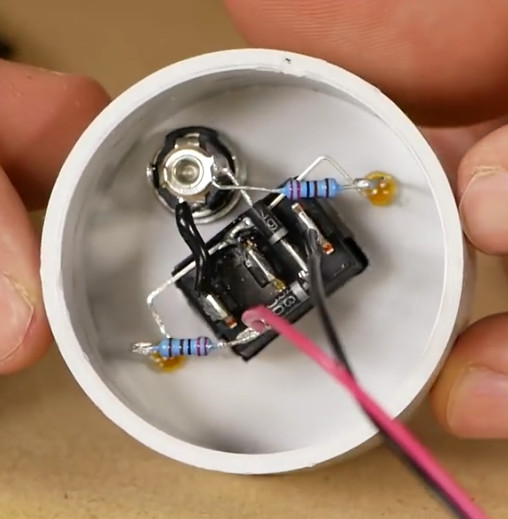
The electronics is nothing more than a PC fan, an off-the-shelf fan controller with a display, and a 3D printed bracket with some magnets. The flea is also 3D printed, although we’d probably buy cheap commercial fleas since they are usually coated with Teflon or some other non-reactive substance. Depending on what you are stirring, the reactivity of your 3D printed plastic and its porosity could be a concern. In addition, a commercial flea has a pivot ring that helps it spin smoothly, although we are sure the 3D printed one will work in most cases.

Continue reading “3D Printed Magnetic Stirrer Could Hardly Be Simpler”

Hackaday guide to Lathes

Buying Machine Tools: Foreign Or Domestic, New Or Used?

The last time we discussed machine tools, we talked about how to choose the size of the new metalworking lathe that your wallet is itching to pour itself into. The next big decision to make is “new or used?” If you’re in North America, this question has a lot of overlap with the classic question “Import or American?”. The answer boils down to what your needs are, and what you want to get out of this machine.

If you are new to machining, and want to learn the skills, I recommend starting with an Asian import machine. If you’re careful which one you select, you’ll end up with a very reasonably priced lathe that can do precise work right out of the crate. If your interest is in learning how these tools work, and in doing a restoration project, an old American machine is a great choice. Let’s look at these two routes in more detail.

Continue reading “Buying Machine Tools: Foreign Or Domestic, New Or Used?”

Rotary Electric Gun Might Not Put Your Eye Out, Kid

This one is clearly from the “it’s all fun and games until someone loses an eye” file, and it’s a bit of a departure from [Make It Extreme]’s usual focus on building tools for the shop. But what’s the point of having a well-equipped shop if you don’t build cool things, like this unique homebrew electric gun?

When we hear “electric gun” around here, we naturally think of the rail guns and coil guns we feature on a regular basis, which use stored electric charge to accelerate a projectile using electromagnetic forces. This gun is much simpler than that, using purely mechanical means to accelerate the projectiles. The heart of the unit is a machined aluminum spiral from an old scroll compressor, which uses interleaved orbiting spirals to compress gasses. This scroll was cut down to reduce its mass and fixed to a complex shaft assembly allowing it to spin up to tremendous speed with a powerful electric motor. A hopper feeds the marble-sized ammo into the eye of the scroll, which spits it out at high speed. Lacking a barrel, the gun can only spew rounds in the general direction of the target, but it makes up for inaccuracy with an impressive rate of fire — 100 rounds downrange in two seconds. It’s pretty powerful, too, judging by the divots in the sheet steel target in the video below.

Like all of [Make It Extreme]’s build, a lot of effort went into this, and it shows. Their other fun builds of dubious safety include these electromagnetic wall climbers and these “Go Go Gadget” legs.

Continue reading “Rotary Electric Gun Might Not Put Your Eye Out, Kid”

Hackaday’s Irish Excursion Is On 7 April

Try something a bit out of the ordinary with us on 7 April. Spend a Saturday with Hackaday in Dublin without really knowing what to expect. This is the Unconference format, and we’ve fallen in love with the spontaneity and consistently fascinating talks that come out of it.

We’ve booked a fantastic hall in the Temple Bar district of Dublin, lined up snacks throughout the day and dinner for all who attend, plus there’s an after bar and we’ll buy the first round. All of this is yours if you grab one of the rapidly disappearing free tickets.

What we ask of you is to come prepared to give a 7 minute talk on something you’re really excited about right now. This is low-pressure; the point of an Unconference is to learn about what people are working on right now (not to see a 40 minute talk that was polished over several months). There will not be enough time for absolutely everyone to speak but we’ll get through as many as we can and make sure there’s an interesting mash-up of topics throughout the day.

To break the ice, we have a few “ringers” who we’ve asked to lead off each talk session. Beth ‘pidge’ Flanagan is an embedded and Linux expert who is well-known for her work on OpenEmbedded and Yocto and will talk about “how the sausage is made” specifically surrounding some advance metering infrastructure. Rachel “Konichiwakitty” will be speaking. Rachel was at our London Unconference back in September and we’re excited to hear about the stem cell research she’s been doing as part of her Ph.D. work. James Twomey will be on hand to go into some of the craft of stage magic, and also talk about what we can learn from the battery-free magic of crystal set radios like the “foxhole” radios built during WWII.

DesignSpark LogoThere are already enough people to pack the place and we only have about 20 tickets left, so hurry up and grab yours.

This event is made possible, free of charge to the attendees, with generous support from DesignSpark, the innovation arm of RS Components. DesignSpark is the exclusive sponsor of the Hackaday Dublin Unconference.

Building A Static Grass Applicator

A “Static Grass Applicator” is very specialized tool used by model makers to create realistic grass. Don’t feel bad if you didn’t know that, neither did we. Anyway, the idea is that you distribute a fine filament over the surface, and then use static electricity to make the “blades” of grass stand up vertically. This is a huge improvement over the old school method of manually placing the grass on the model, but the tool itself is somewhat expensive, at least for a decent one.

But thanks to avid modeler [Luke Towan], those looking to up their diorama game without breaking the bank now have a fantastically detailed guide on building their own grass applicator that is not only fairly cheap (as little as $20 USD depending on what your part bins look like), but is robust enough to last for years of service.

The heart of the device, and probably the only part you’d need to go out and buy especially for this project, is a small 12V negative ion generator. This is used to setup an electric charge between the grid of the applicator and a long wire that gets attached to the piece you’re working on. What little wiring there is simply provides a switch and some status LEDs. The design [Luke] has come up with lets the user switch between and internal 9V battery for portability, or an external 12V wall adapter for larger projects.

Building the chamber to hold the grass filament as well as the handle which houses the electronics will take longer than anything else, and even that seems pretty straightforward. Given the impressive results shown in the video after the break, it’s actually pretty surprising how simple the device is.

The setup used here reminds us of the DIY powder coating we covered a few years back.

Continue reading “Building A Static Grass Applicator”