Low-Cost Cryocooler Pumps Out Cheap DIY Liquid Nitrogen

A word of caution if you’re planning to try this cryocooler method for making liquid nitrogen: not only does it involve toxic and flammable gasses and pressures high enough to turn the works into a bomb, but you’re likely to deplete your rent account with money you’ll shell out for all the copper tubing and fittings. You’ve been warned.

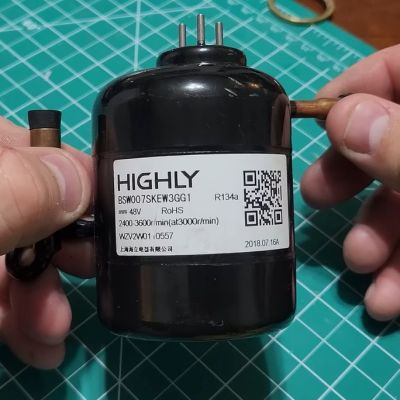
In theory, making liquid nitrogen should be as easy as getting something cold enough that nitrogen in the air condenses. The “cold enough” part is the trick, and it’s where [Hyperspace Pirate]’s cryocooler expertise comes into play. His setup uses recycled compressors from cast-off air conditioners and relies on a mixed-gas Joule-Thomson cycle. He plays with several mixtures of propane, ethylene, methane, argon, and nitrogen, with the best results coming from argon and propane in a 70:30 percent ratio. A regenerative counterflow heat exchanger, where the cooled expanding gas flows over the incoming compressed gas to cool it, does most of the heavy lifting here, and is bolstered by a separate compressor that pre-cools the gas mixture to about -30°C before it enters the regenerative system.

There’s also a third compressor system that pre-cools the nitrogen process gas, which is currently supplied by a tank but will eventually be pulled right from thin air by a pressure swing adsorption system — basically an oxygen concentrator where you keep the nitrogen instead of the oxygen. There are a ton of complications in the finished system, including doodads like oil separators and needle valves to control the flow of liquid nitrogen, plus an Arduino to monitor and control the cycle. It works well enough to produce fun amounts of LN2 on the cheap — about a quarter of the cost of commercially made stuff — with the promise of efficiency gains to come.

It does need to be said that there’s ample room for peril here, especially containing high pressures within copper plumbing. Confidence in one’s brazing skills is a must here, as is proper hydro testing of components. That said, [Hyperspace Pirate] has done some interesting work here, not least of which is keeping expenses for the cryocooler to a minimum.

Continue reading “Low-Cost Cryocooler Pumps Out Cheap DIY Liquid Nitrogen”

Small, Quiet Air Compressor Puts 3D-Printed Parts To Best Use

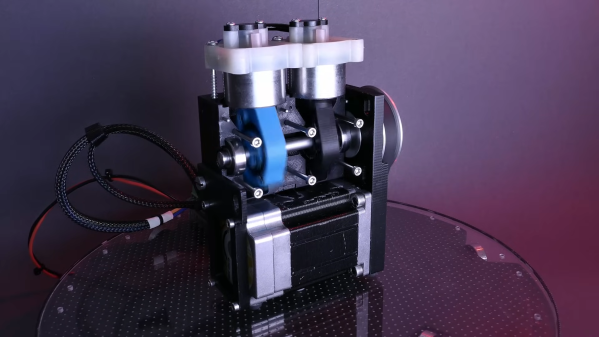
When the only tool you’ve got is a hammer, every problem starts to look like a nail. Similarly, while a 3D printer is a fantastic tool to have, it can make you think it’s possible to build all the things with printed parts. Knowing when to print ’em and when to machine ’em is important, a lesson that [Diffraction Limited] has taken to heart with this semi-printed silent air compressor.

The key to this compressor’s quiet operation is a combination of its small overall size. its relatively low output, and its strategic use of plastic components, which tend to dampen vibrations. The body of the compressor and the piston arms are the largest 3D-printed parts; the design calls for keeping printed parts in compression for longer life, while the parts of the load path in tension travel through fasteners and other non-printed parts. The piston design is interesting — rather than being attached to connecting rods via wrist pins, the machined Delrin pistons are solidly attached to the piston arms. This means they have to swivel within the cylinders, which are made from short pieces of metal tubing, with piston seals designed to move up and down in grooves on the pistons to allow air to move past them. The valve bodies atop each cylinder are salvaged from another compressor.

When powered by a NEMA23-frame BLDC motor via a belt drive, the compressor is remarkably quiet; not quite silent perhaps, but still impressively smooth, and capable of 150 PSI at low speeds. And as a bonus, the split crankcase makes it easy to open up and service, or just show off how it works. We’ve seen a variety of 3D-printed compressors, from screw-type to Wankel, but this one really takes the prize for fit and finish. Continue reading “Small, Quiet Air Compressor Puts 3D-Printed Parts To Best Use”

3D Printed Axial Compressor Is On A Mission To Inflate Balloons

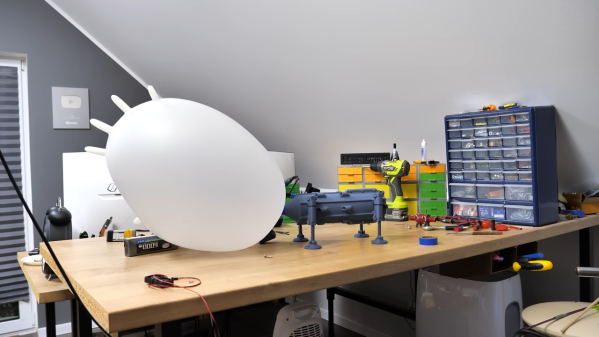
[Let’s Print] has been fascinated with creating a 3D printed axial compressor that can do meaningful work, and his latest iteration mixes FDM and SLA printed parts to successfully inflate (and pop) a latex glove, so that’s progress!

Originally, the unit couldn’t manage even that until he modified the number and type of fan blades on the compressor stages. There were other design challenges as well. For example, one regular issue was a coupling between the motor and the rest of the unit breaking repeatedly. At the speeds the compressor runs at, weak points tend to surface fairly quickly. That’s not stopping [Let’s Print], however. He plans to explore other compressor designs in his quest for an effective unit.

Attaching motor shafts to 3D printed devices can be tricky, and in the past we’ve seen a clever solution that is worth keeping in mind: half of a spider coupling (or jaw coupling) can be an economical and effective way to attach 3D printed things to a shaft.

While blowing up a regular party balloon is still asking too much of [Let’s Print]’s compressor as it stands, it certainly inflates (and pops) a latex glove like nobody’s business.

Continue reading “3D Printed Axial Compressor Is On A Mission To Inflate Balloons”

Home Brew Sandblaster Is A Junk Bin Delight

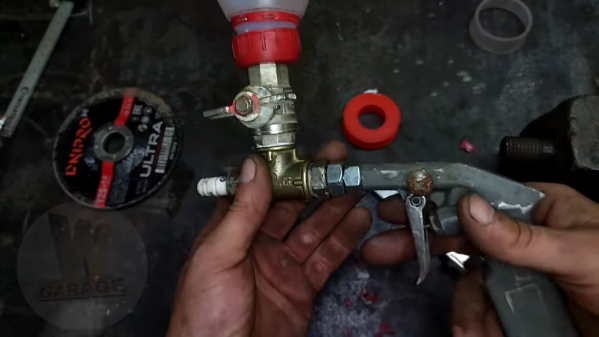
Opinions vary as to what actually constitutes a “complete” shop, but one thing is for sure: the more tools, the better. That doesn’t mean running out to buy a tool every time you have a need, of course. Sometimes you can throw together what you need from scrap, as with this ad hoc sandblaster. (Video, embedded below.)

Fans of junk builds — and we mean that with the highest respect — will want to pay special attention to [GARAGEUA]’s video below. It looks like pretty much everything he uses to make this sandblaster comes from the junk pile — bits of old plumbing fixtures, a blow gun that’s seen much better days, some old nuts and bolts, and even a deceased spark plug all make an appearance. That last one is perhaps the most interesting, since with some clever dissection the spark plug’s body and its ceramic insulator were used for the nozzle of the sandblaster. And best of all, no lathe was needed for this job — everything was done with a hand drill and an angle grinder. Check out the build details in the video below; you might pick up some useful tips.

We’ve featured even junkier sandblaster builds before, but this one is a clever way to save a few bucks and flex a bit on your mechanical ingenuity. If you need a sandblaster and it’s something you’re going to use again and again, by all means go out and buy one — we won’t judge. But rolling your own is cool too.

Continue reading “Home Brew Sandblaster Is A Junk Bin Delight”

A Compressor Of Compressors Breaks The Noise Barrier

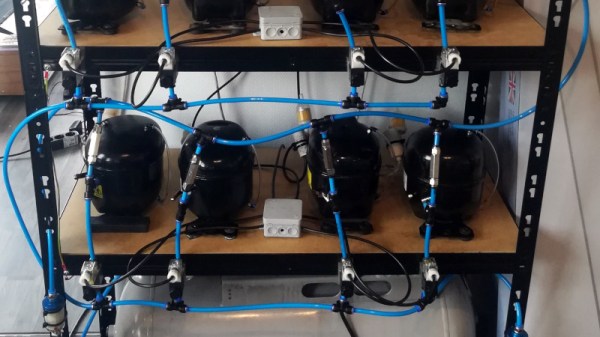
Having compressed air available in a workshop can be extremely useful. Having a compressor isn’t such a pleasure though, because unless it’s a very expensive model, it will be one of the noisier devices you own. Other than putting your compressor outside, is there a solution to the noisy side of having an air line? [Dominik Meffert] may have found one for his CNC plasma cutter in the shape of a rack of much quieter fridge compressors arranged in parallel with an air tank.

Of course, there’s nothing new about using a fridge compressor in the workshop. Indeed, such units are even commercially available as compressors for low-capacity tasks such as airbrushing. But we’ve never seen so many at once. It’s not entirely apparent how he’s handling the replacement of any lubricating oil that’s being caught in his filters, and we hope the refrigerant was disposed of safely, but we can see he’s on to something.

Fridge compressors have appeared here many times over the years, for more than compressing, we’ve even seen one as an engine. They aren’t always as strongly built as they should be though.

Fridge Compressor Teardown Reveals Engineering Compromises

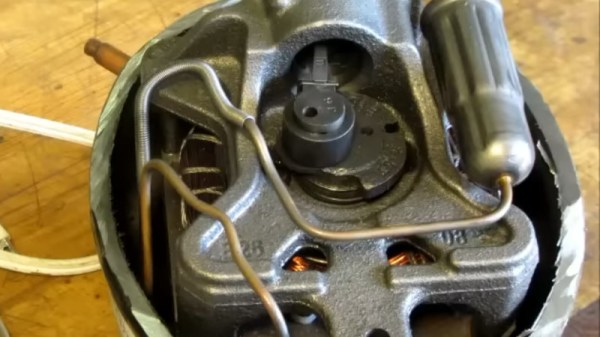
Probably one of the most reliable devices you will have in your house is the refrigerator, as its compressor has the minimum of moving parts and carries its own lubrication. It’s not uncommon to find fridges many decades old still in use, and fridges are far more likely to be discarded due to broken fittings rather than a failed compressor. An interesting teardown of a failed fridge compressor comes from [turbokinetic], who gives us a professional analysis of how shortcomings in its construction caused it to fail. It’s both an opportunity for a look at the inside of a fridge compressor, and a commentary on the quality of consumer grade hardware.

Electrically the unit seemed unhurt, but the motor wouldn’t pump anything. Cutting the lid off revealed the motor, and it was soon established that the bearing had failed. As the teardown proceeded the conclusion was that the fault lay in the oil being too low viscosity. The designer had picked a very light oil in pursuit of low friction for lower energy consumption, but had ended up with one too light to provide adequate coverage within the bearing. The compressor has a lifetime of around ten years baked into it from manufacture, whether the designer intended it to or not.

You can see the full video below the break, but meanwhile this isn’t the first fridge compressor we’ve seen.

Continue reading “Fridge Compressor Teardown Reveals Engineering Compromises”

Air-Assist Analysis Reveals Most Effective — And Quietest — Methods

If there’s one thing that continues to impress us about the Hackaday community as the years roll by, it’s the willingness to share what we’ve learned with each other. Not every discovery will be news to everyone, and everything won’t be helpful or even interesting to everyone, but the mere act of sharing on the off chance that it’ll help someone else is really what sets the hardware hacking world apart.

Case in point: this in-depth analysis of laser cutter air-assist methods. Undertaken by [David Tucker], this project reads more like a lab writeup than a build log, because well, that’s pretty much what it is. For those not into laser cutters, an air assist is just a steady flow of air to blow smoke and cutting residue away from the beam path and optics of a laser cutter. It’s simple, but critical; without it, smoke can obscure and reflect the laser beam, foul lenses and mirrors, and severely degrade cut quality.

To see what air-assist methods work best, [David] looked at four different air pumps and compressors, along with a simple fan. Each of these methods was compared to a control of cuts made without air assist. The test was simple: a series of parallel lines cut into particle board with the beam focused on the surface at 80% power, with the cut speed slowly decreasing. It turned out that any air-assist was better than nothing, with the conspicuous exception of using just a fan, which made things worse. Helpfully, [David] included measurements of the noise levels of the compressors he tested, and found there’s no advantage to using an ear-splitting shop compressor over a quieter aquarium air pump. Plus, the aquarium pumps are cheap — always a bonus.

Not sure how to get up to speed with lasers? Laser Cutting 101 might be a great place to start.