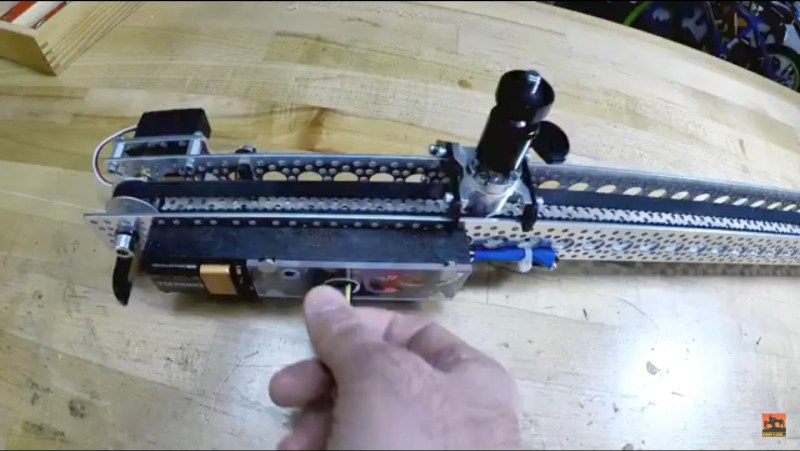
We’ve all gone through it. You buy a kit or even an assembled consumer item, and it’s either not quite right or it’s only a part of what you need. Either you do a fix, or you add to it. In [Jeremy S. Cook’s] case, he’d been working for a while with a camera slider kit which came with just the slider. He’d added a motor and limit switches but turning it on/off and reversing direction were still done by manipulating alligator clips. Now he’s put together some far better, and more professional-looking controls.
He started by replacing the DC motor with a servo motor modified for continuous rotation. Then he built a circuit around an Arduino Nano for controlling the motor and put it all in a carefully made box which he bolted to the side of the slider. A switch built into the box turns it on and off, and a potentiometer sets the direction of the slider. While not necessarily new, we do like when we see different approaches being taken, and in this case, he’s using magnets to not only hold the case’s cover on for easy access, but also a couple of them to hold the 9-volt battery in place. Check out his construction process and the new slider in action in the video below.
We’ve seen a few sliders here on Hackaday. Have a look at this compact one which uses a pantograph-like mechanism. And for anyone with a wood workshop, here’s a mostly wooden slider.


Geeze. Do not hold end mills with a drill chuck! Even in wood!
Concerned about runout?
Not runout (still a problem), but loading. A drill chuck is only on its taper with a slip fit (no fasteners), so side loading has a good chance of knocking it loose.
No, they will not grip well and can pull out. Drill chucks are not designed for side load. Drill but also have a soft shank that allows the chuck to dig in, end mills are hard so they just slip. Also drill chucks are usually just held in place by a taper lock which will come loose with side load.
the movement of the carriage looks very choppy, and the speed does not seem to stay constant.
gear that thing down, and/or use steppers and the result will be much better.
add an mcu for greater control, and new features. Like a much, much lower minimum speed to make a timelapse over a long period of time for example..
oh, there’s already an arduino. add a stepper driver board and you’re set.
Movement isn’t too bad at medium speed IMO, but does get inconsistent when lowered. Certainly not bad suggestions, but it was an easy solution hardware-wise using an adapter plate. It does what I wanted it to do pretty well, though perhaps I’ll make a new revision sometime in the future!
All of that work and he’s using a servo? Nope – a good geared stepper (or even a bad one) will do you a lot more good and cost about the same as a servo. The best part is you can scale the whole thing up and go from the $3.50 Ebay driver/motor to a really beefy setup using a big geared stepper/driver/power supply with almost no further recoding or other changes.
A servo would likely be better, but it works well for my purposes, and the power transmission hardware was pretty easy to implement. Thx for checking it out.
Thanks for the writeup Steven!