The Raspberry Pi has become the best video game console on the planet. With RetroPi, anyone can play Super Mario 3, Doctor Mario, and even Doki Doki Panic. Adafruit’s PiGRRL Zero and [Wermy]’s reconfabulation of an old brick Game Boy to house a Raspi Zero and display have made the Raspberry Pi portable, along with all those retro games we love so dearly.
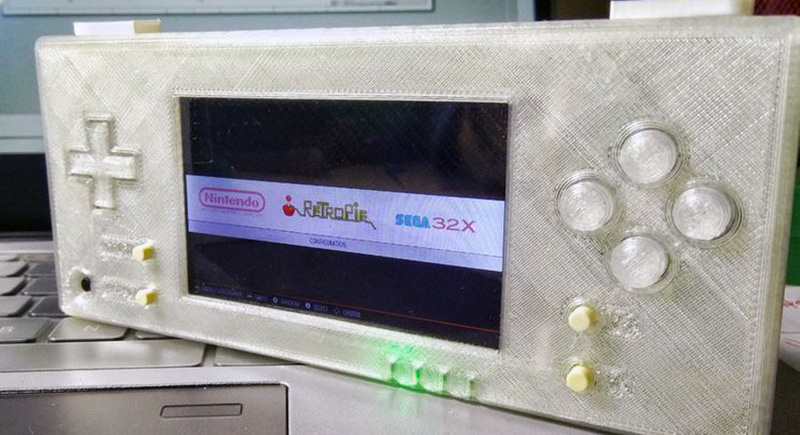
There’s a problem with these builds, though. They only use the Raspberry Pi Zero, and with that the limitations on emulation performance, and the Raspi 3 is far too big for a portable console. What’s the solution? It’s the greatest homebrew console ever created. For this year’s Hackaday Prize, [DeanChu] is building the Retro-CM3. It’s a retro handheld with a 3D printed enclosure, that’s powered by the Raspberry Pi Compute Module 3. Stand back, folks. We have a winner that will top the Raspberry Pi and 3D printing subreddits.
The key feature for this build is, of course, the raw processing power of the Raspberry Pi Compute Module 3. This is a Raspberry Pi 3 with 4 GB of eMMC stuffed onto a board that fits into an SODIMM socket. The pins on this device give you access to the GPIOs and the DSI connector. All you really need to turn this into an amazing vintage emulation console is a breakout board with a few buttons, power supply, and a display.
The extra components for this build include a 3.2 inch LCD using the DPI interface. There’s a speaker, and a 2000mAh battery. The real tricky part here is the custom PCB, breaking out the DPI pins on the Compute Module, adding a small speaker, and throwing a small STM32 to read the buttons. It’s an entire system, ready to be housed in a 3D printed enclosure.
This is, simply, the best Raspberry Pi portable you’ll ever see, at least until we get a Rasberry Pi Zero with the capabilities of the Pi 3. It’s an excellent use of the very small Compute Module, and one of the most polished Hackaday Prize entries we’ve seen thus far.


don’t want to be that guy, but I want to point out the existance of the circuit sword https://hackaday.com/2018/04/06/circuit-sword-delivers-retro-justice/
I was gonna day the same thing. Although Kite’s Circuit Sword doesn’t indicate a 3D-printed enclosure, it certainly was ahead of this build.
That said, this build looks awesome. It’s really good to see some hobbyist-level stuff using the Pi CM3. Also, this build probably wins out on ergonomics, since the original DMG GameBoy is really kinda awkward if you want shoulder buttons.
Why are all builds so uggly?
Is there no one considering design today?
because for most of us – the goal is to get the project working.
I certainly dont have a industrial designer living in the back of my workshop to call upon to design enclosures for my projects.
I would love to have my projects looking nicer so please if you are able peruse the project pages and offer some designs to help put
That’s it, I’m gonna cram a raspberry pi into an Ugg boot now.
the raspberry 3 is not that big, and two great builds appeared on thingiverse since last month
https://www.thingiverse.com/thing:2846560
https://www.thingiverse.com/thing:2809128
A pi 3 B+ is too big you say? Have you tried desoldering the USB and ethernet jacks?
Did any of you have a Sega Nomad? That thing was like holding a cinder block in your lap. It was portable if you were determined. There was a battery expansion which devoured about three Costco bulk packs of double-As at once and doubled the depth of the device, and you’d burn through all those before the road trip in the back of your dad’s Volvo station wagon was over.
You could fit three full-blown raspberry pis in that case. In fact, that would be a good idea for a project. Find an old one of those and cram in a pi along with as many amp-hours of lithium ion you can muster. You’d probably be able to run Retropi for a couple months straight.
Not mine, though. It still works as long as you don’t mash the buttons too hard.
I found your Sega Nomad idea interesting for about as long as it took me to check ebay for parts/repair Sega Nomad prices–$40 to $60.
For my son and nephews, I rigged up a GameCube and portable DVD player in the back of our minivan, powered from vehicle power, so no need to buy AAs by the gross.
“This is, simply, the best Raspberry Pi portable you’ll ever see”
I doubt that.
I’m the author of this “Retro-CM3” and I’m not so agree with this “best” word at all. There will no “best” for any maker, only “better” and I am sure there are quite a lot raspi portable gadgets that are better than mine.
The RPi Compute Module 3 is a great choice for projects that require CPU power and slimness. The uptake is the greater skill requirement, as you have to design your own board rather than simply solder wires to the RPi Zero’s GPIO pins.
That is very nicely done! Seems like an SLS case would suit it well :)
The only other retro gaming CM3 project I’ve seen is the Freeplay CM3:
https://www.kickstarter.com/projects/1227007236/freeplay-zero-freeplay-cm3-by-freeplaytech
I hope more folks use the CM3 for their projects: the community needs to see more examples of straightforward carrier boards.
shell console is better https://itsfoss.com/gameshell-console/
I love retropie but I find the input lag to be completly game breaking on game requiring quick reaction and precise movement like Super Mario Bros. I feel many people making these builds haven’t had the chance to play on the real console in a while and can’t really see any problem. I mentionned it to a few peoples and they seem to think I’m nuts but I am much better playing on my original nes than when I play on an emulator. Some game would be impossible to play with that kind of delay, like Parappa the Rapper for example, which is extremely difficult to play even on the official PSN version. I’m hoping future FPGA based retro game systems will fix this issues.
I’m right there with you. I made a nice-ish wooden case for a Raspberry Pi 2 and loaded RetroPie on it for a birthday present for a friend’s foster kid . . . and the games are effectively unplayable because of the lag. RetroPie is a great idea and a well-polished product but it’s just too laggy to use.
Are there Linux emulators that ARE useable that I can run on Raspberry Pi 2?