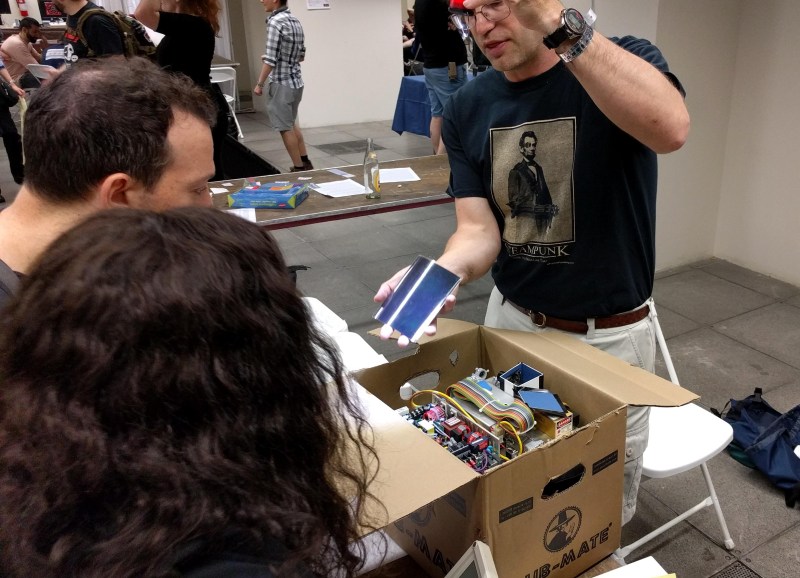
Prior to this weekend I had assumed making holograms to be beyond the average hacker’s reach, either in skill or treasure. I was proven wrong by a Club-Mate box full of electronics, and an acrylic jig perched atop an automotive inner tube. At the Hope Conference, Tommy Johnson was sharing his hacker holography in a workshop that let a few lucky attendees make their own holograms on site!
The technique used here depends on interference patterns rather than beam splitting. A diffused laser beam is projected through holographic film onto the subject of the hologram — say a bouquet of flowers like in the video below. Photons from that beam reflect from the bouquet and pass back through the film a second time. Since light is a form of electromagnetic radiation that travels as a wave, anywhere that two peaks (one from the beam the other from the reflected light) align on the film, exposure occurs. With just a 1/2 second exposure the film is ready to be developed, and if everything went right you have created a hologram.
Simple, right? In theory, at least. In practice Tommy’s been doing this for nearly 30 years and has picked up numerous tips along the way. Let’s take a look at the hardware he brought for the workshop.
The Laser and the Film
 Tommy is using a 100 mW laser meant for a machine that etches aluminum printing plates for offset printers. He described this as “a laser printer on steroids”. Apparently a bunch of these hit the used market and the cost was reasonable. I didn’t get more info than this and my eBay-fu failed me but if you have more info please leave a comment below.
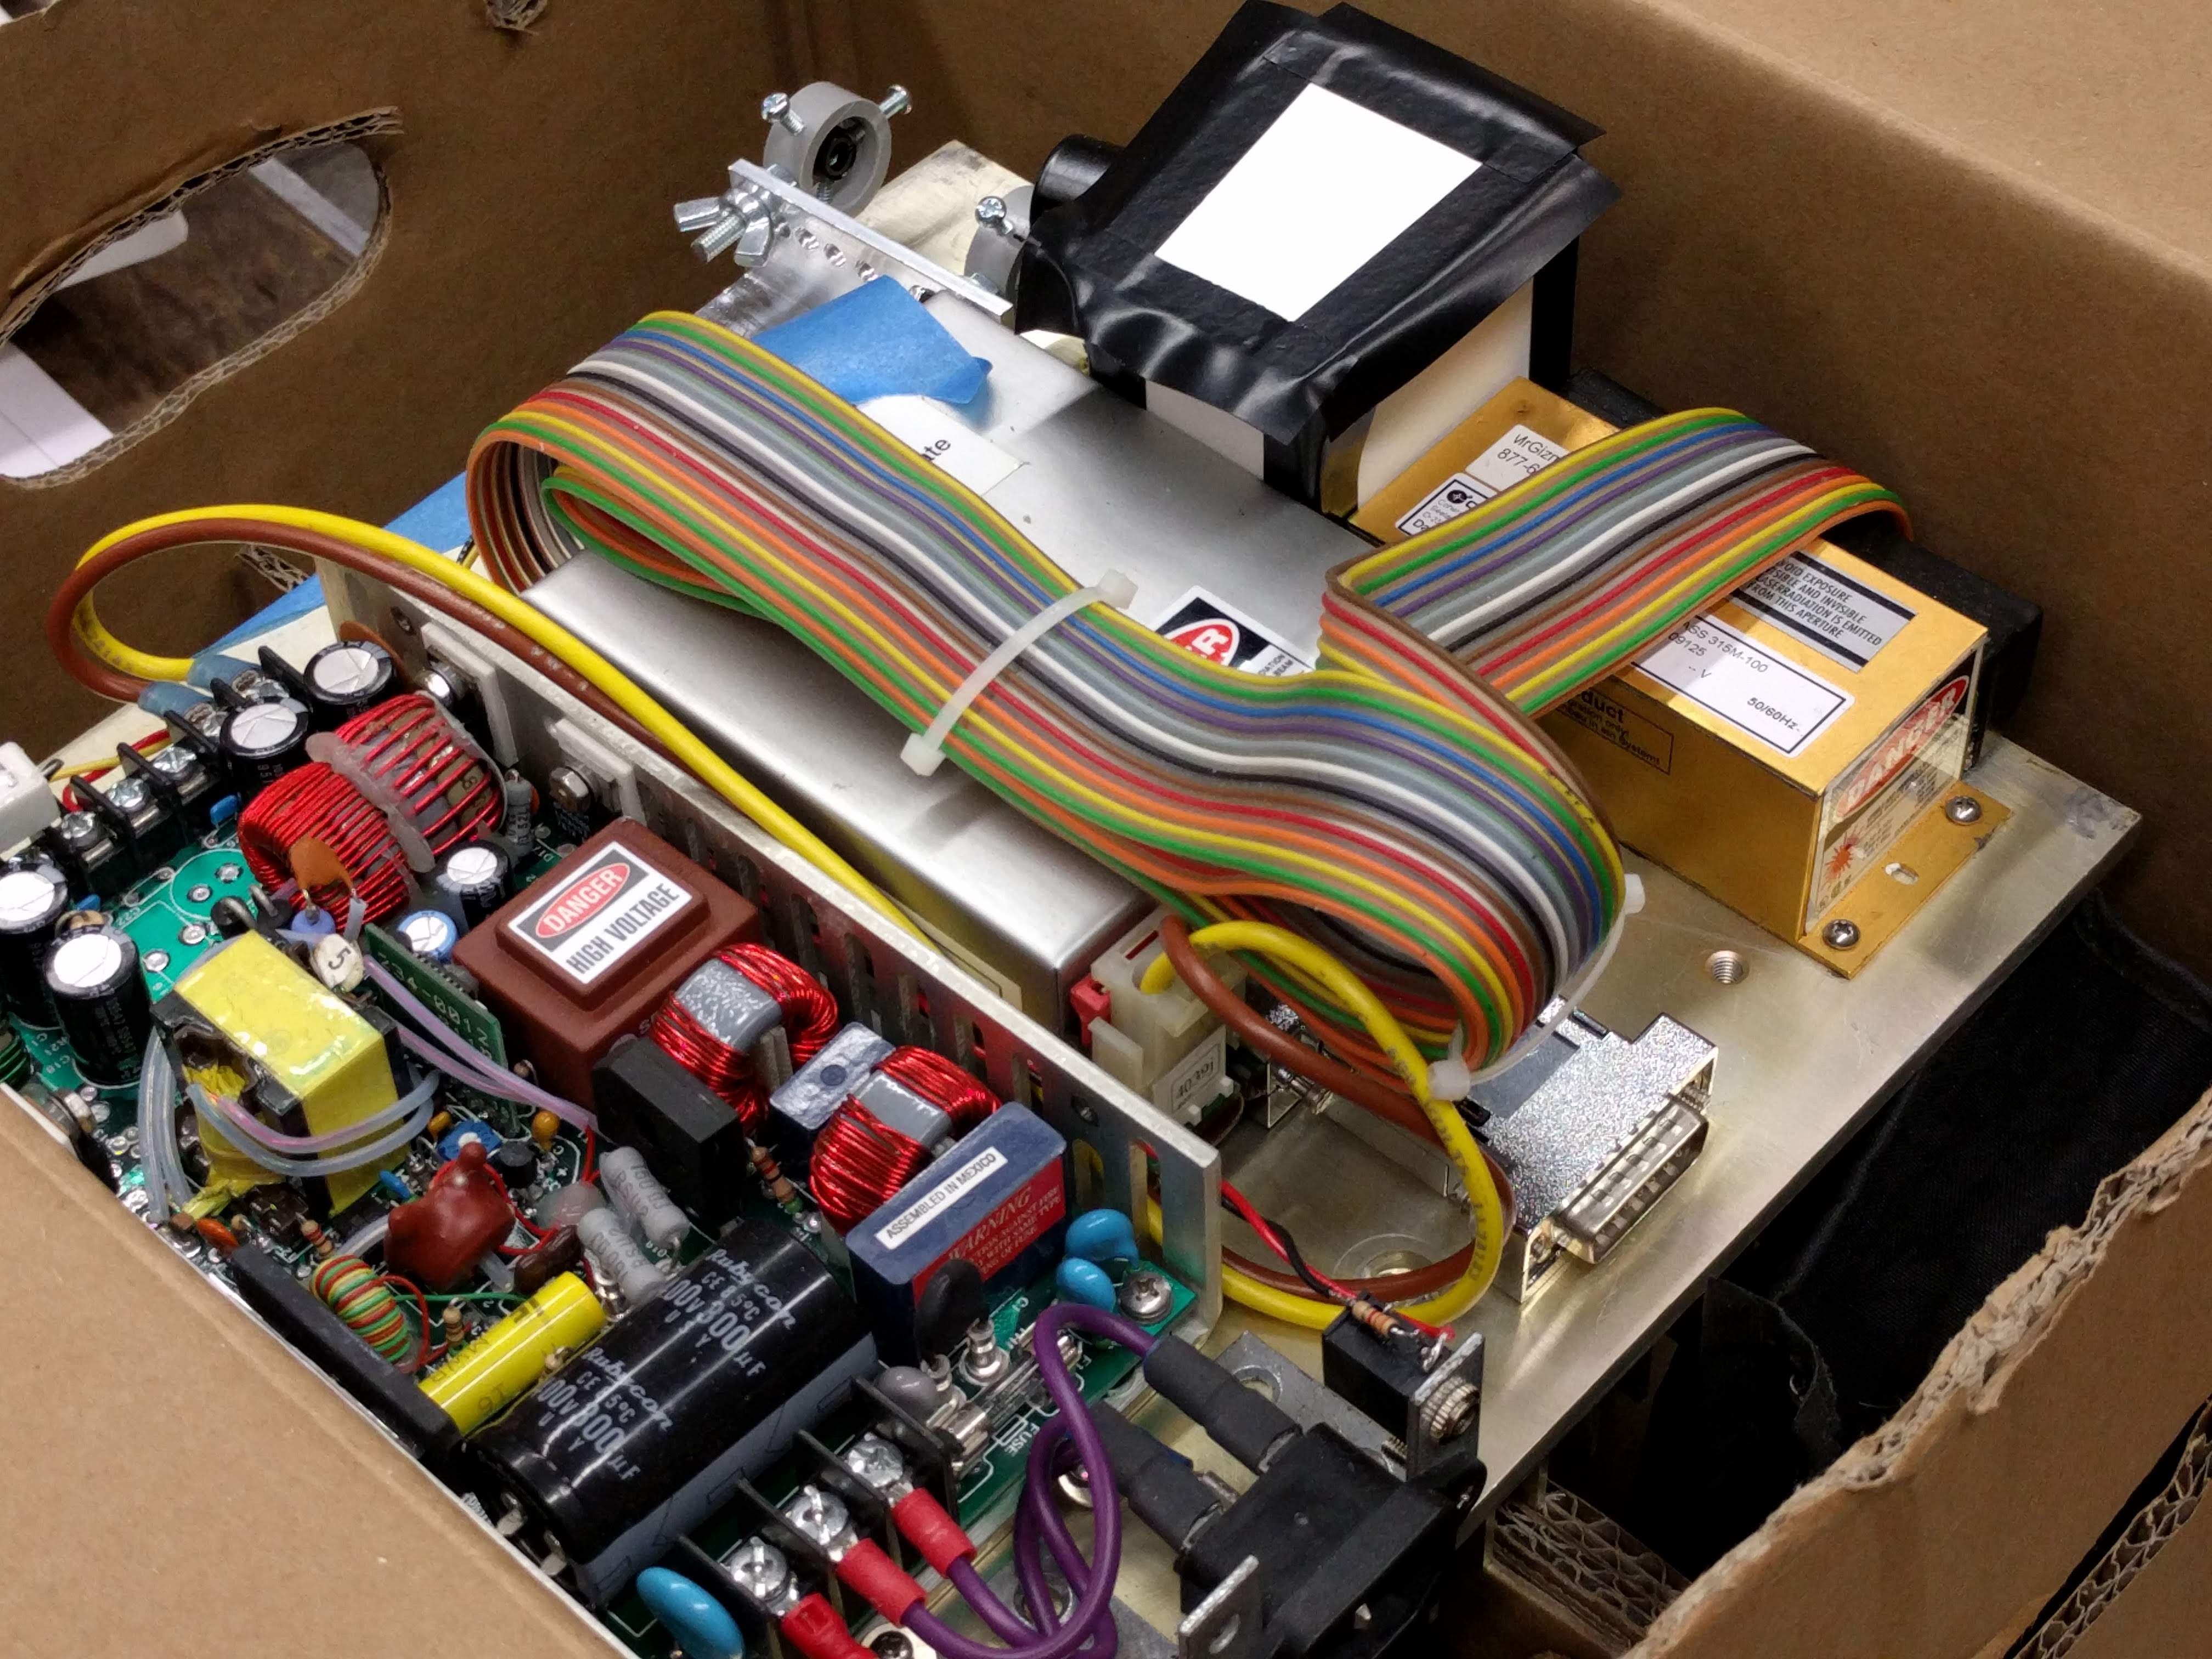
Here we see the laser inside its cardboard enclosure (click for the full size image). The laser module is the gold box to the right. The beam shines to the left, through the white box that has electrical tape on it, through two lenses that spread the size of the beam, and out of a hole in the box which is just out of frame (top edge of this image). The module in the middle connects to the control circuitry for the laser, and to the left is a power supply board.
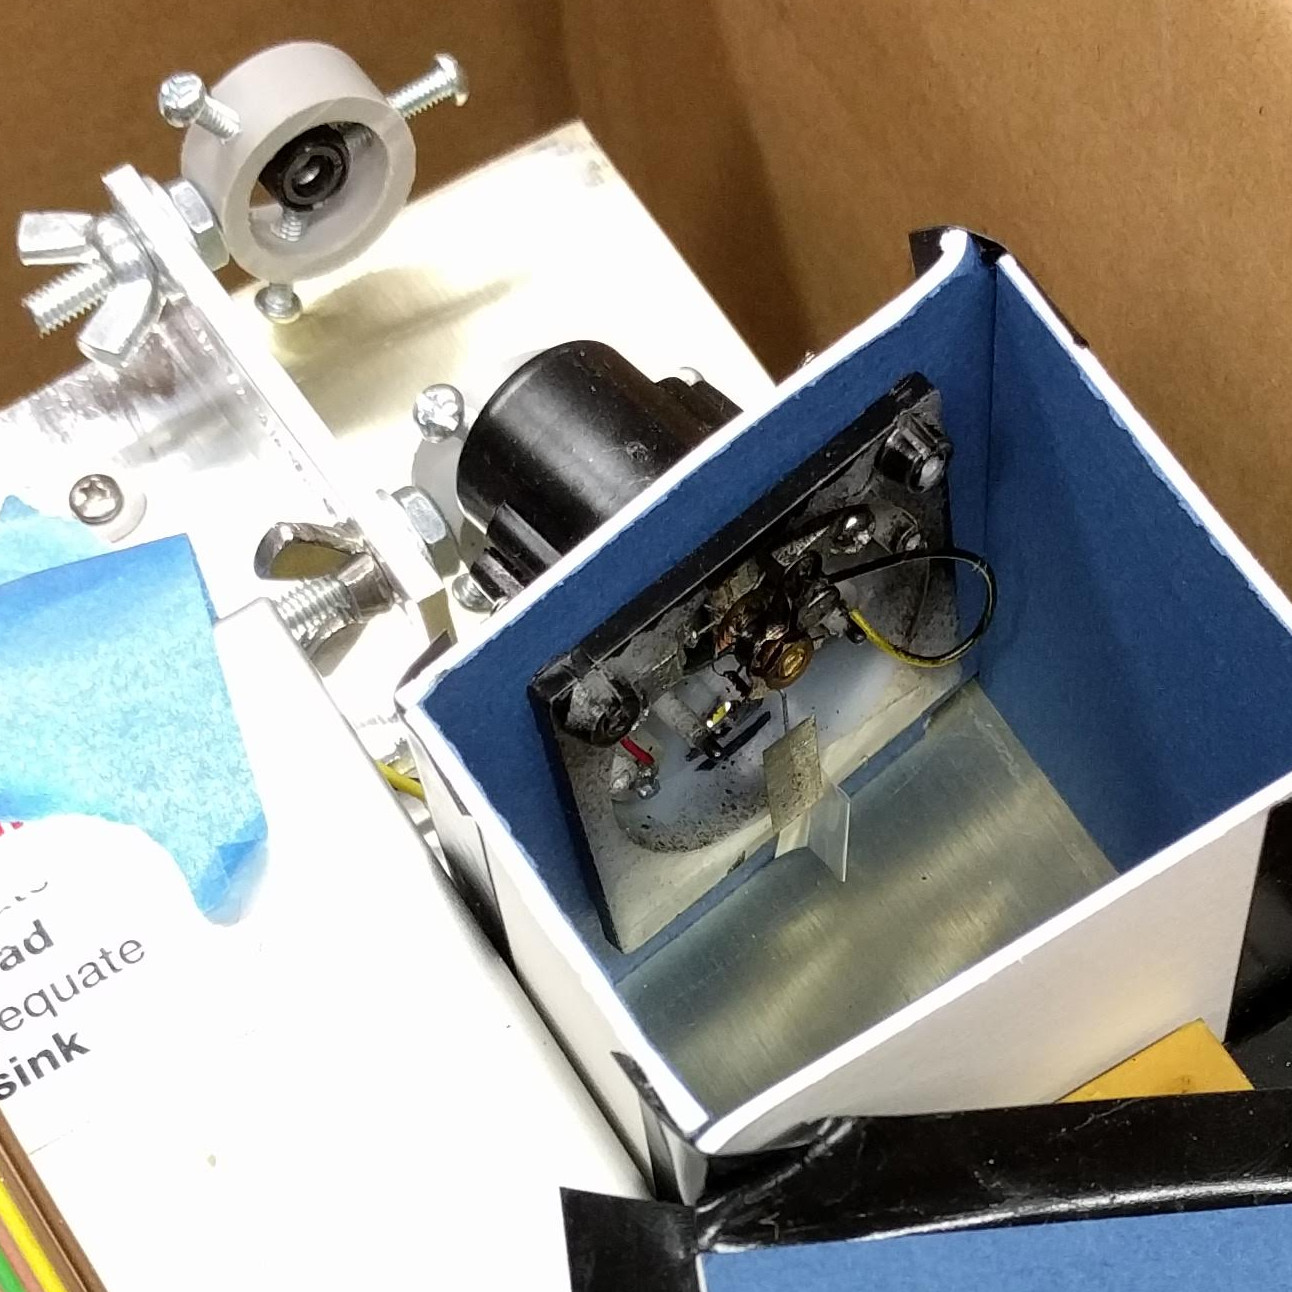 Here you can see the inside of that white box which houses a shutter system for the laser. It takes about 10 minutes for it to adequately warm up and the diode is on the entire time. A shutter is necessary to ensure the film is exposed only when the
 Death Star beam has reached full power.
This shutter is an excellent hack. Tommy pulled the needle mechanism from an analog voltmeter and attached a mirror to the needle. The mirror itself is a hack; he used that shiny silver material that you find if you disassemble a retail store anti-theft tag. This is a very cool choice since it is both adequately shiny and light-weight. The meter’s needle can be moved aside simply by injecting a bit of voltage.
When the shutter is open the beam shines through two lenses. These are responsible for directing the beam and diffusing it. I wondered if the beam needed to scan over the subject being photographed. But at a range of around 30 feet, the beam will cover the entirety of the film, exposing it in one shot.
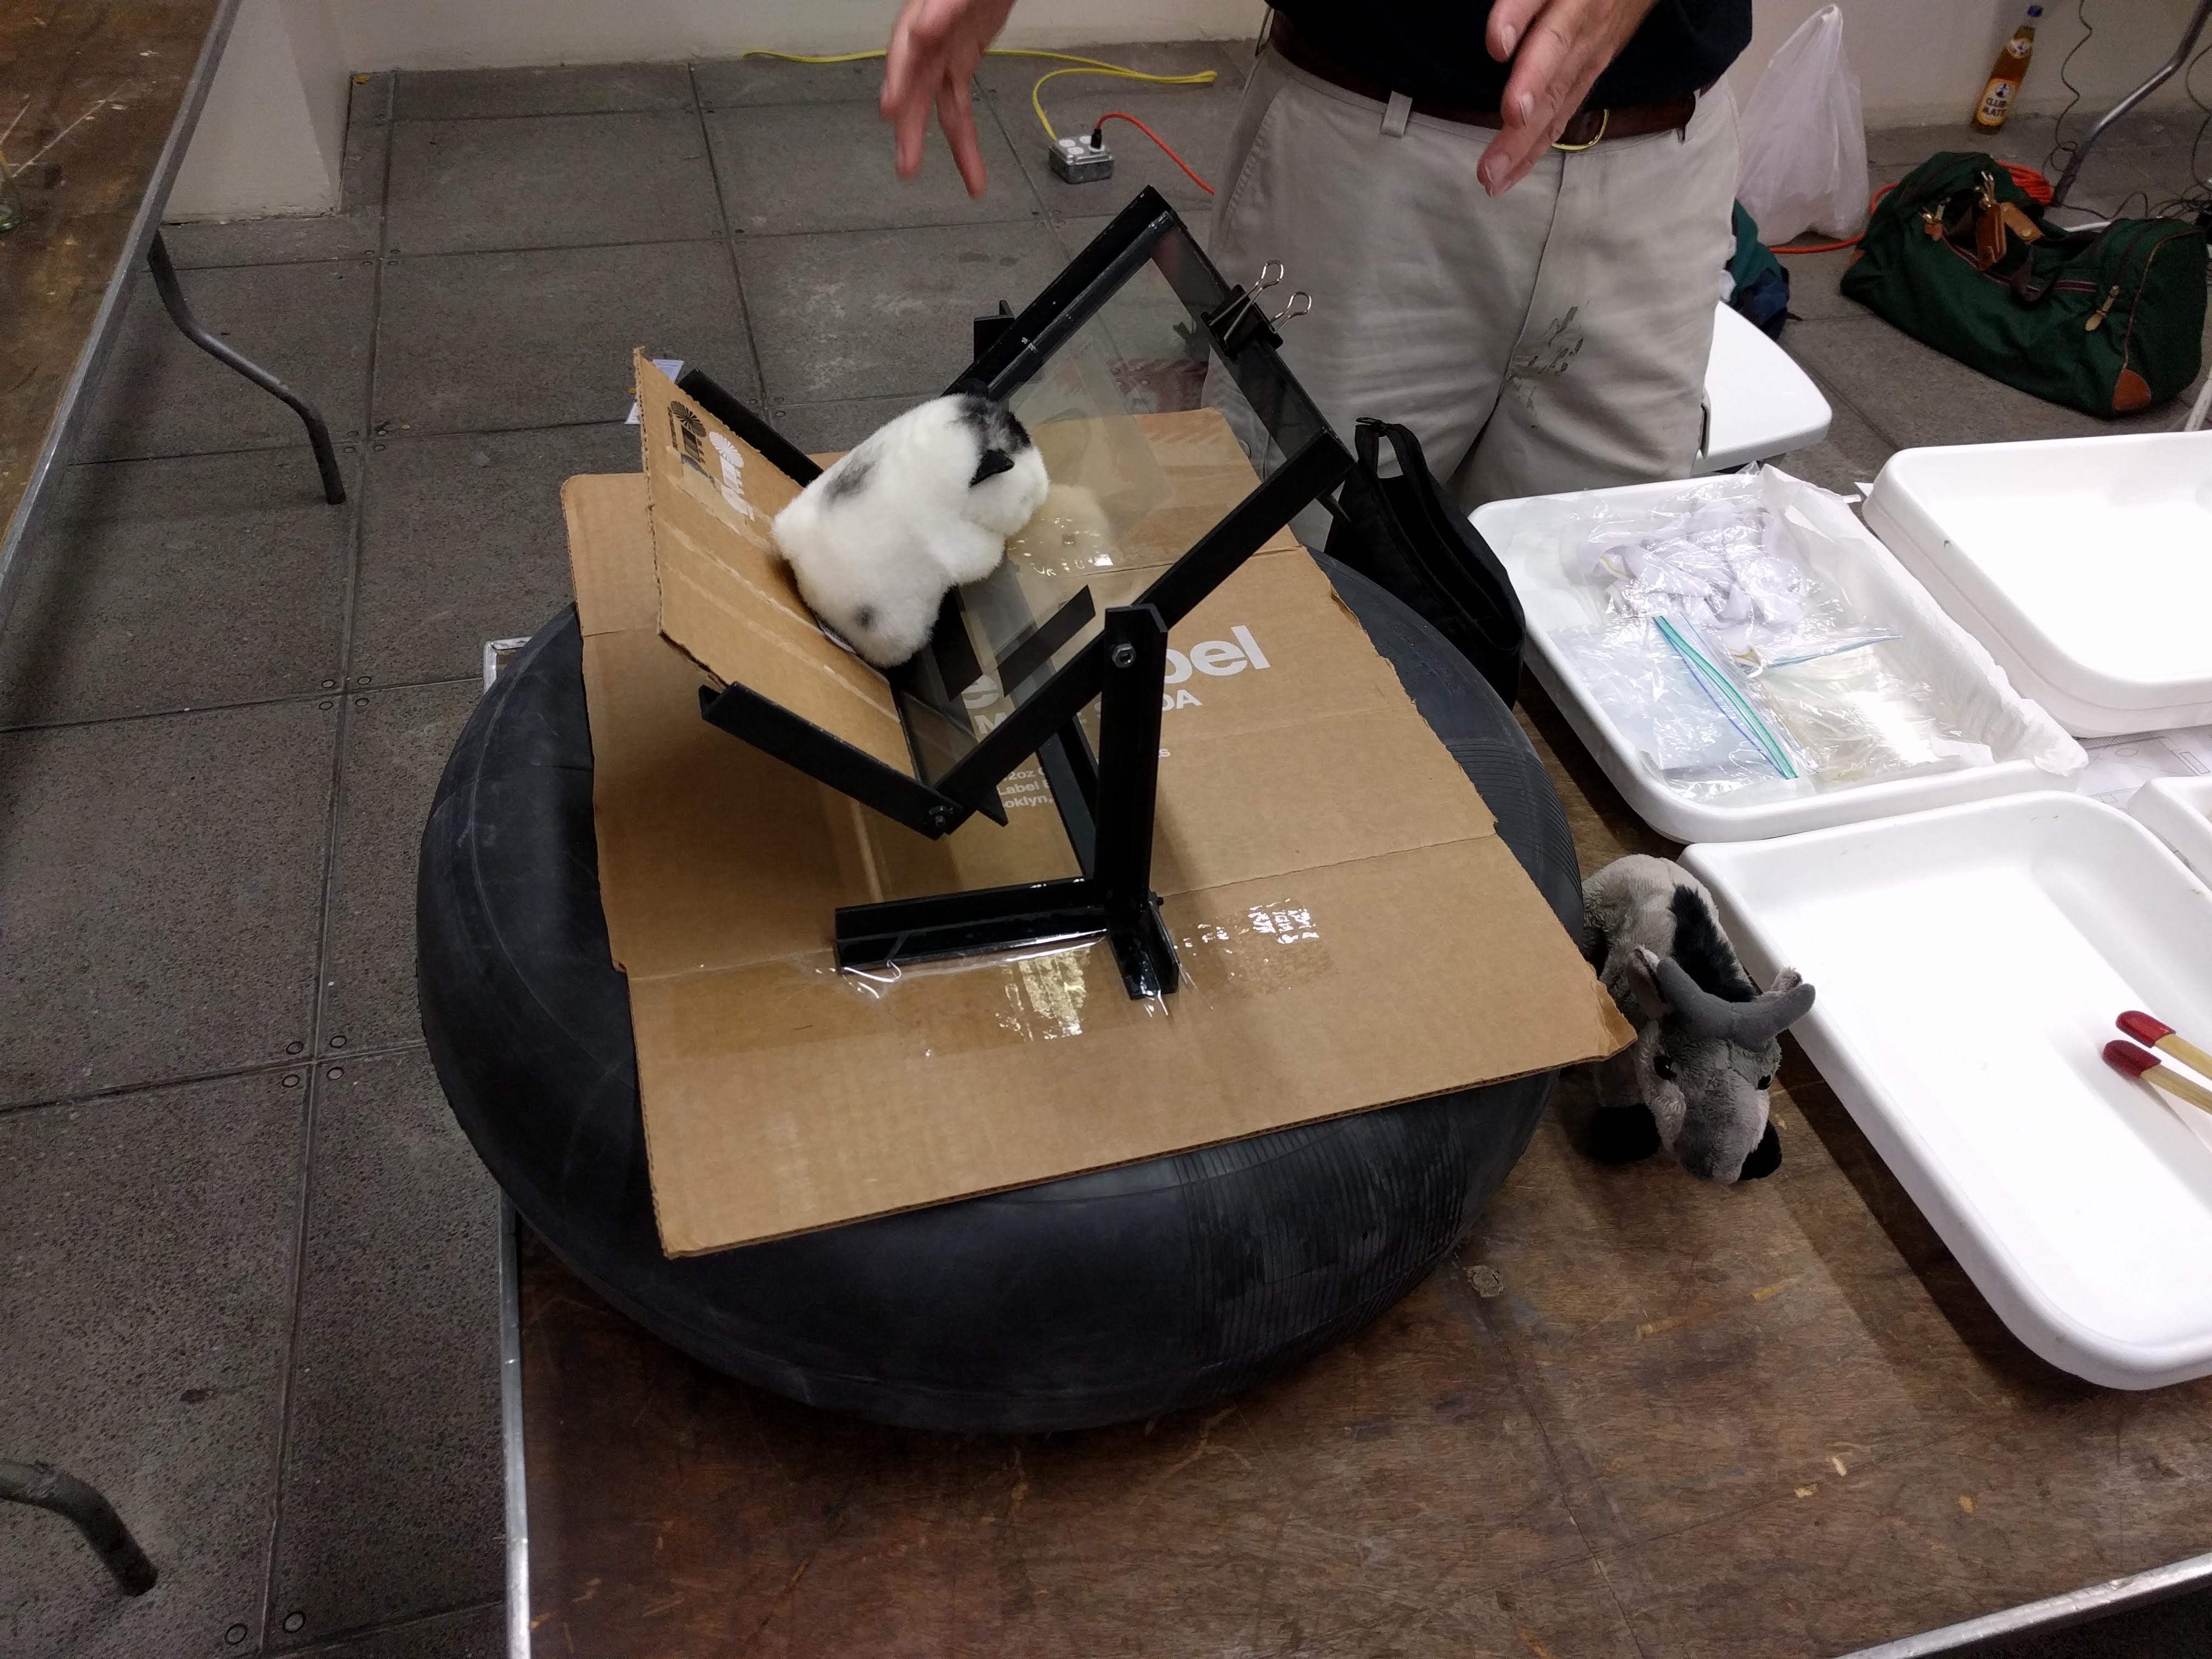 The film apparatus itself is another set of cool hacks. Optics are highly prone to vibrations, and any movement more than 1/4 of a wavelength is enough to blur the exposure. To account for this, the jig that holds the film sits atop an automotive inner tube — an air cushion to isolate the jig from any vibrations transmitted through the floor and up the table.
The photo here shows a stuffed animal as the subject of the hologram, but it does not show the film itself which is normally held up against the glass to the right of the subject. This is at an angle to the incoming beam, call it 45 degrees. The angle isn’t crucial, you could expose the film straight on. But if you did, the light source necessary to reveal the hologram in the final product would also need to come straight on. Exposure at an angle allows you to look directly at the film and place the light source at an angle to it so that your head isn’t in the way of the light. This is what Tommy is demonstrating in the image at the top of this article.
Developing the Film
Tommy purchases his film, which is much higher resolution than traditional holographic photographic film, from a person who makes their living as a holographer and sells the film on the side. The development process is similar to traditional photography, conducted in a darkroom using chemical baths.


Unfortunately Tommy hasn’t written about this holography equipment before, but he plans to do so on his homepage. Already up is a delightful collection of his other, more involved holography experiments. I also enjoyed check out the webcam of his shop which has a pleasingly mad-scientist feel to it! I’m going to keep my eye on this link for more details. Until then, check out the two-page guide he put together for the workshop.


https://www.ebay.com/bhp/computer-to-plate
CTP Computer-to-plate machines.
More:
https://www.printninja.com/printing-resource-center/printing-academy/pre-press-production/manufacturing-printing-plates
The word “holographic” seems unnecessary in the above sentence. Holographic films have much higher resolution than traditional (2D) ones.
holographic “film” is actually plate glass, not film, so yes, it is necessary to use the “holographic” modifier to distinguish it from normal “film”. See above; “any movement more than 1/4 of a wavelength is enough to blur the exposure. ” You can’t keep “film” from flopping around during the long exposures required. If you live in the city you will probably have to make your exposures late at night to avoid vibrations from the subway.
I’ve got some very nice home made holograms on normal floppy holographic film (Agfa). You sandwich it in plate glass during exposure. I used the cheap floppy film for test exposures and the expensive plate glass emulsion for the final exposure. Yes, the entire apparatus is extremely sensitive to vibration…
For a better understanding of holographic film works, how the information is stored in the 3-D structure of the exposed grains, I would suggest reading the class notes from Prof. Steve Benton’s holography class at MIT. Be prepared for the legendary fire-hose of heavy mathematics and physics.
You are correct. That is the wrong word. It should have been “photographic film”. I’ve made the change using strikethrough above. Thanks!
Thanks to single mode diodes (hint: don’t bother using Bluray diodes, they suck) you can now make your own holograms.
Kudos to the OP for shutter hack!
Laser looks like a Coherent Compass 315m
Hand made holograms
https://www.youtube.com/watch?v=0uko9oixijg
:o)
https://www.youtube.com/watch?time_continue=1&v=XUy8lELWhJg
Are the Holograms true holograms though?
I was told in a course I took in college that any piece of a hologram contains the information to recreate the whole. Does this method do that?
I heard the same, but I can’t see how it can be true. If it were, why not keep a bit 0.0000000001 mm² and throw away the rest?
I think that statement was meant to highlight the fact that the plate holds an interference pattern, which has no 1:1 correspondance with 2d projection of the object. Would like to hear more about this.
https://www.amazon.com/Holographic-Imaging-Stephen-Benton/dp/047006806X
AIUI, any part of a hologram contains the whole image. But a small piece will be blurry, and only viewable from a small range of angles. Like looking through a keyhole. You need the whole thing for a clear and fully visible image.
That’s an important detail. It makes much more sense now.
Yup. A _bit_ more sense anyway! I’d still love to know how it actually works though, to store a whole image, complete with depth. Actually it’s not depth is it? It’s stereography, it presents a differing image to each eye, for every eye viewing, a different image from every possible viewing angle.
I’d like to know, what is the limit of the viewing angle? How’s that determined by the exposure? How can a whole picture be stored in a tiny place? What’s the resolution limit caused by? I know you split the laser into 2, then shine both onto the film. One, just spread across it, and the second, as reflected by the object you’re photographing. Something something interference patterns.
The maths would be no use but a decent diagram or walkthrough would be nice, for the average sort of educated layman.
Yes, but a tiny piece of the hologram only recreates the scene from an extremely narrate viewing perspective. Did holograms in college…
What you’re thinking of is light fields and computational photography.
https://en.wikipedia.org/wiki/Light_field
It is almost true, especially if you’re willing to accept values of “whole” that are small enough.
If Platonic metaphysics were more accurate, it would be more true. A lot of stuff continues to fall into that same pit-trap even 2300 years later.
“Scratch Holograms” – not everything that produces a light field is a hologram. Also, “Scratch Holograms” have a serious limitation because there’s a defect wherever scratches intersect. This prevents them from representing arbitrary light fields, like surfaces. Look cool if you’re representing a small set of points though
I tinkered with holography as a hobby in the mid 80’s using a 5mw HeNe laser from a laser disk player. Exposures took hours. Here is a most excellent book on amateur holography: http://a.co/5WMxnwh (Amazon) The book includes how-to’s for many different types of holograms as well as many techniques and sources for creating them on a small budget.
I remember homemade holograms being a project in a Popular Electronics magazine back in the 90s. I do remember it not looking particularly easy and the parts and equipment were far outside my childhood budget but so much has changed since then. I pretty much expect anything that made it into a hobbyist magazine back then to be very much within reach today.
was supposed to be a reply including the quote “Prior to this weekend I had assumed making holograms to be beyond the average hacker’s reach, “
Where’s Princess Leia?
I remember reading a book in the Torrance, CA library on hologram, among other things. It detailed how to construct the development table for it — which used springs/foam rubber to act as shock absorbers, to keep the hologram from blurring -‘ and other supporting equipment.
The same book also detailed how to construct liquid based solar cells. Wish i could remember the name.
This was a very cool to see first-hand. Like Mike, I figured this was not the sort of thing you could reliably do on the desktop with a bunch of random bits of hardware, but of course the hacker mindset never ceases to impress.
Does anyone have any good references or suggestions regarding computer processing of 3D or even real time 4D objects using high resolution camera(s)?
As with photographic film or media plates, what are the limits or really is the limit in resolution required of the camera/sensor where the digital imaging systems are able to be equivalent or better than the traditional prior analog technology that was the best method?
https://en.wikipedia.org/wiki/Digital_versus_film_photography
My guess is the newer 16K or 32K with multiple sensors can and really a 64K can be equivalent.