We probably don’t need to tell this to the average Hackaday reader, but we’re living in a largely disposable society. Far too many things are built as cheaply as possible, either because manufacturers know you won’t keep it for long, or because they don’t want you to. Of course, the choice if yours if you wish to you accept this lifestyle or not.
 Like many of us, [Erik] does not. When the painted markings on his stove become so worn that he couldn’t see them clearly, he wasn’t about to hop off to the appliance store to buy a new one. He decided to take things into his own hands and fix the poor job the original manufacturers did in the first place. Rather than paint on new markings, he put science to work and electroetched them into the metal.
Whether or not you’ve got a stove that needs some sprucing up, this technique is absolutely something worth adding to your box of tricks. Using the same methods that [Erik] did in his kitchen, you could etch an awesome control panel for your next device.
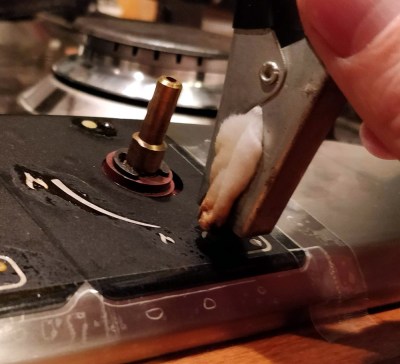
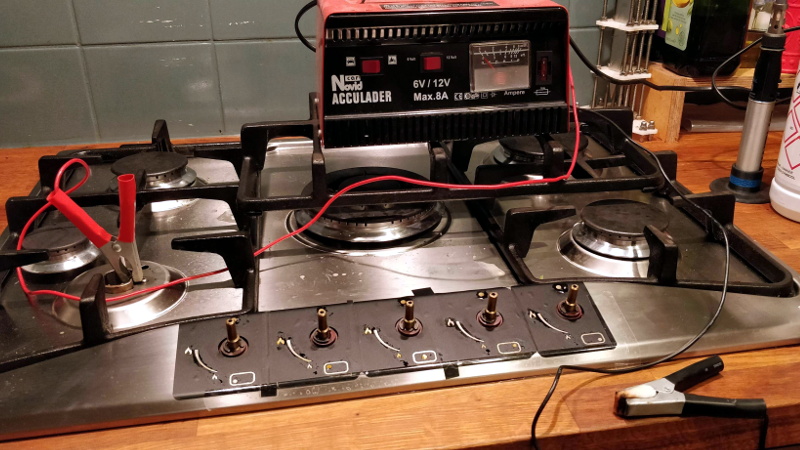
So how did he do it? Despite the scary multisyllabic name, it’s actually quite easy. Normally the piece to be etched would go into a bath of salt water for this process, but obviously that wasn’t going to work here. So [Erik] clipped the positive clamp of a 12 V battery charger to the stove itself, and in the negative clamp put a piece of gauze soaked in salt water. Touching the gauze to the stove would then eat away the metal at the point of contact. All he needed to complete the project were some stencils he made on a vinyl cutter.
We’ve previously covered using electricity to etch metal in the workshop, as well as the gorgeous results that are possible with acid etched brass. Next time you’re looking to make some permanent marks in a piece of metal, perhaps you should give etching a try.
[via /r/DIY]


Ecthing is a really good way to personalise your things and make them look much nicer. But, and I’m just throwing this out there, what we really need is an easy way to make detailed sencils. Some method that does not require a vinyl cutter or special chemicals. Something like that transfer paper stuff for t-shirts we used to have … but different. Someting anyone could use at home with a laser printer and kitchen supplies.
You could toner-transfer to aluminium foil and then electro-etch it.Or even reuse some beer or soda cans. I’m planning to use metal from soda cans, spray them with paint, scratch paint with sewing needle mounted to 3d printer head and then etch that metal to make some very fine shapes.
You may not need the paint. My understanding is that soda cans have a very thin layer of polymer over both sides to keep the aluminum from corroding.
A thin layer of wax would also work as a mask for simple things, with appropriate areas of removal to create apertures.
Yes, but only at low current densities. The heat would melt the wax.
I’ve tried that method and not had luck with it. Somehow the fluid got under the wax and I ended up etching areas that I didn’t intend.
I’m using a cheap (100€) vinyl cutter for solder stencils and stuff like this here. It’s very flimsy to make more complicated stencils, so as long as the surface is plane, screenprinting tools do wonders. (for 50-100€ you’ll get a complete screenprinting starter kit that works well enough.
Thinking about it i’d probably spray photosensitive paint on the stove, print the to be etched stuff on a transparent foil, expose and then etch. skipping the vinyl cutter or developing the screen.
I bought a cutter on ebay for like 28 bucks untested, I use it a ton for paint stencils, graphics, stickers, and solder paste stencils, if you can get one cheap its worth every penny
We use a cartridge that fits in a brother hand held lable machine – type up what you want and print it out and that produces the stencil. We used to get a get a sheet of special paper (like a grease proof tissue paper) and printed the stencil on a dot matrix printer, it punched holes through the paper. sorry for the lack of names but Ill have to check when Im back at work again
I wouldn’t get scared of “special” chemicals. A lot of them have common household substitutes. Like my PCBs, you can buy the UV reactive film off ebay. Now instructions list some wonderful Dupont chemical names for developing and stripping, but you can just do it using washing soda (developer NaHCO3) and drain cleaner (sodium hydroxide).
Get lye (sodium hydroxide) instead of drain cleaner, which often has aluminum salts mixed in to make an exothermic reaction when exposed to water. You don’t need the aluminum.
There is no reason to be scared of chemistry. Buy the purest reagents you can get, read up on how to handle them, and go about your business.
good ol’ screen printing…
Creating the screen is a photochemical process, so regular phototransfer methods you’d use for PCBs work well, but you don’t even need a computer to do this.
Once the screen is done, you can either use it for etching or for actual screen printing. With a silicone transfer…pillow thingy…almost any shape can be printed on.
When you put current trough salt water doesn’t you create chlorine gas? This sounds nasty.
Actually it releases HCl, hydrochloric acid, but the amount being created here is at ‘irritant’ concentrations, not ‘WWI trench warfare’ concentrations. Make sure your room is reasonably ventilated and don’t stick your nose right down to where you’re working…
And do be sure not to have other items sensitive to damage from HCl too close, such as bare steel.Even low HCl concentrations in the air will cause damage.
“be sure not to have other items sensitive to damage from HCl too close”
Contact lenses are an important example.
Okay, so it produces nasty stuff but in low quantities. Thank you for clarification.
@HaD: Sorry for double post, i thought i was caught again in this spam filter, you may remove the other comment.
wow, that result looks very professional, good job!
Might need to be careful about applying a plugged-in power source to the chassis of a plugged-in appliance. You could make sparks fly (or worse). Best to unplug the appliance being worked on.
It’s a gas stove…
With an electric lighter.
This is the sort of job that spot sandblasters are good for. Cheap ones are available at auto parts stores, but the catch is you need a compressor. The spot sandblaster differs from a regular sandblaster in that it is for tiny areas (often with a pattern mask cut from say, old film or brass shim) whereas the regular sandblaster most people think of is for cleaning the paint and crud off car bodies and the like. Spot blasters are great for say etching patterns onto glass or in this case, metal.
Yep, I’ve spot blasted once some acrylic where they do mirrors. With led lighting, the effect is very nice, much nicer than you can do with just engraving acrylic.
This can be done using a 9 volt battery and a Cotton swab.