An All-Billet, Single-Piece, Flexure-Based Nutcracker

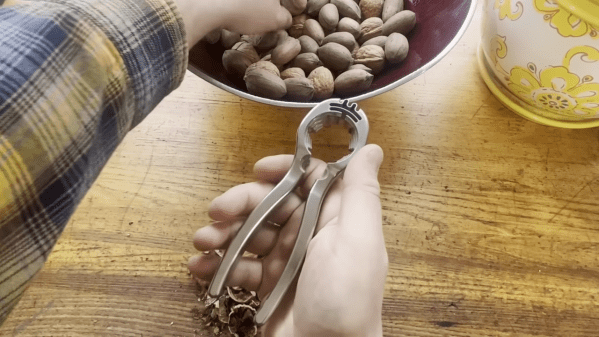
Typical nutcrackers rely on simple pin hinges to join two handles for the cracking task. However, [adam the machinist] has demonstrated that a single-piece nutcracker is possible by using the flexural properties of the right grade of steel.

The nutcracker is manufactured out of 17-4 PH stainless steel, heat treated to the H900 condition. A flexural spring section at the top of the nutcracker takes the place of the usual hinge, allowing the handles to be squeezed together and the teeth of the cracker to open the nut. Machining the flexural section is first achieved with a series of CNC drill operations on the billet stock, before regular milling is used to shape the rest of the spring section and tool. The video dives deep into the finer points of the CNC operations that produce such a great finish on the final part. It even covers the use of a tiny scissor jack to help hold the handles still during machining.

The result is a highly attractive and desirable nutcracker that looks far more special than the regular fare you might pick up at Walgreens. The all-billet tool is a nutcracker very much fit for a sci-fi set. We’ve seen some other kitchen tools around here before, too, albeit of more questionable utility.

Continue reading “An All-Billet, Single-Piece, Flexure-Based Nutcracker”

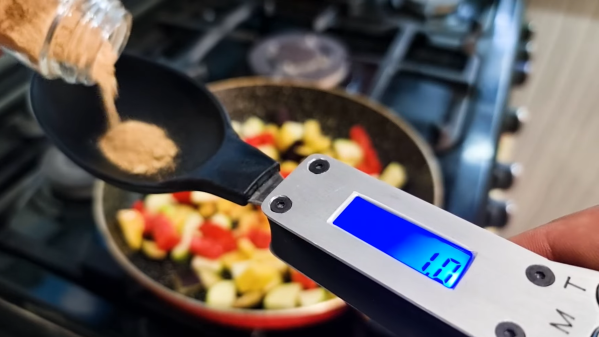
Digital Kitchen Spoon Makes Weighing Your Ingredients A Snap

There seem to be two camps when it comes to recipes: those based on volume-based measurements, and those based on the weight of ingredients. Gravimetric measurements have the advantage of better accuracy, but at the price of not being able to quickly scoop out a bit of this and a dash of that. It would be nice to get the convenience of volumetric measurements with the accuracy of weighing your ingredients, wouldn’t it?

It would, and that’s just what [Penguin DIY] did with this digital kitchen spoon scale. The build started with, perhaps not surprisingly, a large mixing spoon and a very small kitchen scale. The bowl of the spoon got lopped off the handle and attached to the strain gauge, which was removed from the scale along with its LCD display and circuit board. To hold everything, a somewhat stocky handle was fabricated from epoxy resin sandwiched between aluminum bolsters. Compartments for the original electronics parts, as well as a LiPo battery and USB charger module, were carved out of the resin block, and the electronics were mounted so that the display and controls are easily accessible. The video below shows the build as well as the spoon-scale in action in the kitchen.

We think this is not only a great idea but a fantastic execution. The black epoxy and aluminum look amazing together on the handle, almost like a commercial product. And sure, it would have been easy enough to build a scale from scratch — heck, you might even be able to do away with the strain gauge — but tearing apart an existing scale seems like the right move here.

Continue reading “Digital Kitchen Spoon Makes Weighing Your Ingredients A Snap”

Style Your Tile With 3D Printed Countertops

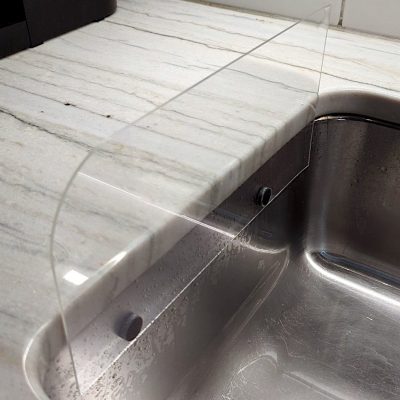
We’re all familiar with supply chain issues as they relate to chips and DIPs, but anyone who has requested an estimate for home improvements lately knows that the problems extend to things like plywood, and probably tile, marble, and Formica. Faced with adversity when it came to renovating the kitchen, [3DPC] decided to have a go at 3D printing custom countertops instead of buying tile.

Always build a testing rig first! Polyurethane looked great when wet, but resin was the clear winner.

Since grout isn’t required here but is ultimately expected, [3DPC] beveled the edges of the tiles in order to allow for decorative ‘grout’ filler pieces that provide a nice contrast. That high-gloss shine comes from a combination of printing onto glass, the direction of the layer lines, and the resin sealer that [3DPC] hired a professional to pour. Because of these factors, the tiles have an increased transparency that makes them look super cool. Be sure to check out the brief build video after the break.

To be fair, this is not [3DPC]’s first 3D-printed home-improvement rodeo — he has already saved tens of thousands of dollars by printing instead of purchasing. For this particular project, [3DPC] calculated a total cost under $400 —  a fraction of what a professionally installed countertop would have cost. We wonder how much he’ll save on tiling the bathroom, which is already in progress. We can’t wait to see it!

Are you still without a printer? Might as well make one that can use trash. Or if you already have a printer, just make filament from recycled plastic. It’s all here among the 2022 Hackaday Prize Round 2 winners; just let your imagination wander.

Continue reading “Style Your Tile With 3D Printed Countertops”

How To Bake Brownies With A Perfect Glossy Skin

If you’re anything at all like this writer, you don’t spend a lot of time inspecting brownies past the initial object identification phase, preferring to insert them directly into the mouth post-haste. But those with more of an aesthetic focus take great care to produce brownies with a glossy, attractive skin. [Adam Ragusea] decided to find out what it takes to get a perfect brownie skin, time after time.

After many, many trays of brownies, [Adam], with the assistance of [Dr. Pia Sörensen], determined that the key seems to be making a brownie mixture with very finely dissolved sugar, in sucrose form, with a carefully controlled amount of water in the mixture. This produces a thick mixture which can hold together against the gases bubbling out during the cooking process, and produces a nice glossy skin. Too much water, and the mixture isn’t viscous enough to hold up, leading to brownies full of pock marks, while alternative sugars like fructose and glucose likely disrupt the ordered structure of sucrose molecules necessary for a shiny surface.

Together, [Adam] and [Pia] do a great job of exploring the molecular chemistry behind the process, as well as ruling out several myths that have been perpetuated in the viciously insular brownie subculture. All they’re missing is a set of standardised reflectivity tests executed with an Arduino and some photodiodes, but we’ll assume that was just cut for time. We’ve seen other hacks in the realm of molecular gastronomy before, like this homebrew kitchen centrifuge. Video after the break.

Continue reading “How To Bake Brownies With A Perfect Glossy Skin”

Never Forget To Turn On The Cooker Hood Again

The cooker hood is a wonderful invention for removing excess fumes and steam from the kitchen. But like all electrically-powered devices, it only works when it is turned on. This was the problem facing [Peter], whose family are enthusiastic cooks who frequently forget to hit that switch. His solution? An automatic cooker hood switch that comes on when the cooker is in use, and stays on long enough afterwards to fully dissipate the fumes.

At its heart is a current transformer on the 3-phase stove power line, and we’re treated to a lesson in reading from these devices with an Arduino. They have a shunt resistor across which to produce a voltage, and their AC output is placed upon a reference DC voltage to supply the microcontroller pin. The impedance is quite high, so when the sensor had to be placed a distance from the microcontroller it necessitated an op-amp buffer. The readings then cause the Arduino to trigger a pair of relays to switch on or off the cooker hood. We can imagine that the family kitchen is thus a much pleasanter environment for it.

Cookers can also provide quite a hazard when they are left on. To that end, we’ve also featured a cooker alarm in the past.

Header image: Pbroks13, CC BY-SA 3.0.

Building A Dishwasher From Scratch

[Billy] was no fan of doing the dishes, but also found commercial solutions lacking. The options on the market simply didn’t fit his cookware and flatware. Instead of compromising, he set out to build a dishwasher of his own design. 

The build consists of a whole heap of hardware all lumped in a sizeable plastic tub. A washing machine solenoid lets water into the system, and it’s heated by an element in the base of the tub. It’s then pumped through a garden sprinkler head to give the dishes a good all-over spraying. At the end of a wash cycle, the drain pump then dumps the water to let everything dry off. An ESP8266 and a bank of relays are in place to run the show, with the user selecting wash programs via buttons and a small screen.

It may have taken a couple of years to come together, but [Billy’s] dishwasher seems to get the job done. Files are on Github for those interested, however we’d caution against attempting such a build unless you’re familiar working with plumbing and mains electricity. The other benefit of building your own dishwasher is that you’re less likely to have to patch it against widespread exploits – the security is instead up to you. Video after the break.

Continue reading “Building A Dishwasher From Scratch”

Beautiful Sourdough Bread At Home Thanks To Dynamic Recipe Parameterization

More people are making sourdough at home than ever before, and while it may not take a lot of effort to find a decent recipe, it’s quite another thing to try using recipes to figure out how and why bread actually works. Thankfully, [Makefast Workshop] has turned copious research and hundreds of trials into a dynamic sourdough (and semi-sourdough) bread recipe chock-full of of drop-down options to customize not just ingredients, but baking methods and other recipe elements as well. Want to adjust quantities or loaf styles? Play with hydration or flour type? It’s all right there, and they even have quick-set options for their personal favorites.

In order to do all this, [Makefast Workshop] needed to understand bread at a deeper level than is usually called for. During research, they observed that the format of recipes was often an obstacle to understanding how good bread actually gets made. The reason for this is simple: recipes are presented as standalone documents describing a fixed process; a set of specific steps that, when followed, yield a particular result. What they do not normally do is describe the interplay and balance between ingredients and processes, which makes it difficult to understand how and why exactly the recipe produces what it does. Without that knowledge, it’s impossible to know what elements can be adjusted, and how. The dynamic recipe changes all that.

[Makefast Workshop] performed hundreds of tests, dialing in parameters one by one, to gain the insights needed to populate their dynamic recipe. It’s got clear processes and drop-down options that dynamically update not just the recipe steps, but also the URL. This means that one can fiddle the recipe to one’s desire, then simply copy and paste the URL to keep track of what one has baked.

When it comes to thoughtful approaches to food, this certainly isn’t [Makefast Workshop]’s first rodeo. We covered their beautiful directions for creating delicious speculoos, complete with effective 3D printed molds for a modern twist on a Belgian classic.