Figuring out the maximum number of peripherals which can be sensed or controlled with a minimum number of IOs is a classic optimization trap with a lot of viable solutions. The easiest might be something like an i2c IO expander, which would give you N outputs for 4 wires (SDA, SCL, Power, Ground). IO expanders are easy to interface with and not too expensive, but that ruins the fun. This is Hackaday, not optimal-cost-saving-engineer-aday! Accordingly there are myriad schemes for using high impedance modes, the directionality of diodes, analog RCs, and more to accomplish the same thing with maximum cleverness and minimum part cost. Tucoplexing is the newest variant we’ve seen, proven out by the the prolific [Micah Elizabeth Scott] (AKA [scanlime]) and not the first thing to be named after her cat Tuco. 
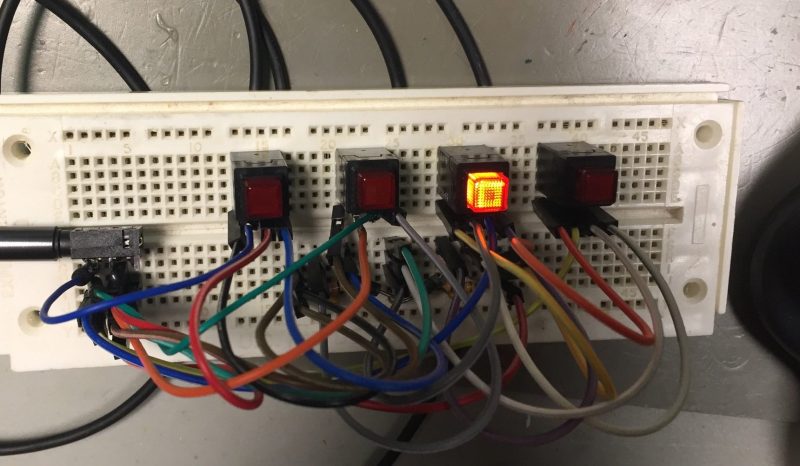
[Micah’s] original problem was that she had a great 4 port USB switch with a crummy one button interface. Forget replacement; the hacker’s solution was to reverse and reprogram the micro to build a new interface that was easier to relocate on the workbench. Given limited IO the Tucoplex delivers 4 individually controllable LEDs and 4 buttons by mixing together a couple different concepts in a new way.
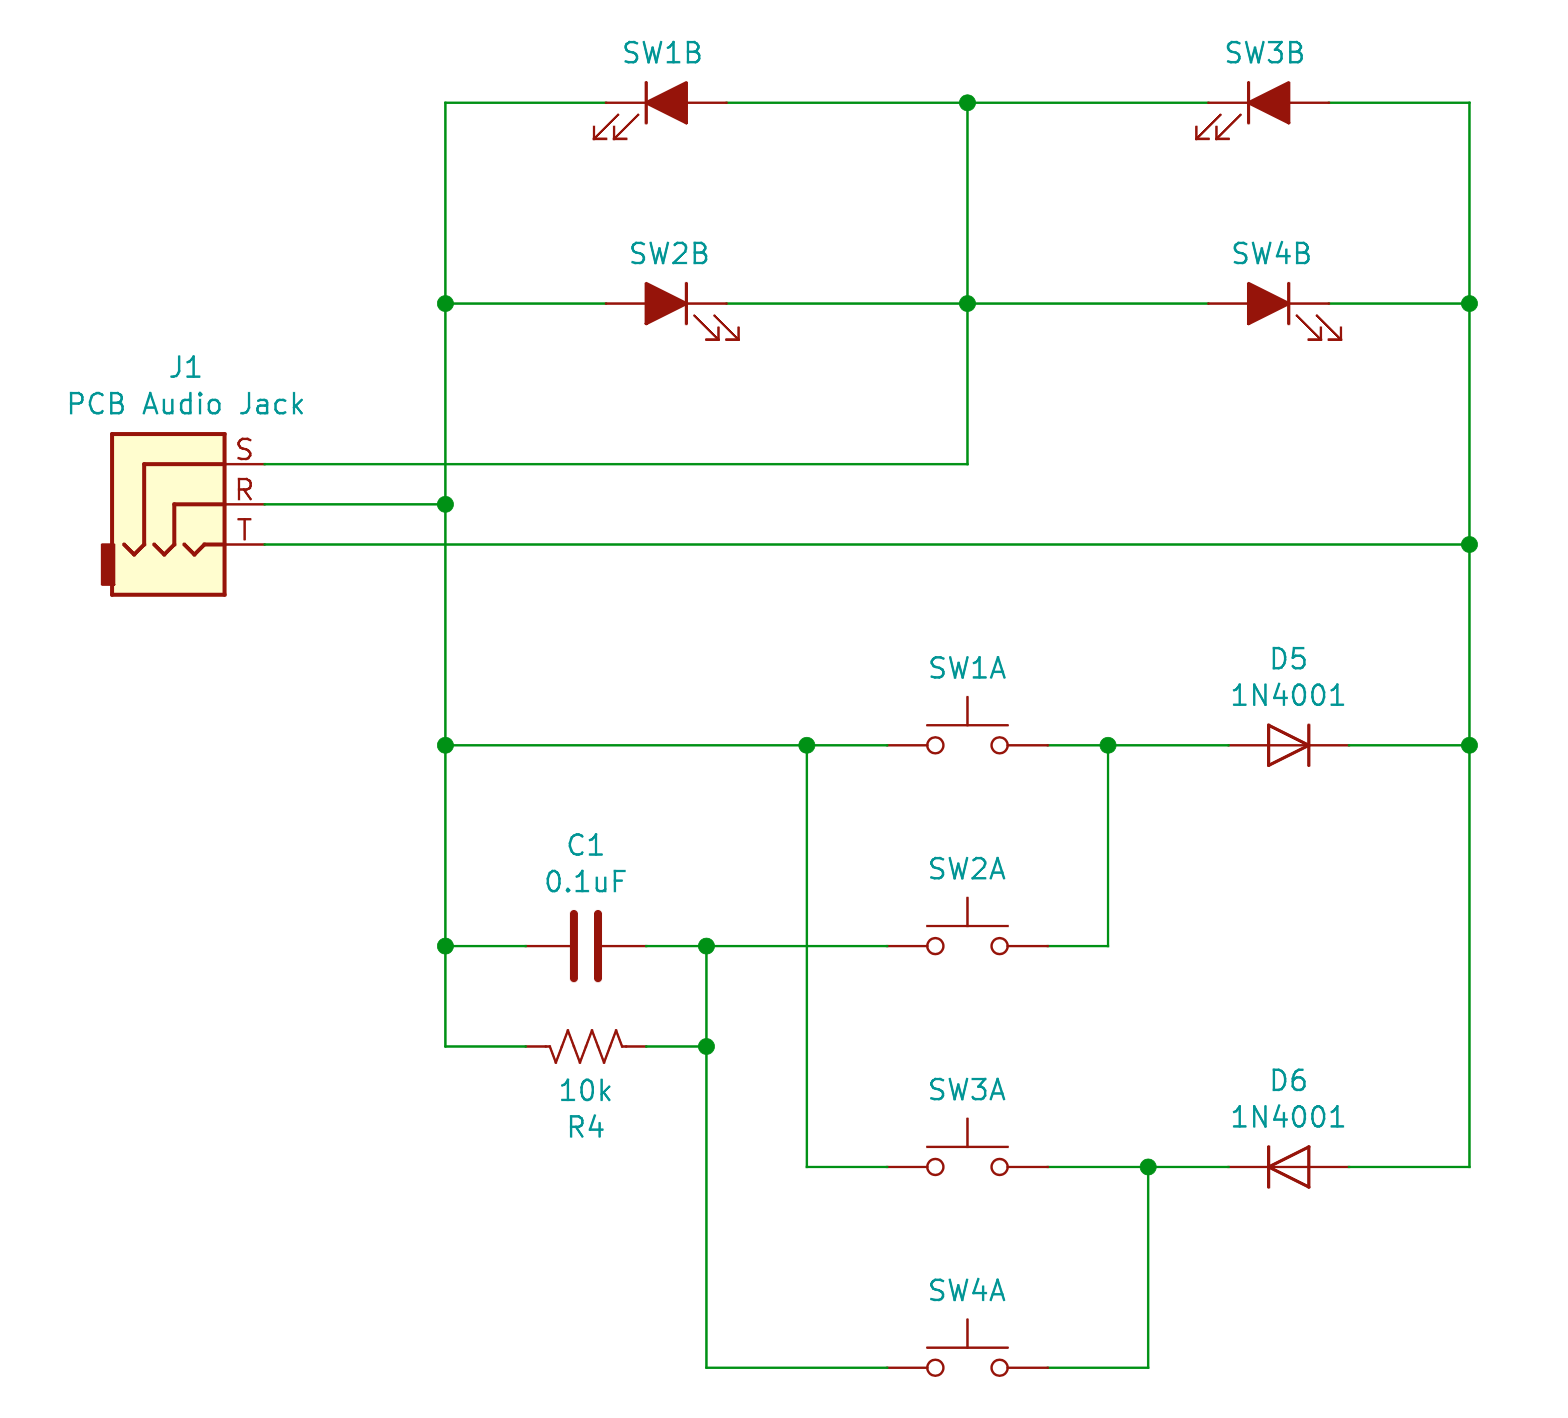
Up top we have 4 LEDs from a standard 3 wire Charlieplex setup. Instead of the remaining 2 LEDs from the 3 wire ‘plex at the bottom we have a two button Charlieplex pair plus two bonus buttons on an RC circuit. Given the scary analog circuit the scan method is pleasingly simple. By driving the R and T lines quickly the micro can check if there is a short, indicating a pressed switch. Once that’s established it can run the same scan again, this time pausing to let the cap charge before sensing. After releasing the line if there is no charge then the cap must have been shorted, meaning that switch was pressed. Else it must be the other non-cap switch. Check out the repo for hardware and firmware sources.
Last time we talked about a similar topic a bunch of readers jumped in to tell us about their favorite ways to add more devices to limited IOs. If you have more clever solutions to this problem, leave them below! If you want to see the Twitter thread with older schematics and naming of Tucoplexing look after the break.


I know it’s going to be considered lame by hackaday standards, but I would still go using MCP23008. 2 lines for i2c, I can even throw-in a 3rd for interrupt…
IO expanders are fine if you have a free/available interface to use and don’t mind the extra cost. This is a case of using GPIOs and super cheap components.
I2C master can be easily bit-banged and doesn’t have to be fast, since it’s you who provides the clock. Price doesn’t matter that much when you are building single units, especially since the time you spent on testing and tuning and debugging it will be worth more. But of course if you plan to build a million units, then every optimization counts.
Bit-banging an I2C interface with only few bytes to send and receive would be much simpler and faster than this solution. A friend of mine bit-banged I2C interface just because it was easier than dealing with dedicated hardware and its bugs…
Also there is no minimum clock frequency for I2C, only rise and fall times must be less than 1ms and 300ns. So you can do I2C master with some NE555s and shift registers…
Kevin Darrah made a video where he bit-bangs I2C with just push buttons on a breadboard using an EEPROM as slave device.
https://youtu.be/8ZYMrcHm91s
I’m skeptical of bugs in the hardware, though.
Pick a dsPIC or any other 16- or 32-bit PIC. Open the Errata. Pick another one and open its Errata. Some silicon bugs in Microchips’ products are more cross-platform than GCC…
How about HT16K33? I²C, constant-current drivers for 128 LEDs, and a 39-key matrix with built-in debouncing.
It’s not really an optimization problem, because the best solution is already known – it’s just a matter of implementing it.
If you have an IO pin, that has three possible states like low, high, high-Z, you have already defined the maximum amount of information that it can represent, and therefore the maximum number of buttons etc. you can read with it. It’s just a matter of figuring out how to implement it.
That said, if you cheat and use RC delays to measure buttons, you can technically do an infinite number – you’re limited only by the resolution of your timers to measure subtle differences in the charging delay.
So that makes it not an optimization problem either. A single IO line can read a whole row of buttons that are paired with resistors, and if you follow the binary series for the resistor values, the delay depends linearly on the binary combination of the buttons being pressed.
Use tones like a phone keypad.
Not unlimited because you have to factor component tolerances.
But still you could get quite a number from the bandwidth of a CPU and gpio.
It would be interesting to see this technique used for LEDs.
As you can see, you can do better — by sending/receiving more information in time. And then if at least one of the pins has an ADC (or you can build a primitive ADC in front of it), then you have even more options. Ultimately it all goes down to how fast it has to be and how much work you are willing to do.
Measuring RC time delays is a primitive ADC.
Counting on the plain logic states (steady states), then three pins with three states has 3^3 configurations, which means you can detect or produce 27 different states of your buttons and lamps.
I’ve seen that some sony audio systems use only 1 pin and a specific resistor besides each button to chain a lot of them… it’s weird that I have never seen it mentioned or used in homebrew projects
https://hackaday.com/2012/03/02/r2r-ladder-connects-multiple-buttons-to-one-adc-pin/
GM also does this with their steering wheel controls.
Resistor coding is a very bad, i am repair monitors and Tv failed tactile button failure
When the contacts go manky, the resistance values go all over the place and one button gets read as another.
Several of the article”s links are bad or dead.
Lotsa people on here suggesting I2C but the big advantage I saw in this design over I2C is that this does not require maintaining a stable power supply at the remote end. I didn’t have a pin for that, and I also wanted everything on the 1/8″ cable to be short circuit tolerant, since every cable insertion causes short circuits.
I hate using I2C expanders, because if I needed an expander I probably already used the hardware I2C for something else. And if I have to do it software it can use a lot of space.
I think I want to try out this technique. Thank you!
And thank you so much for writing such clean code. The firmware will be easy to port. :) :)
It’s good to be reminded that not everything has to be solved by chaining special-function chips together. Consider whether your problem can be solved with a few passive components, and you will avoid limiting your skills as an electronics designer.
Anything first “First name”-plexing seems a bit objectionable to me. Just my 2ct.
You are wrong because in this case, it is the name of a cat.
This reminds me of a hack that implemented I2C (IIRC) using only one microcontroller pin and a simple RC circuit. Anybody else remember that one?
Also, the linked tweet seems to have been deleted.
This reminds me of a hack that implemented I2C (IIRC) using only one microcontroller pin and a simple RC circuit. Anybody else remember that one?
This is a very clever hack! It tok me a minute or so to figure out looking at the schematic. Was a good evening mental puzzle :-)
I read the comment that many suggest solving te problem with I2C, but Micha solves it with three wires – I2C would have required four wires, two for data plus one ground and one power.
Like “Charlieplexing”, this concept predates HaD.
Switch scanning like this, along with several other versions, are in Microchip’s Tips and Tricks pamphlet. A good read that was largely written in the 90s but still relevant today.
I think I’ll call this technique “Switch Scanning Technique Originally Devised by an Underpaid Microchip Engineer”.
..or STODUME for short.