Reverse Engineering A Telephonic Relay Device

The Plain Old Telephone Service, or POTS, doesn’t get a lot of love from the average person anymore. Perhaps once in a while a payphone will be of use when a phone battery has died, but by and large many people simply don’t have hardwired phones anymore. However, that doesn’t mean that the old landline can’t be put to good use. As [Felix Vollmer] shows us, it’s still possible to get useful hardware running over the phone line.

The YC-KZ02DN is a simple device which hooks up to a standard phone line. It’s capable of answering calls and responding to commands by switching its various relays on or off. [Felix] wasn’t quite happy with the stock functionality, however. Investigation showed the onboard STC15W202S microcontroller can be repogrammed over serial via an unpopulated header. Thus opened the door to hacking the device.

[Felix]’s alternative firmware has a couple of key features that make it valuable. Longer PINs are supported, decreasing the likelihood that malicious actors can gain access to the system. Additionally, the device is set to restore the last relay state after a power loss event. This makes the device far more useful for situations where it’s important to ensure consistent operation. It’s no use if an intermittent power loss stops your livestock’s water trough from filling, for example.

In this day and age of the Internet of Things, an old school telephony hack warms the cockles of our hearts. We’re suckers for anything that recalls the days of rotary dialing and speaking with the operator, after all.

Get Moving With New Software From OpenBuilds

If you’re reading Hackaday, you’ve probably heard of OpenBuilds. Even if the name doesn’t sound familiar, you’ve absolutely seen something on these pages that was built with their components. Not only is OpenBuilds a fantastic place to get steppers, linear rails, lead screws, pulleys, wheels, and whatever else you need to make your project go, they’re also home to an active forum of people who are passionate about developing open source machines.

As if that wasn’t enough reason to head over to the OpenBuilds website, [Peter Van Der Walt] recently wrote in to tell us about some new free and open source software he and the team have been working on that’s designed to make it easier than ever to get your creations cutting, lasing, milling, and whatever else you could possibly imagine. If you’ve got a machine that moves, they’ve got some tools you’ll probably want to check out.

BlackBox CNC controller

“OpenBuilds CAM” is a web-based tool which imports SVG and DXF files and creates toolpaths for all sorts of cutting, whether your machine does the business using a beam of angry photons or a simple drag knife. The resulting GCode can then be plugged into “OpenBuilds CONTROL”, which as you may have guessed, does the actual controlling of the piece of hardware connected to your computer. There’s no worries about vendor lock in here either, CONTROL will talk to any Grbl-compatible board.

But what if you don’t have a board? Well, it just so happens that OpenBuilds offers a very slick new piece of gear they’re calling the BlackBox. This beefy CNC controller includes a laundry list of features that [Peter] says the team is very excited about, including stepper drivers powerful enough to run NEMA 23 motors. As an interesting note, they’ve actually made the enclosure for the BlackBox out of cleverly solder masked PCBs; a fantastic trick we don’t see often enough.

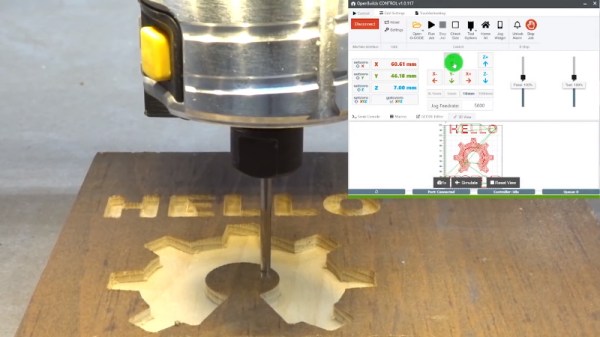
The video after the break shows the CNC router version of “Hello World” using CAM and CONTROL, and should give you a pretty good idea of the typical workflow. If it looks familiar to you, it might be from our previous coverage of LaserWeb, a similar web-based project spearheaded by [Peter Van Der Walt] a few years back. Continue reading “Get Moving With New Software From OpenBuilds”

Make Your Commodore 16 64k, But Not A Commodore 64

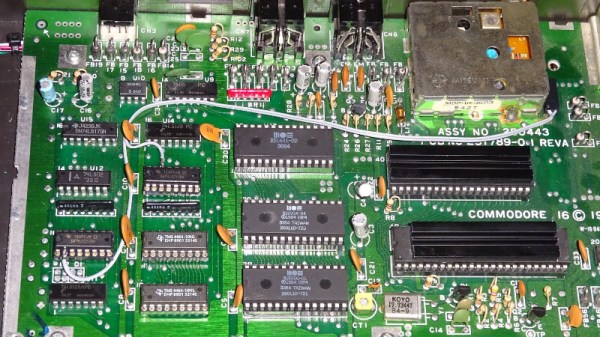
The Commodore 16 was a budget home computer from the mid 1980s, the entry-level model in a wider range of machines. As its name suggests it only has 16k of memory in keeping with its budget status, and while it has the rest of the hardware necessary to run software intended for its 64k stablemates, that 16k is impossible to expand without modifying the machine. Should you have a ’16 in your collection this is not a particularly arduous process, and Tynemouth Software have gone into great detail over how it can be achieved.

As was quite common in machines of the period, the address lines for the RAM area above the fitted 16k are not wired to disable it when those addresses are selected, so the same 16k appears mirrored three times in the space between it and the 64k limit. Thus simply plugging in a 64k cartridge would result in the top 48k being unusable, and some means of disabling or supplanting the internal chips was called for. Contemporary upgrades required pin or track snipping, but as they go on to show us there are some less ugly alternatives both permanent and reversible. Whichever you might favor they all at least don’t carry the huge cost hurdle in 2019 that they might have been when the machine was new. Sadly even though their cases may be similar the resulting machine will not be a Commodore 64, not even a new one.

Long-time Hackaday readers will know that the hardware designer for these machines was our Hackaday colleague [Bil Herd], and all followers of Commodore and his work should read his account of the CES trade show at the heady height of Commodore’s  fame.

Game Boy Recreated In Verilog

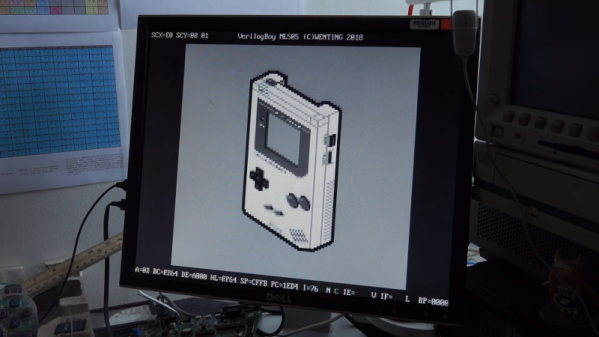
With the wide availability of Raspberry Pi hardware and pre-baked Linux distros with emulators ready to go, making a retro handheld is easier than ever. Emulation isn’t the only way to go about playing old games however. [Wenting Zhang] decided to instead recreate the Nintendo Game Boy in Verilog, and has documented the effort.

The project runs on a Spartan 6 FPGA. [Wenting] first developed the hardware to use a DualShock controller for input, and output video to a regular LCD monitor. However, work is now underway to produce a handheld VerilogBoy. This will feature a 320×320 LCD screen, with pixels being quadrupled from the original Game Boy 160×144 resolution, with some pixels to spare. [Wenting] is also looking at porting the code to some Pano Logic units, which we’ve discussed before. The thin clients pack FPGA hardware and lots of IO ports that make them perfect for such a project.

Code is available on Github for the curious tinkerers out there. While there are easier ways to play old handheld games, the amount of learning value of such a project should not be underestimated. We’ve seen FPGAs used for other Nintendo hijinx, too – like this NES cart that packs some serious muscle. Video after the break.

Continue reading “Game Boy Recreated In Verilog”

Show Your Skills With A Bootable CV

It’s a thankless task, searching for a job. You send off your CV, or resume, and it joins a thousand other destined for the round file. What on earth can you do to make your career stand out, and catch the eye of the recruiter?

Your bootable CV isn't eye-catching if the recruiter uses GitHub to view the PDF.
Your bootable CV isn’t eye-catching if the recruiter uses GitHub to view the PDF.

If you are [Pablo Jiménez Mateo], the answer is straightforward enough. Simply combine the document as a PDF with an x86 bootloader, to make a readable document that will also boot an x86 computer system. He can do this relatively easily by prepending the bootloader file to the PDF, as long as the “%PDF” header of the CV remains within the first 1024 bytes it will remain a readable document. Which it does, though as our GitHub screenshot shows, not in all PDF readers.

A bootable PDF is pretty cool and we have to salute his effort in getting it in front of us in the hope of  career boost, but it would be fair to admit that it’s a trick that has been done before. So it’s time to turn attention to the bootloader itself, whose code comes in the form of an extremely well-commented assembly file that loads some sprites and a border to a VGA screen that looks as though it might be the first room in a top-down adventure game. Through the code we can gain an appreciation of just how simple a bootloader can be, and that in itself makes this project worth a second look.

If writing your own bootloader interests you, that’s certainly a subject we’ve covered in the past. It’s possible to make bootable images very small indeed, even down to fitting in a Tweet.

Imitating Art In Life With A Reverse-Engineered Tattoo

In general, tattoo artists are not electrical engineers. That’s fine; the world needs both professions. But when you need a circuit designed, you’re better off turning to an EE rather than a tattoo artist. And you certainly don’t want an EE doing your new ink. Disaster lies that way.

Surprisingly, [Missa]’s tattoo of a heart-shaped circuit turned out at least to be plausible design, even if it’s not clear what it’s supposed to do. So her friend [Jeremy Elson] took up the challenge to create a circuit that looked like the tattoo while actually doing something useful. He had to work around the results of tattoo artistic license, like sending traces off to the board’s edge and stranding surface-mount components without any traces. The artist had rendered an 8-pin DIP device, albeit somewhat proportionally challenged, so [Jeremy] went with an ATtiny85, threw on a couple of SMD resistors and a cap, and placed two LEDs for the necessary blinkenlights. Most of the SMDs are fed from traces on the back of the board that resurface through vias, and a small coin cell hidden on the back powers it. One LED blinks “Happy Birthday [Missa]” in Morse, while the other blinks prime numbers from 2 to 23 – we’ll assume this means it was [Missa]’s 23rd birthday.

There’s a surprising amount of crossover between the worlds of electronics and tattooing. We’ve featured functional temporary tattoo circuits, prison-expedient tattoo guns, and even a CNC tattoo machine.

Continue reading “Imitating Art In Life With A Reverse-Engineered Tattoo”

Tucoplexing: A New Charliplex For Buttons And Switches

Figuring out the maximum number of peripherals which can be sensed or controlled with a minimum number of IOs is a classic optimization trap with a lot of viable solutions. The easiest might be something like an i2c IO expander, which would give you N outputs for 4 wires (SDA, SCL, Power, Ground). IO expanders are easy to interface with and not too expensive, but that ruins the fun. This is Hackaday, not optimal-cost-saving-engineer-aday! Accordingly there are myriad schemes for using high impedance modes, the directionality of diodes, analog RCs, and more to accomplish the same thing with maximum cleverness and minimum part cost. Tucoplexing is the newest variant we’ve seen, proven out by the the prolific [Micah Elizabeth Scott] (AKA [scanlime]) and not the first thing to be named after her cat Tuco.

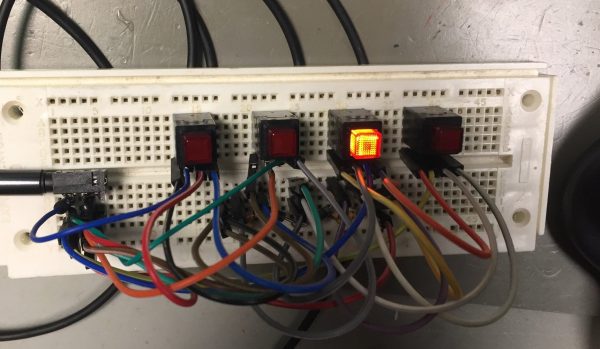
[Micah’s] original problem was that she had a great 4 port USB switch with a crummy one button interface. Forget replacement; the hacker’s solution was to reverse and reprogram the micro to build a new interface that was easier to relocate on the workbench. Given limited IO the Tucoplex delivers 4 individually controllable LEDs and 4 buttons by mixing together a couple different concepts in a new way.

Up top we have 4 LEDs from a standard 3 wire Charlieplex setup. Instead of the remaining 2 LEDs from the 3 wire ‘plex at the bottom we have a two button Charlieplex pair plus two bonus buttons on an RC circuit. Given the scary analog circuit the scan method is pleasingly simple. By driving the R and T lines quickly the micro can check if there is a short, indicating a pressed switch. Once that’s established it can run the same scan again, this time pausing to let the cap charge before sensing. After releasing the line if there is no charge then the cap must have been shorted, meaning that switch was pressed. Else it must be the other non-cap switch. Check out the repo for hardware and firmware sources.

Last time we talked about a similar topic a bunch of readers jumped in to tell us about their favorite ways to add more devices to limited IOs. If you have more clever solutions to this problem, leave them below! If you want to see the Twitter thread with older schematics and naming of Tucoplexing look after the break.

Continue reading “Tucoplexing: A New Charliplex For Buttons And Switches”