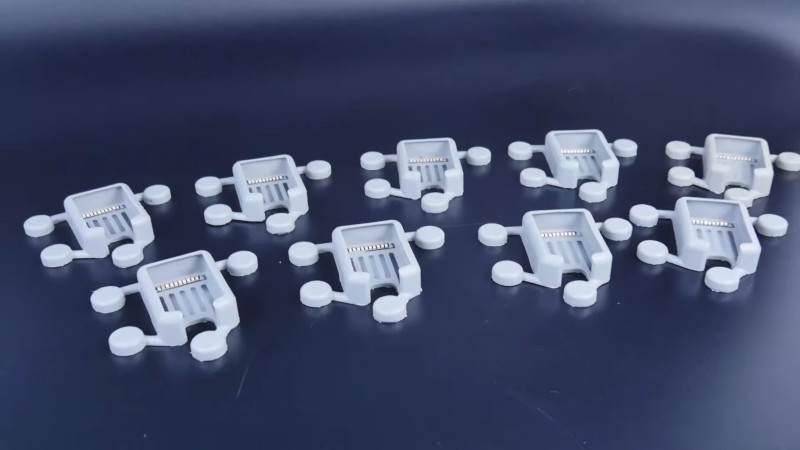
Resin casting videos have taken social media by storm of late. Everything from inlaid driftwood tables to fancy pens are getting the treatment. Pouring some nicely colored epoxy is straightforward enough, but it’s just the tip of the iceberg. [Eric Strebel] has some serious skills in resin casting, and has lately been working on some overmolded electroniics with urethane resin (Youtube link, embedded below).
The build starts with the creation of a silicone mold, using a 3D printed SLA master. The part in question is for a prototype medical device, and requires overmolding, in which a flexible PCB is covered in flexible urethane. Wooden pins are used to allow the flexible PCB to clip into the mold for accurate location, and a small shield is placed over the metal contacts of the PCB to avoid them being covered in silicone.
Initial tests are done with an empty mold to determine the correct material to use, before the actual parts are ready to produce. [Eric] takes great care with the final production, as any mistakes would waste the expensive prototype PCBs provided to him by the client. With the electronics placed in the mold, the resin is degassed and carefully injected, using a syringe to minimise the chance of any air bubbles. With some delicate cleanup by hand, the completed parts are ready for delivery.
It’s a process that covers the basics of overmolding for a prototype part, as well as showing off [Eric]’s skill at producing quality prototype parts. We’ve seen [Eric]’s work before, too – like his discussion of the value of cardboard in product design. Video after the break.


“Initial tests are done with an empty mold to determine the correct material to use,”
“any mistakes would waste the expensive prototype PCBs provided to him by the client”
The PCB costs more than the epoxy? Wow! Every epoxy I have found seems to be made from printer ink. I want to know where to buy it cheap!
Or is the PCB really that expensive. Are they prototypes with actual functioning electronics? If so then why?
Something I have wanted to do be able to do for some time… export the 3d preview in KiCAD to a format that a 3d printer slicer can read. I’d also like to be ably to substitute an alternate set of 3d parts images to make things more printable, for example component bodies would extend all the way down to the PCB so that parts are not floating on too-skinny to be printable leads.
You can export as VRML and then convert to STL. My worflow is PCBnew -> VRML -> Blender -> STL -> Fusion 360. It’s a stupid workflow but it preserves the 3d components AND the traces from PCBnew. There are some VRML to STL scripts online line that I’m going to try later.
Or if you use FreeCAD check out “KiCad StepUp”.
Forgot to mention.
-VRML export units should be “mm”
-Blender import option is “x3d/wrl”
-Delete the default box, import the VRML, center it, then export to STL
Polyurethane not epoxy, a quick glance says estimate says under a dollar worth of resin to test that one. And yes they have to be functional electronics, otherwise he’d be making mock-ups instead of prototypes.
High quality epoxy can be had for under $100 per gallon. The little tubes of epoxy you’d buy at a drugstore have high packaging costs and high markup.
They’re hand-built boards, so labour costs, part costs (which are high because they are buying them in low quantities), as well as shipping/time costs if more need to be made – all of these things add up to make even a simple thing like this surprisingly expensive. Eric’s time would also be quite expensive. Compared to that, resin costs are almost trivial.
just saw a CNC kitchen vid a couple days ago where he makes a mold to build a silicon jacket for his 3d printer hot end.
I was going to make those for my printer but, I went to his link to check the price of the high-temp. silicone and it was like $26 plus $10 shipping. (Inside USA) So I bought a 3 pack for $9.00 and free shipping. Normally I enjoy making my own stuff but…that was too big a difference in costs for me.
Worth it if you have other silicone projects I suppose.
Still not cheap as chips (it’s silicone, and platinum catalyzed at that) but you could up something like Dragon Skin at your local art supply e.g; Utrecht ($31 for 2 pounds). Smooth-on’s site says it’s rated to 230C (450F), that should be well above the temp of any plastic-contacting 3D-printer parts. Other art-grade, tin-catalyzed products might also work.
FYI, 230C is just the upper end for printing PLA. Others go a lot higher than that. 450C would be the minimum for heat resistance, I believe.