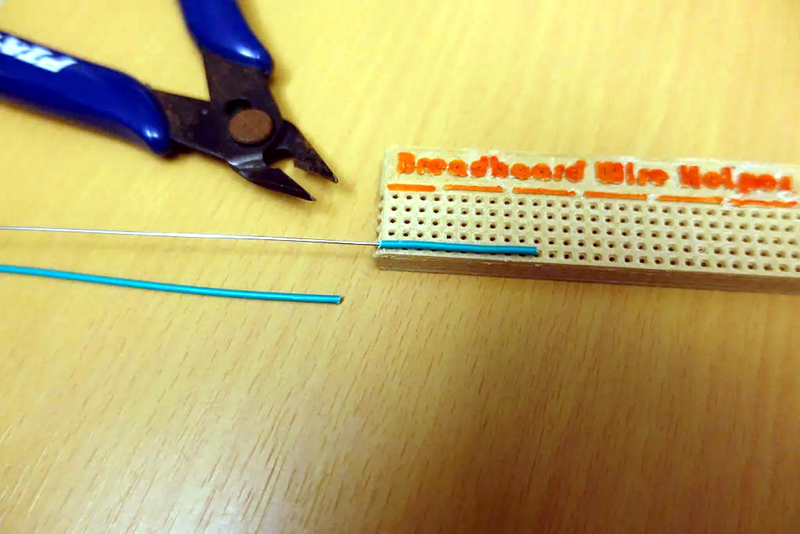
Breadboards make it simple to prototype and test circuits. If you use flexible wires with pins to make connections, it usually results in a rat’s nest. For many of us, using solid wire makes a rat’s nest, too. However, the very neat among us will cut solid wire to just the right length and strip just the right amount of wire and lay the wires very flat and neat along the board. [Moononournation] did a 3D print that makes the latter method much easier. You can find his Breadboard Wire Helper on Thingiverse and see a video, below.
The idea is simple: start with a piece of wire stripped on one side, then count out the number of holes it needs to traverse and push the stripped end through the hole. Trim the wire to fit. To complete the other side, lay the wire flat along the tool to the edge. Now you can see where to strip that side of the wire. After you remove the insulation, you can bend the wire down and cut the wire to fit. Now you have a perfect size and shape wire to place in the actual breadboard.
Granted, this isn’t that hard to do with the existing breadboard if it isn’t too packed. You could even use a spare breadboard. But it is a little easier to trim the wire to the right size with this jig. If you don’t want to 3D print it, you could probably pull the tape off the back of a cheap board and remove the springs to get a similar effect.
So while this little tool probably won’t change your life, it might make it a little easier. What other tools do you use when breadboarding? Let everyone know in the comments.
There are lots of tricks to make breadboards neater. We’ve also seen ways to make them more permanent.


Or.. buy the premade wires. $2.35 including shipping: https://www.ebay.com/itm/381374867190
OR those with 3D printers can print one of the BB Helpers for a few cents which, unlike one of the pre-made lead sets of which I own several different types, allows one to easily measure and cut wire for precisely ANY spacing UNLIKE the lead sets.
Resistor Lead Bending Tool: https://www.sparkfun.com/products/13114
It can also let you measure the wire and bend them.
Any idea how/where to get such a thing for cheap in the european union? On Aliexpress it is actually more expensive, but Sparkfun is US so lots of shipping.
https://www.aliexpress.com/item/32938894757.html US $6.49 “Free shipping” corona special – was $9.99
Sparkfun wants $4.99 before shipping.
Can’t comment on the build quality.
This one is closer to sparkfun. The last one I posted only have 4 different lengths.
https://www.aliexpress.com/item/32887191866.html $7.99 US “free shipping”
There’s models for them on Thingiverse. Just print one (or get one printed for you)
Here’s on on eBay, sold from France and fairly cheap.
https://www.ebay.co.uk/itm/2020-RESISTOR-AND-AXIAL-COMPONENT-LEAD-BENDING-TOOL/192698678131
Uh, too late, i ordered one from China.
Thanks everybody.
Man, I remember those from Heathkit days. Lost mine years ago.
I was all ready to go model one up, but guessed someone must have done it before and, yep: Go ahead and print yer own: https://www.thingiverse.com/thing:26025
https://www.thingiverse.com/wd5gnr/collections/lead-benders
Something similar used to come free on the electronics magazines from time to time.
I own a set of those in different sizes. They are for lead bending for insertion into PCBs. The BB Helper is handier for breadboard leads.
One of those #Duh, wish I had thought of that, hacks! Excellent.
The best kind
Pro tip: if you want things to be neat, don’t use breadboard.
*wwii vet slumps into creaky chair, defeated* ninety-two and still drives, what a widower.
What would be a better way to quickly throw a prototype together using on hand through-hole components? I still like to use breadboards to test simple circuits before designing a PCB.
So its the exact same method most of us have been doing for decades on bread and perfboard without a dedicated tool, thanks…
I’ve always used a lead bending tool. I lay it between the points I want to connect to measure, then bend my wire over it and clip it. The tool is really for doing resistors, and is even more useful for that, but since I have it on hand I also use it.
once I replaced the rats nest of wires on my breadboard clock it worked a lot better, my intention was only to make it easier to find what I did wrong. Which means I learned nothing from the experience. ;-)
These things are made by Donau Elektronik in Germany:
https://shopware.donau-elektronik.de/artikel/elektronikbedarf/elektronikzubehoer/2945/ab5-abbiegevorrichtung-fuer-bauteile
Distrelec sells them for €2.29 excl VAT, P/N 180-40-609
https://www.distrelec.at/de/komponenten-biegegeraet-biegen-elektronischer-komponenten-auf-standard-neigung-donau-ab5/p/18040609
I’d love to see this used with dissolvable filament
Would make interesting creations if your careful with stresses
My favourite breadboarding tool is a small curved jaw hemostat. (Think curved pliers with a locking mechanism). Lets my thick sausage fingers handle wire with ease.
or take a piece of perf board and cut through the first line of holes
Big Clive uses an RS Stock No 545-109 (@01:02)
https://www.youtube.com/watch?v=qfOardiykPs