If you work on old radios, electronics is only one of the skills you need. The other is wood or metal working to restore the cabinets and chassis. However, more recent electronics have plastic and old plastic tends to turn yellow. [Odd Experiments] shows how to whiten plastic using a UV light source, aluminum foil, and hydrogen peroxide. Generally, ABS is the plastic at fault, especially those mixed with bromine as a fire retardant. You can see the results in the video below.
Note the peroxide in use was 12% — much stronger than what’s probably in your medicine cabinet. That’s usually only 3% solution, although you can get different strengths including some over 30% if you shop. However, if you search you’ll find that people have used 12%, 6%, and even 3% successfully, although we’d imagine it takes more time with 3%.
You’ll also need some patience. Best results apparently occur in 24 to 48 hours. We’ve seen other people use small amounts of TAED (tetraacetylethylenediamine; a laundry additive) to accelerate the process. The TAED mixes with hydrogen peroxide to form peroxyacetic acid.
We’ve also seen people do this with hydrogen peroxide-based hair bleaching creams that they can apply like a paste. We can’t promise any of this doesn’t weaken the plastic, but it does seem like it works, for the most part.
We have looked at this process before, and that post explains some of the chemistry occurring. If you want to restore old knobs, maybe try Neosporin.


30% peroxide???
that will rip your skin to bits and can start fires
I used to use 30% peroxide with 30% paracetic acid to flush the water lines on the turkey farm
you can not flush it off your skin
we tried soaking the iron out of the water filters and they caught fire
be bloody careful!!!
It’s “30 volume” (9%). https://www.retr0bright.com/make.html
So tl;dr don’t go too high.
definitely not!!!
it’s not like splashing acid where you can neutralise it with sodium bicarbonate
Interesting. I remember using H2O2 at school for some experiments, but haven’t used it since. What is the recommended course of action if it comes in contact with skin? I’d have assumed water and lots of it.
@Shannon
If you used H2O2 (hydrogen peroxide) in a chemistry class….then they should have introduced you to Material Safety Data Sheets (MSDS).
These documents outline everything one needs to know to use said chemical safely (including what to do if it gets on the skin, in the eyes, etc).
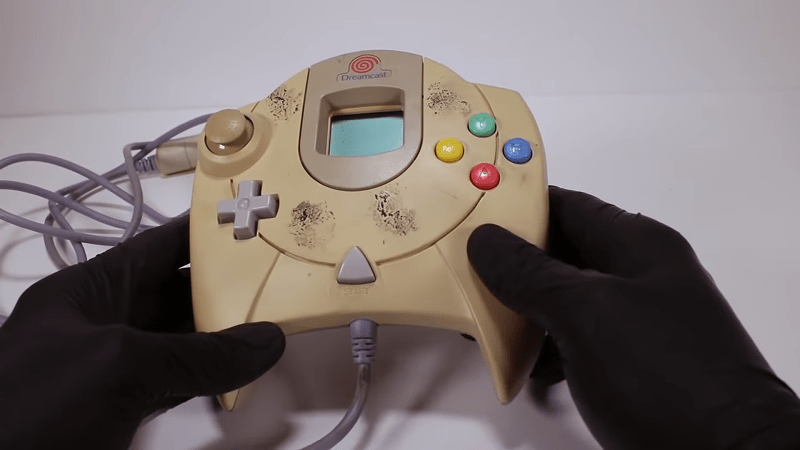
I tried retrobrighting my dreamcast and went back to it’s original colour after a while…
That has me thinking. If one really wanted to keep some prized old piece of tech “like new” indefinitely then I guess the best solution would be to occasionally re-retrobrite it. If one really wanted to do this then maybe it would be worthwhile to add heat-set inserts to all the screw holes and switch to machine screws.
It wouldn’t be quite authentic but you would have to look inside the screw holes to see the difference. A lot of them would probably be recessed so far you would need to shine a light in to see it.
I never really like self tapping screws, at least not on anything I intend to take apart and reassemble repeatedly. Nice metal threaded inserts would last practically forever. Also the switch from what are probably philips head to hex cap (or square for the Canuks) would make disassembly and reassembly so much more pleasant as you don’t have to be constantly applying pressure to keep them from camming out.
Maybe with a bit of 3d printing plus the right adhesives some plastic clips could even be replaced with screws. The hard part would be recessing the screw hole so that it looks natural.
I like pozidriv head best, unfortunately they’re scarce.
The trick to re-inserting self tapping screws in plastic is to let the screwdriver rest on the screw then gently rotate it backwards. When you hear and feel it thunk and drop a little, you have the screw threads aligned with the previously cut threads and it will screw in easily.
Yep, that’s what happens. You can try to seal the plastic a little, but the thing about retrobrite is that while it will make things look much better for a little while, you’re actually setting the plastic up for more yellowing in the future.
Wonder what would happen if you just slapped a satin clear coat on it
you can use the same UV-resistant clear varnish that is used in car headlights after polishing.
It should be noted that apparently this is not a permanent solution. There have been (anecdotal) cases of people retrobright-ing plastic, then finding it re-yellowed after storage, even if it’s been kept in the dark.
Do they then reretrobright? :-D
I haven’t tried Retrobrite yet but I have been interested. The recipes I remember reading about had more ingredients and ended up as a paste to spread on. More significant, they didn’t call for UV (or any special) lighting. That part looks like kind of a pain to me. Not a deal-breaking type pain but something I wouldn’t choose to fuss with if there is another way. Does it provide an advantage? A better result? Faster?
Also lots of people doing this with vintage RC car parts over at the RC10talk forum, that’s where I first learned about the process. Folks there were putting white suspension parts and hydrogen peroxide into mason jars and setting it out in the sun for UV exposure.
Adding some Xanthum Gum, Glycerine, and Oxy-Clean makes more of a paste that you can brush onto larger parts that might be difficult to completely submerge, like computer cases. Recipes here: https://www.retr0bright.com/make.html
I think you mean xanthan gum… Be careful with that stuff, it can act as a pretty powerful laxative…
Retrobrighting with just the Sun
https://www.youtube.com/watch?v=8P1OVj0IcqY
OR with just UVA LEDs alone?
Also, will UVC work better than UVB or UVA? Someone should use a quartz UVC bulb (carefully – hazard for eyes and skin; generates O3, too) from a fish tank water sterilizer to test that in a UVC vs UVA comparison with UVA LEDs. I say someone else should do it because I have nothing to retrobrite.
you need a lot of UV, if you want to do it indoor you need a tan lamp.
Tanning lamps are expensive, have ridiculously low life bulbs from what I can find, probably by design, and emit 365 – 390 nm. The sterilizing UVC lamps used in aquarium sterilizers are cheap, very long life, and emit more energetic 255 – 280 nm UV. Closer proximity can overcome ANY emitted power shortage. The aquarium lamp could be moved along the part to be retrobrited -IF- emission level is an issue which I will bet it won’t be.
Like I said, I don’t have anything that needs retrobriting, so someone who does should experiment taking the appropriate care with the extreme UVC emissions from the aquarium sterilizer lamp.
Yeah, I follow some CoCo groups (Radio Shack Color Computer), and several folks there do restoration work on old units. I think several of them have decided that retrobrite isn’t worth the effort, and they get good results just from leaving plastic cases out in bright sunshine (might take a few day’s worth, depending on the amount of yellowing).
You do NOT need the sun or UV. You only need energy and an oxidizer for the reaction to work, so heat is just as effective as UV. I have had great success using liquid peroxide in the oven (turned way down). I’ve seen other people making big sous-vide style heaters to do the same thing for large parts. You can also use generic Oxi-clean instead of peroxide, just mix it double the label instructions.
https://www.youtube.com/watch?v=qZYbchvSUDY
I wish I knew what was in the yellow all purpose/all-surface cleaner I used to get in the UK in the 90s. I was thinking it was a Mr Clean clone, but having tried that more recently, it’s definitely not the same. Maybe it was a lemon-ammonia based one. Trouble is formulas have changed a lot over the years even under the same brand names due to environmental concerns, or you could make drugs out of it, or whatever.
Anyway, that was great stuff, one shot cleaning, would de-gunge and de-yellow old plastic in one application, no UV required. It also did not seem to be as impermanent as retrobrite, in that things would only re-yellow at their original rate, so it would take years.
Not trying to take the piss, but are you sure you weren’t just cleaning off cigarette smoke residue?
Pretty certain, it only did the brightening if you used it concentrated, but would do the cleaning diluted. Also, stuff you’d cleaned well before with dish soap, other cleaners, would come brighter with it. Maybe had some other bleaching agent like sodium perborate.
Sugar soap
“If you want to restore old knobs, maybe try Neosporin.” Well I’m not putting Neosporin on MY old knob!
It’s funny, there are some devices (like my old Amiga) where I feel the yellowing adds to the charm. However, having seen a few retrobrighting videos, I do see the merits of it.
I find it’s easier to just accept old electronics the way they are. Retrobrighted plastic, in person, looks good, but feels terrible. It tends to take on a brittle, rough character, especially if it was already brittle plastic in the first place (looking at you, old macs). Retrobrighting is for youtubers. I think it’s fine if you want to do it, have done it myself, but don’t deceive yourself into thinking you’re restoring your electronics like a museum would restore its art pieces. Even they would appreciate the physical changes that come to a piece over time instead of trying to completely erase them.
Sorry for necroposting and being a year late, but I wanted to respond because, eBay is a thing, and when Model M keyboards are going for $400 and up… There are still more than one side to the issue of whether retro-brighting for eBay sales is fundamentally deceptive or just good business sense, but it’s not “just for youtubers”, by a long shot. I actually learned some “retrobrighting” from an online community of RVers, since RVs have a lot of white plastic sinks and bathroom and kitchen fixtures that were made with white ABS plastics. And actually, for those thinking of leaving their computers to posterity, most items gain value from “patinas” and other signs of continuous use, and the worst thing to do is to chemically clean them. I haven’t seen PCs on “Antiques Roadshow” yet, but you know that day is coming.